

 606
606
The Riskcast Time and Materials module allows you full control and visibility over the time and materials data for each of your projects.
What can it do?
- Create detailed T&M tickets
- Send directly to approvers
- Manage approval status
- Packaging of tickets for invoicing
What resources do you need to create Time and Material tickets?
- Employee and/or equipment
-
Billing Rates (supports the use of pay classes as billing rates)
-
Project
-
Cost Event
Follow the few steps below to start using the T&M Module:
I. Enable your project for T & M
- Go to the Jobcost module from your Riskcast home page.
- Click the Projects icon
 on the left side of the page.
 - Edit the project you would like to enable by clicking the green pencil icon
 .
.
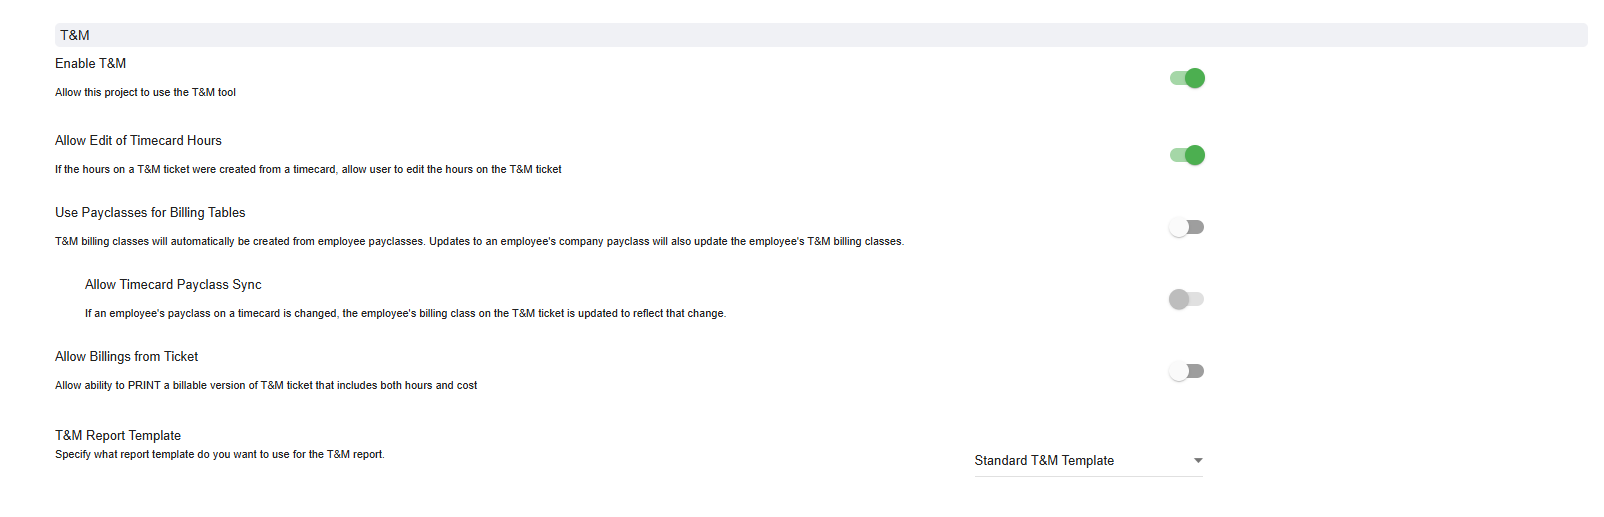
- Go to "Options." Toggle ON the option to ‘enable T&M’. If you’d like to be able to edit the hours entered on the timecard, you must also enable “Allow edit of timecard hours”
II. Add T & M approvers.
-
This could be an owner, GC, or alternatively, an internal person within your organization.
-
To set up an approver, visit the Edit project screen, and then select the T&M tab at the top. You may add both approvers and a email distribution list.
 III. Create Cost Event
-
Go to the Jobcost module from your Riskcast home screen.
-
Click the Jobcost icon
 on the left side of the screen.
 -
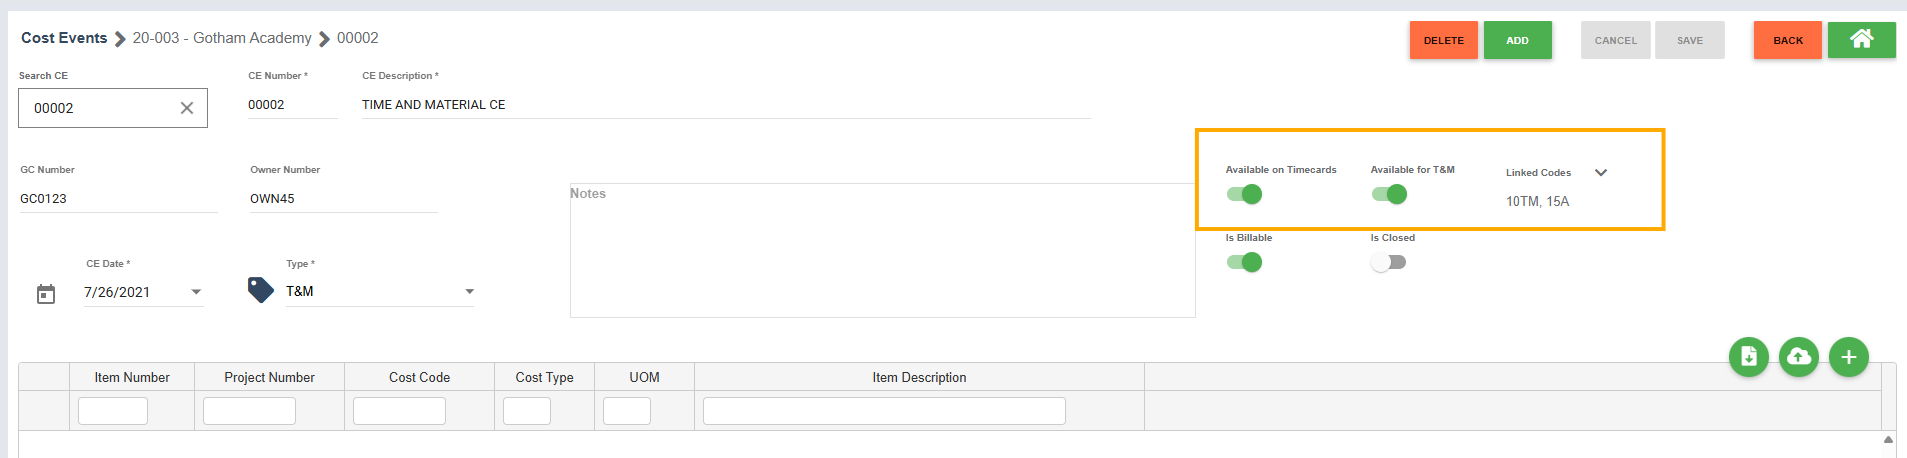
Under the Cost tab, click "Cost Event." Select the correct project from the dropdown list.
-
Click the green plus sign to add a new cost event.

5. You can create tags to track in the timecard and in the T&M module. Additionally, you can link existing cost codes directly to the cost event.
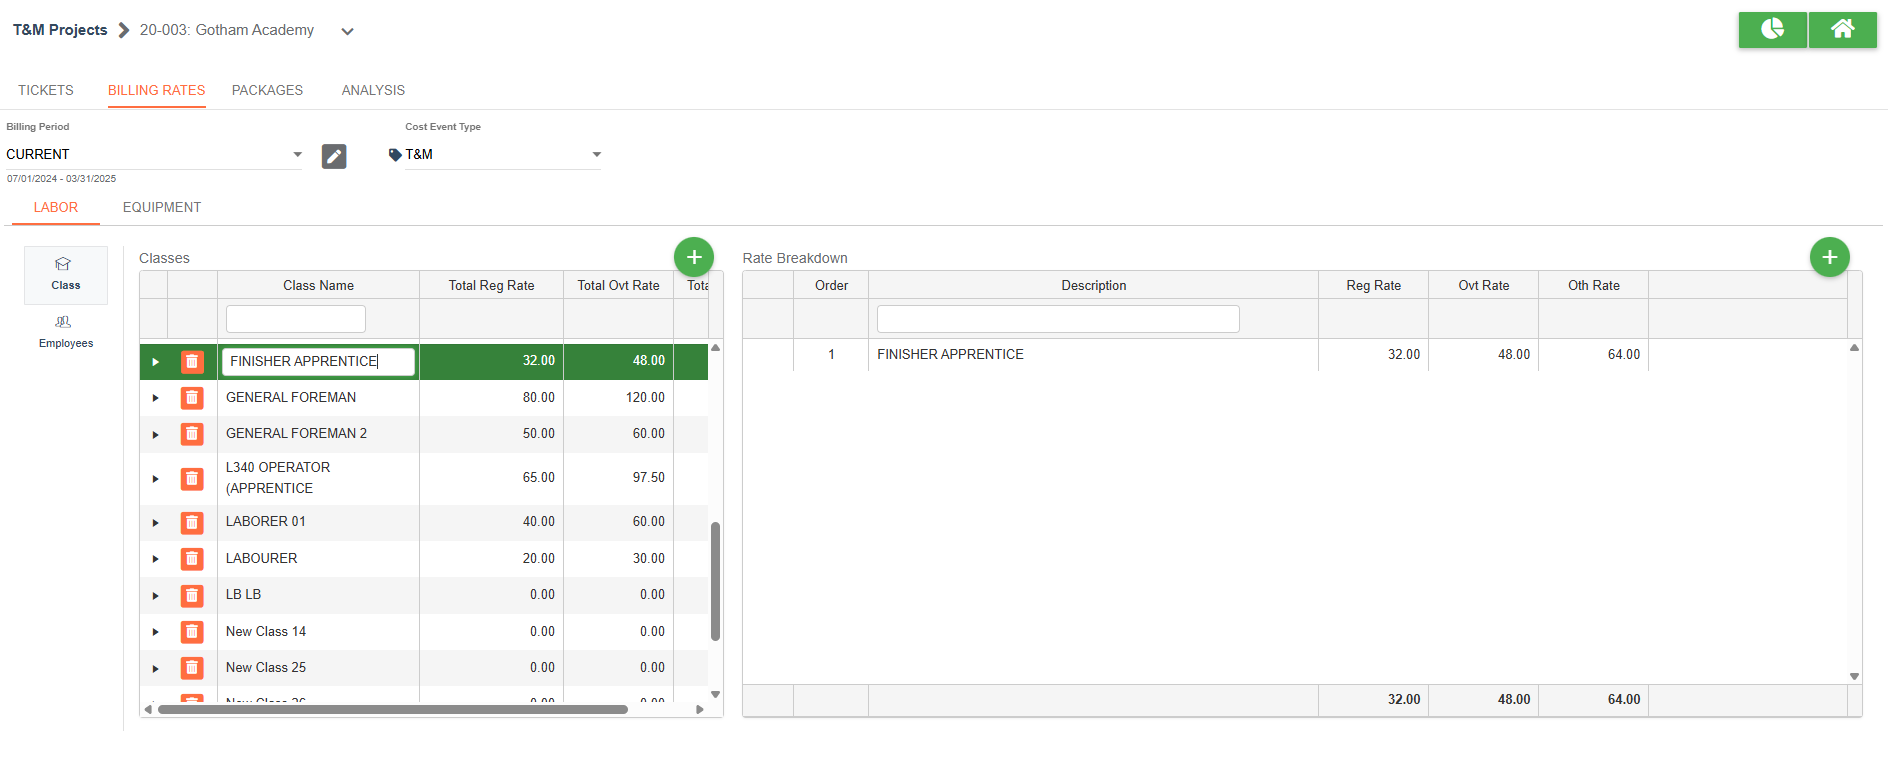
Create a Billing Rate Table:
- Go to the Time and Materials module from your Riskcast home page.
- From the T&M project tab, select the correct project.
- In the project, select the grid icon to visit the billing rates table.
- You can create a new billing period or edit an existing one by clicking the pencil icon, next to your billing period drop down.
- NOTE: Make sure the Cost Event type aligns with the cost event type you created within your project. For example, Cost Event 002 in the example below was a T&M event. We support other types of cost events as well, such as Back Charge, Internal, and more.
 6. Once these items are set up, you can start generating tickets, either from your timecard hours that are linked to the cost event, or from the Time and Materials module.
Questions? Contact [email protected] and we will be in touch with you!

