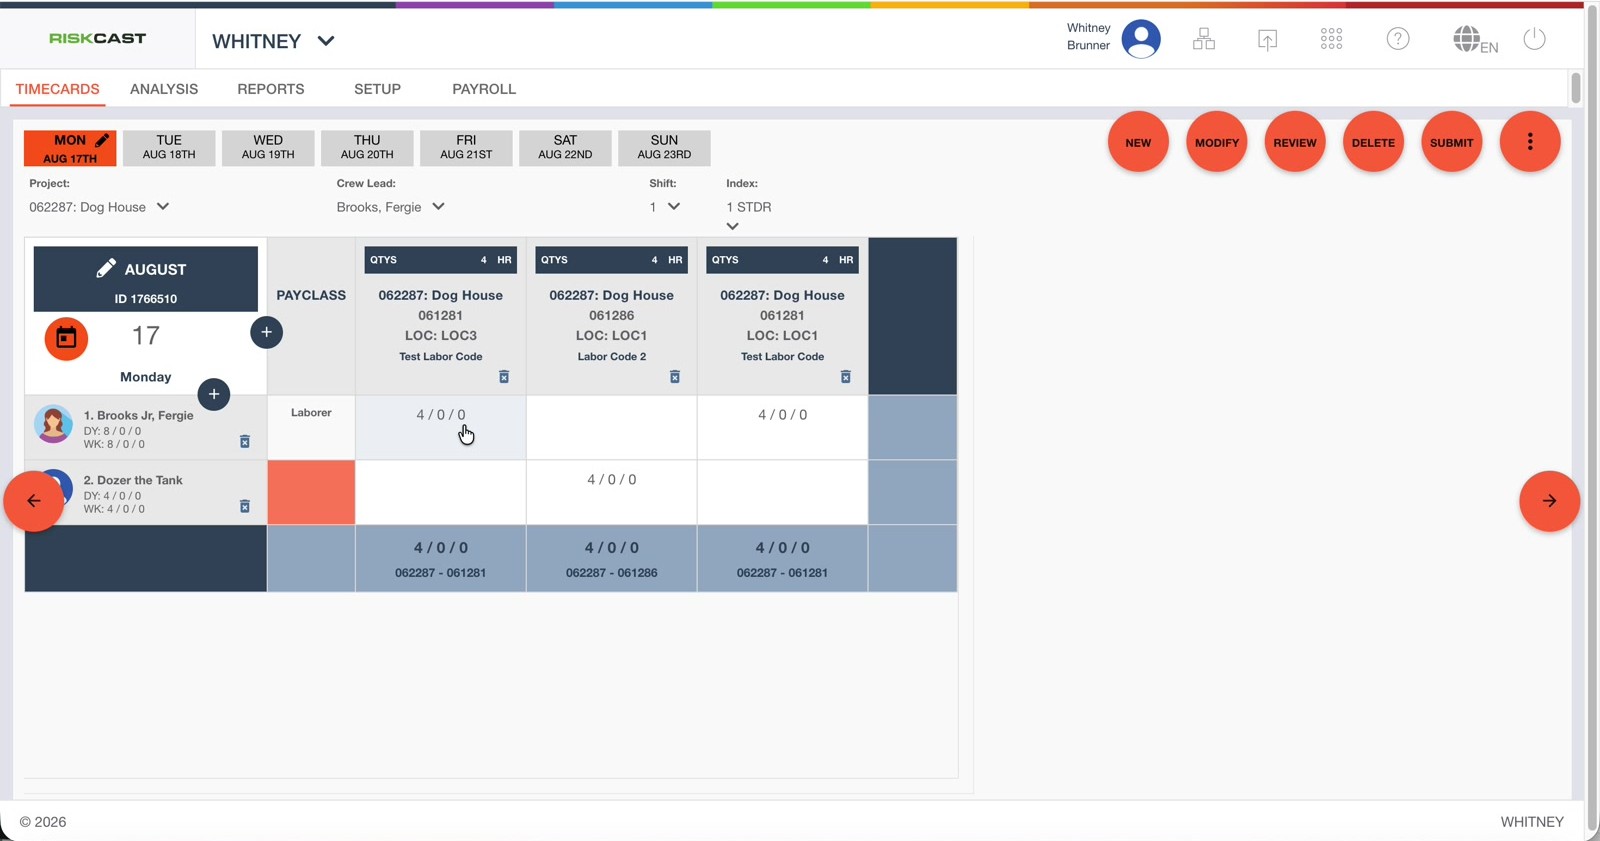
This guide walks through how to use quantity line items to capture hours and quantities interchangeably within Riskcast. Additionally, the guide also shows how locations can be, but is not required, used with this feature.
Step 1: Configure Project(s) Appropriately
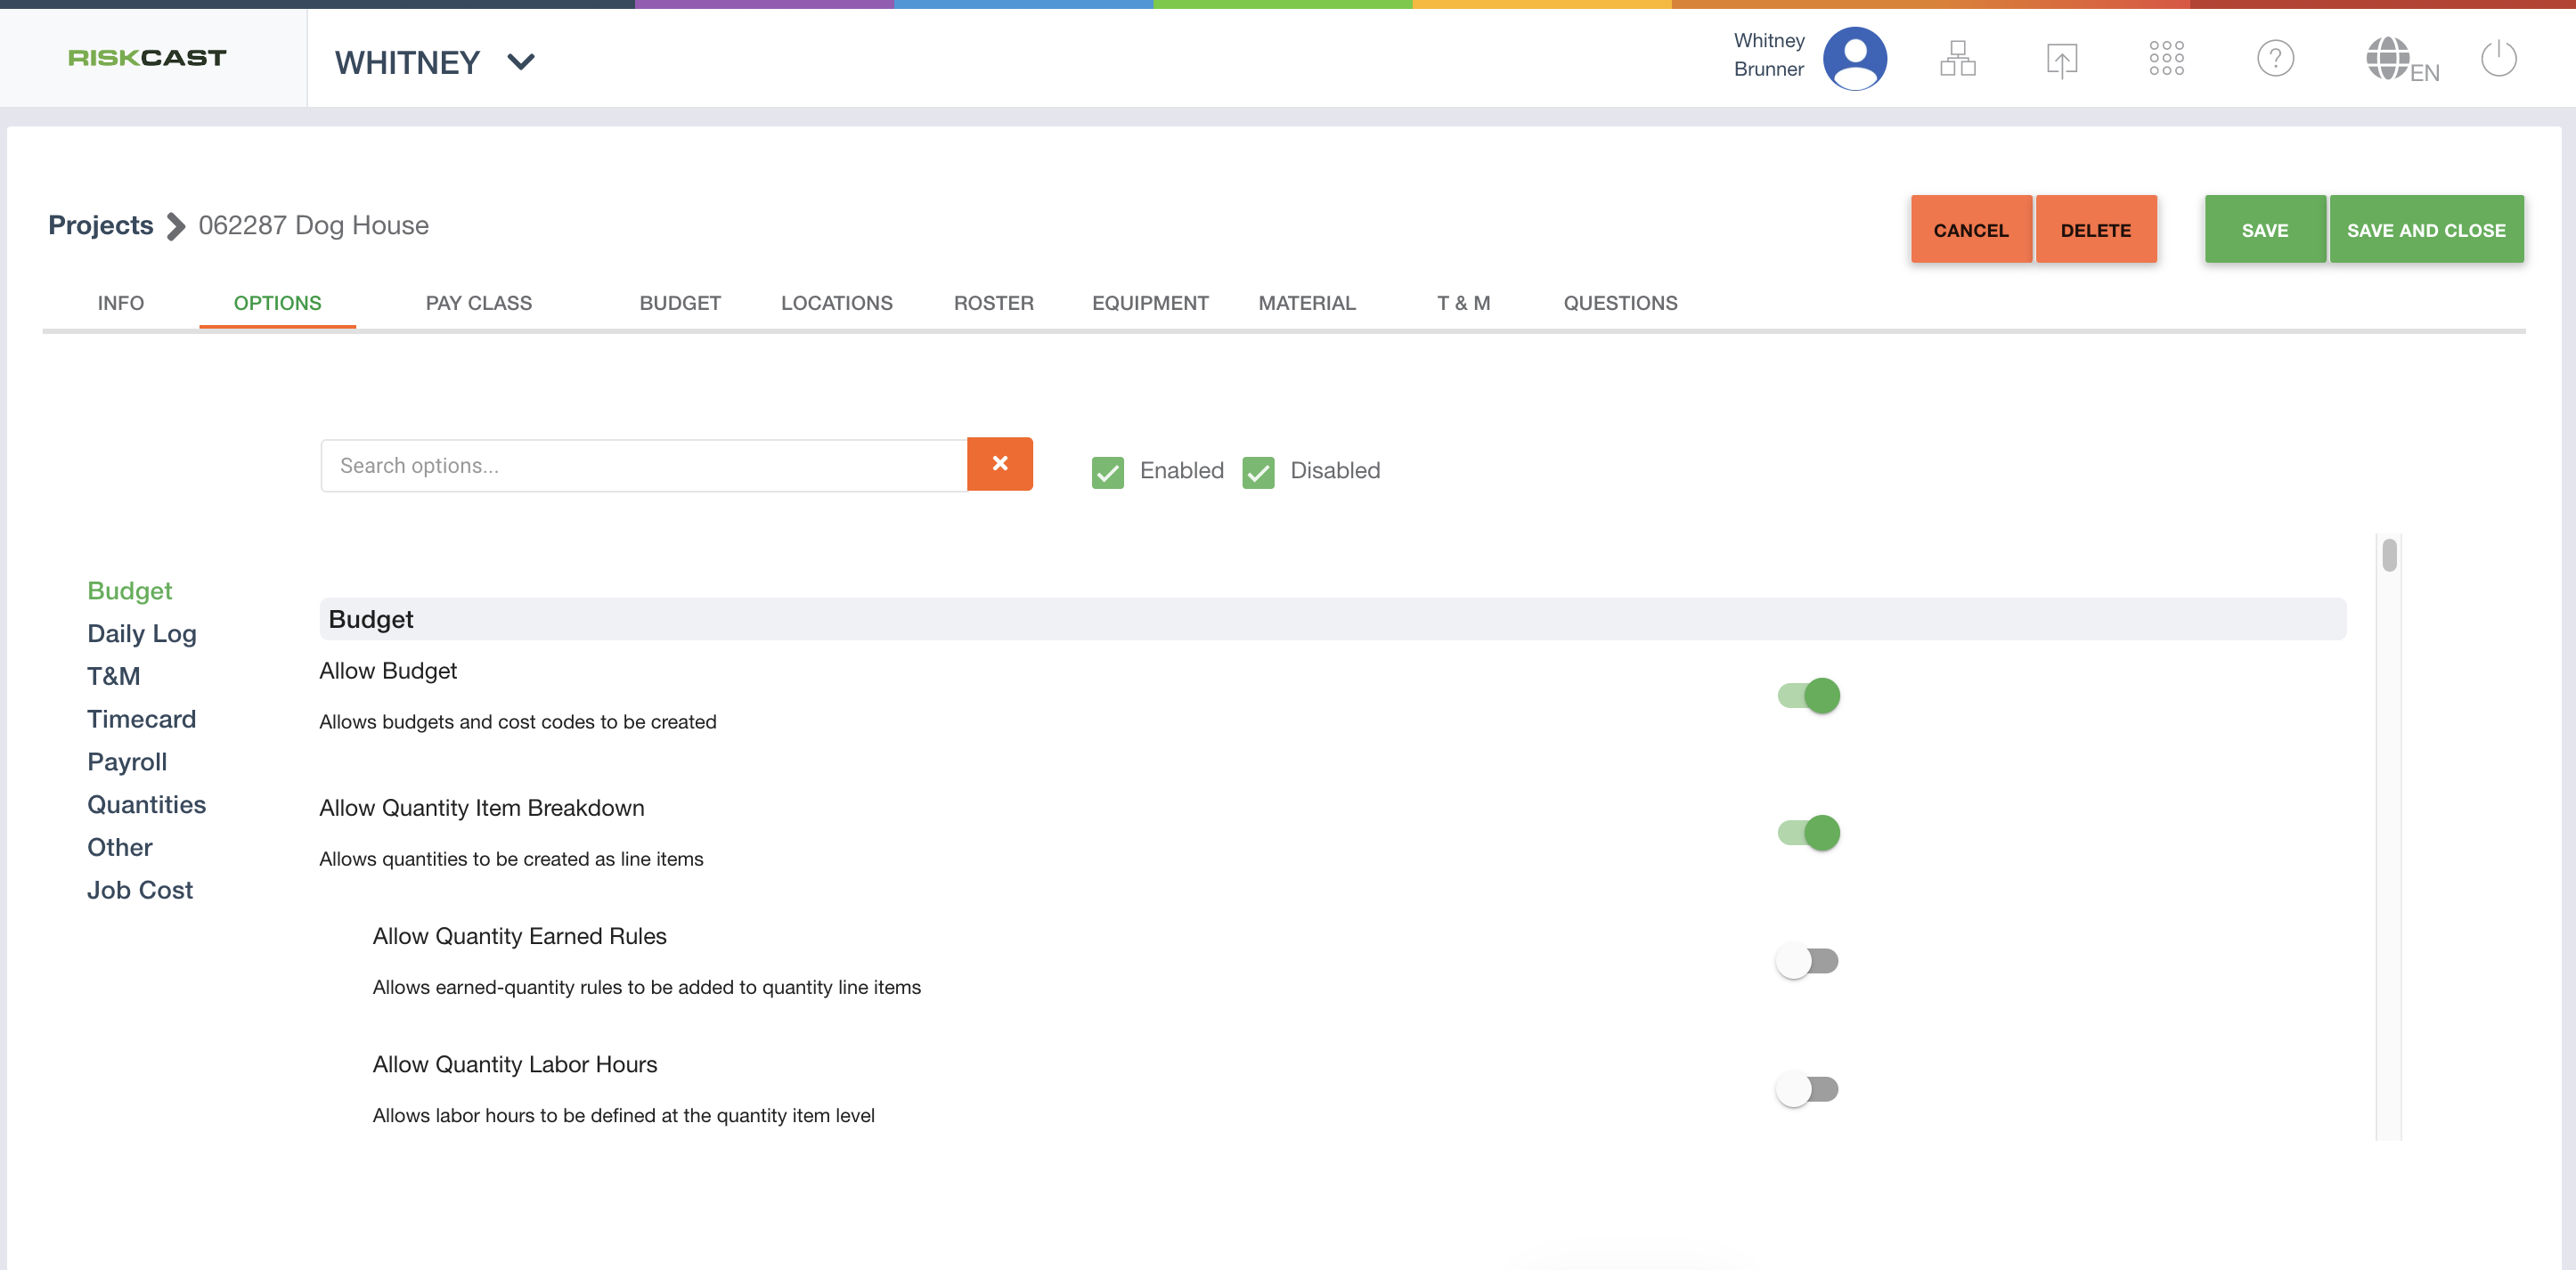
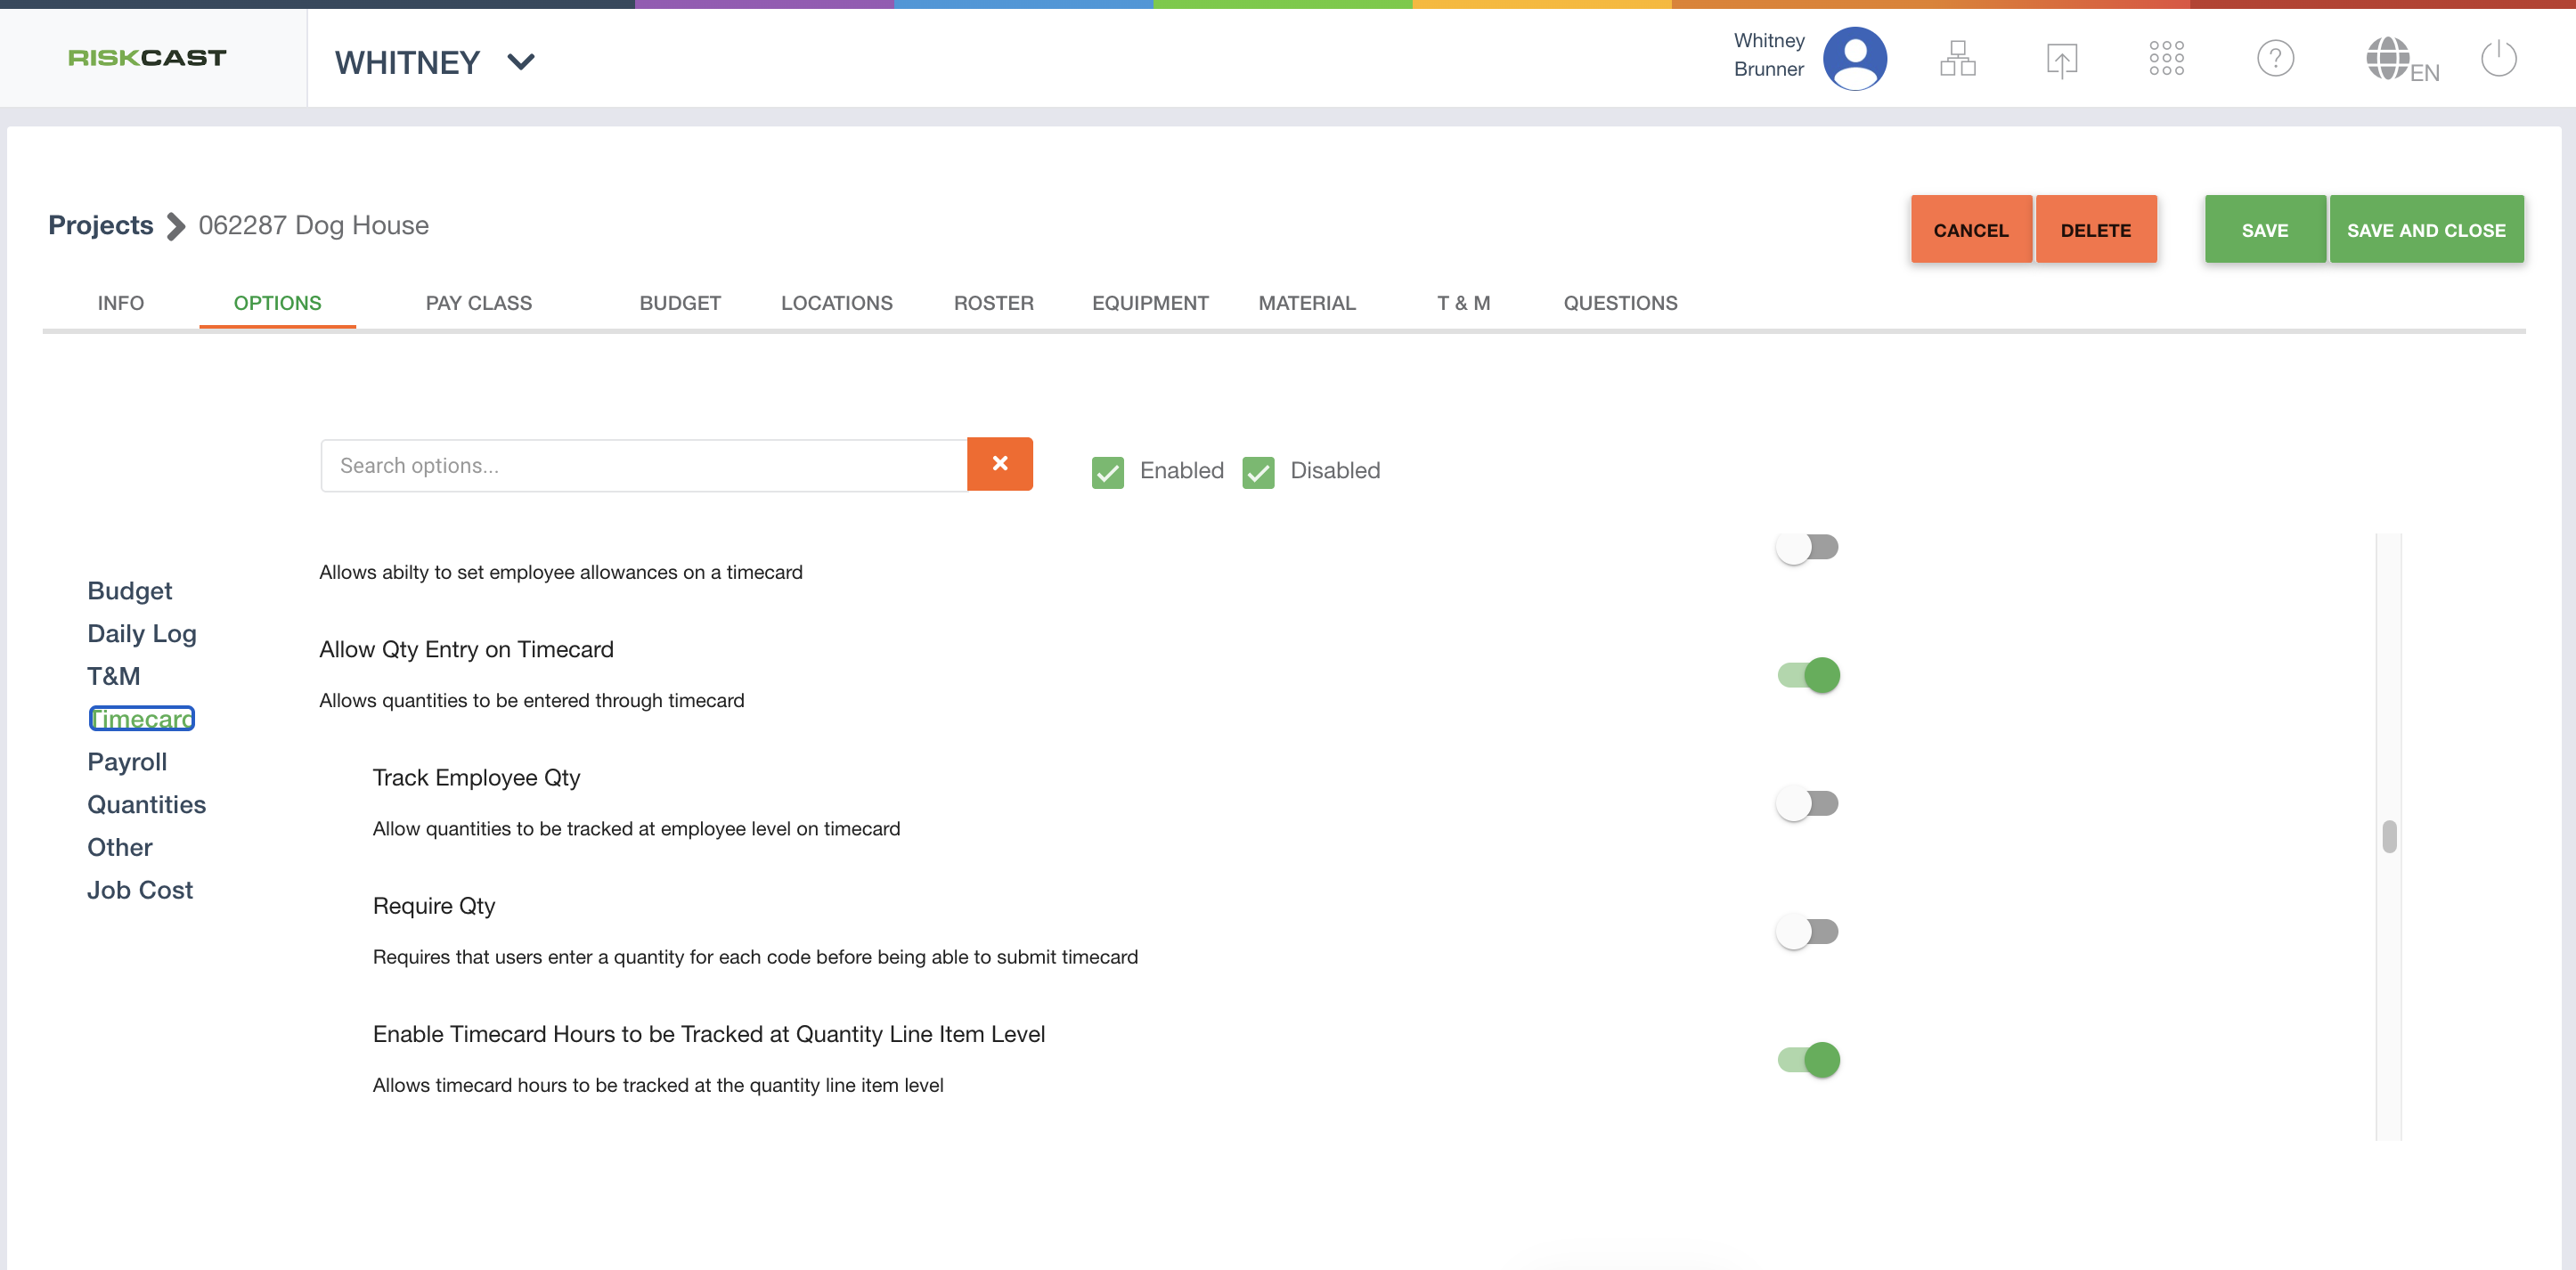
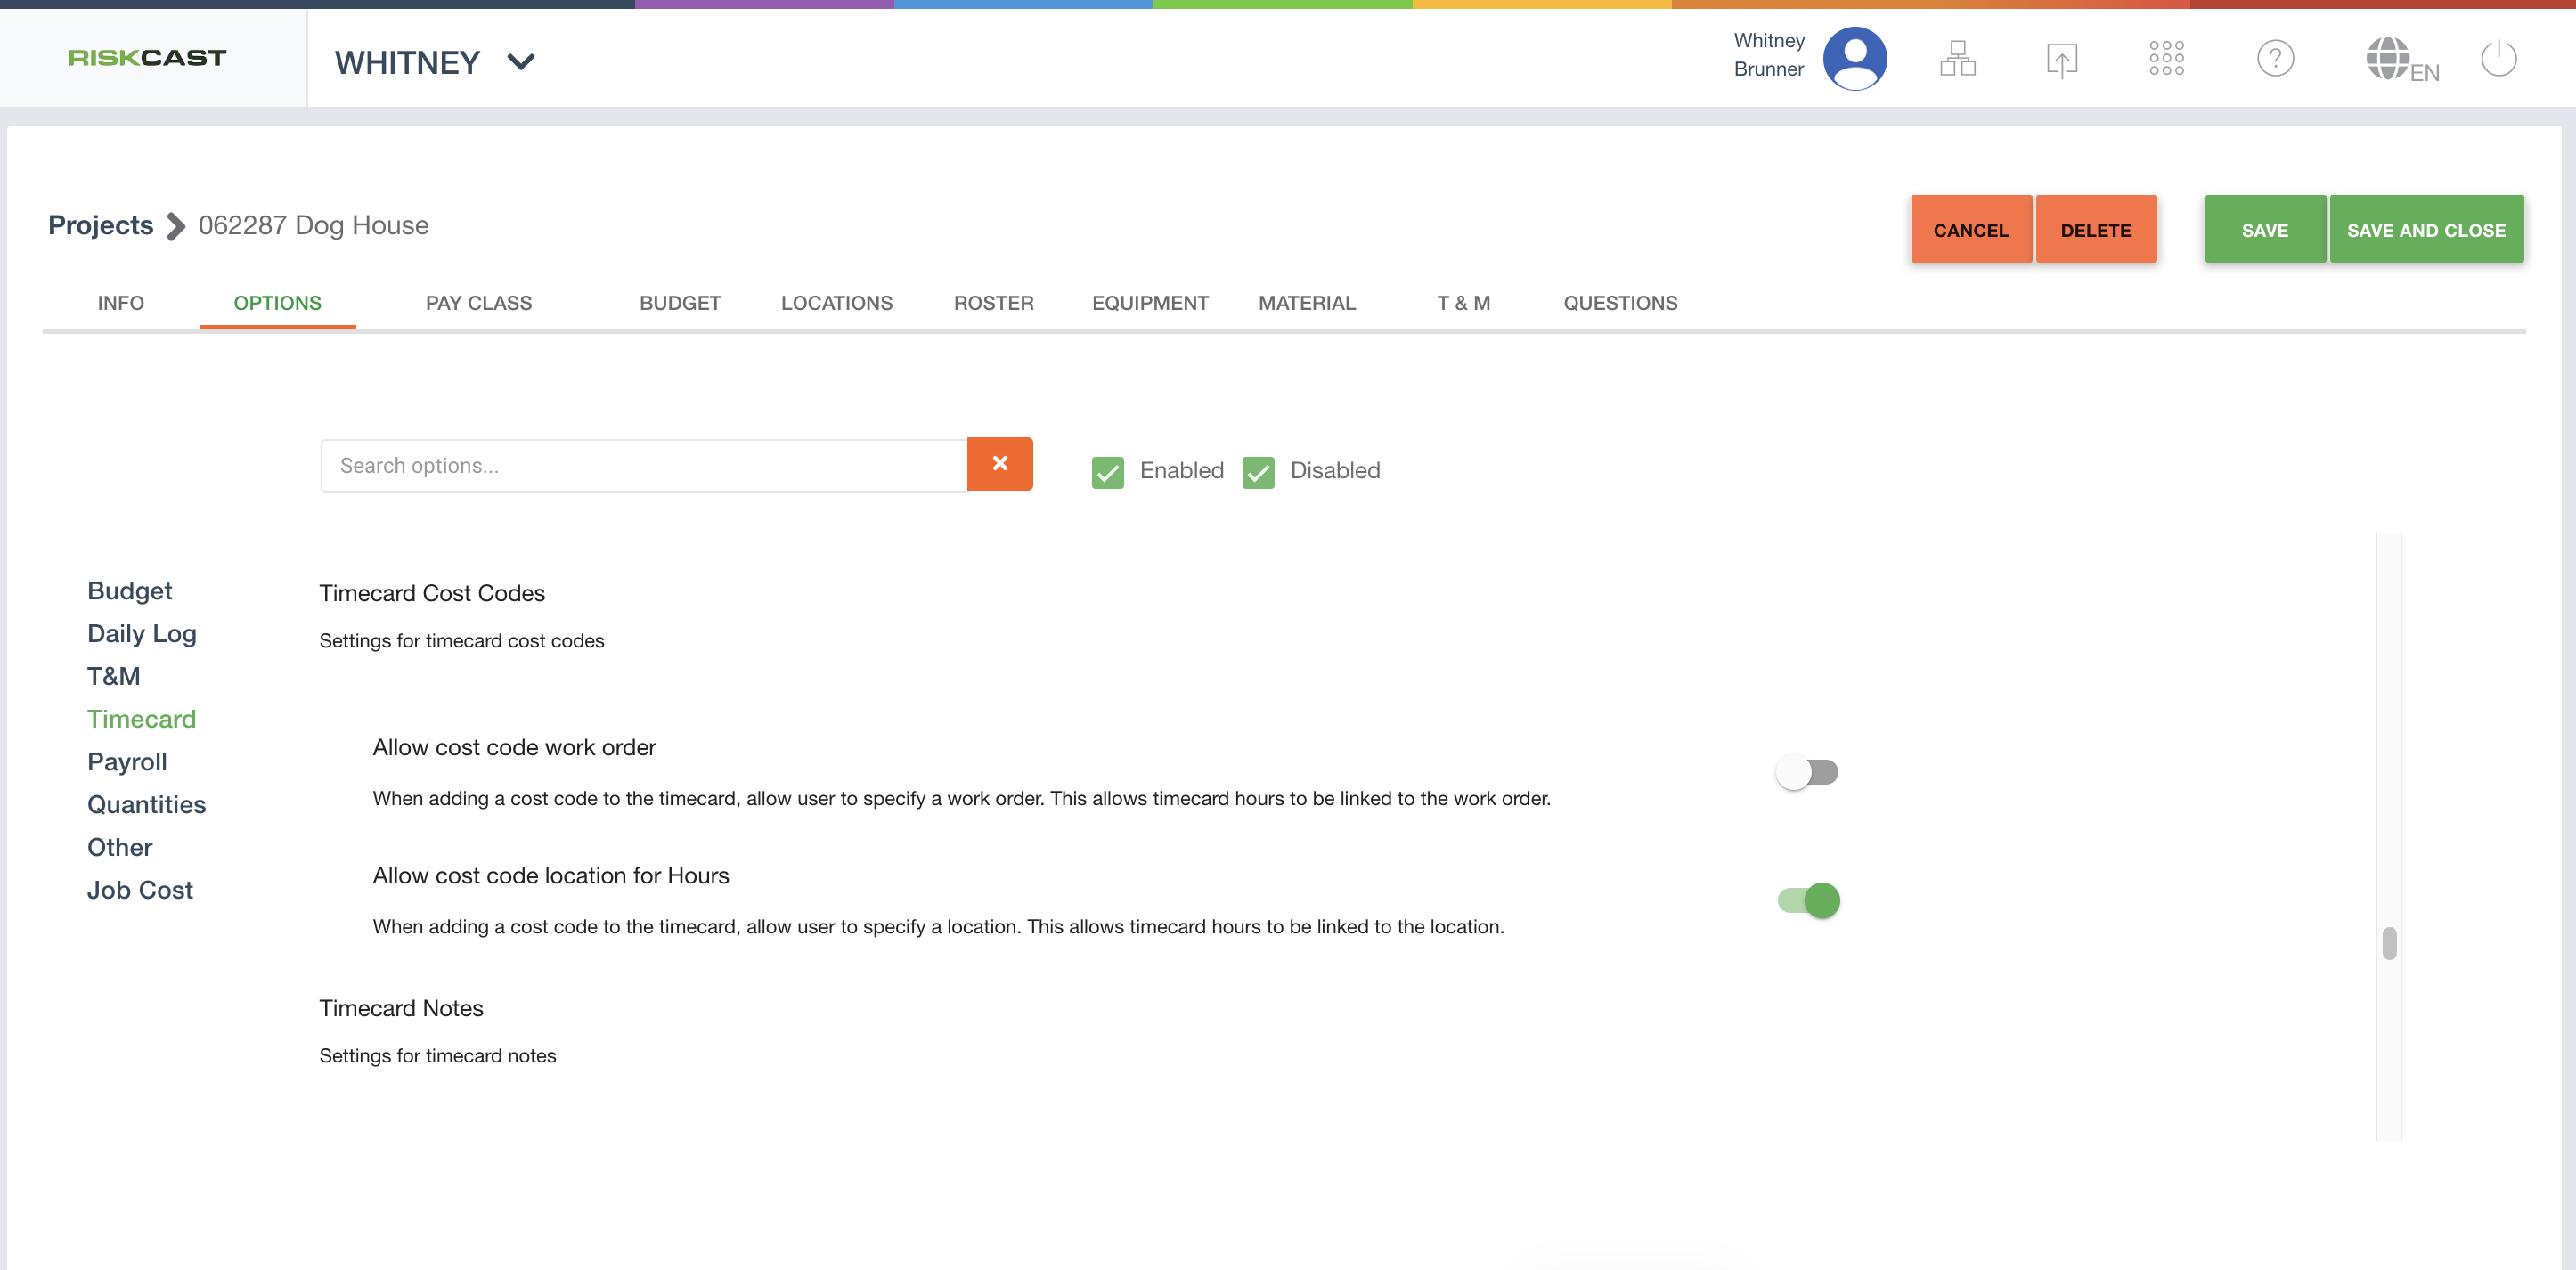
Within the Projects, find the correct project and click the edit button. Then go to the “Options” tab. Ensure the following Options are toggled ‘On’
1. Under ‘Budget’ -> “Allow Budget” and “Allow Quantity Item Breakdown”
2. Under ‘Timecard’ -> “Allow Qty Entry on Timecard” and “Enable Timecard Hours to be Tracked at the Quantity Level”
3. Under ‘Timecard’ (OPTIONAL) -> “Allow Cost Code Location for Hours”; See Project Locations for additional information on Locations
Step 2: Go to Job Cost → Budget
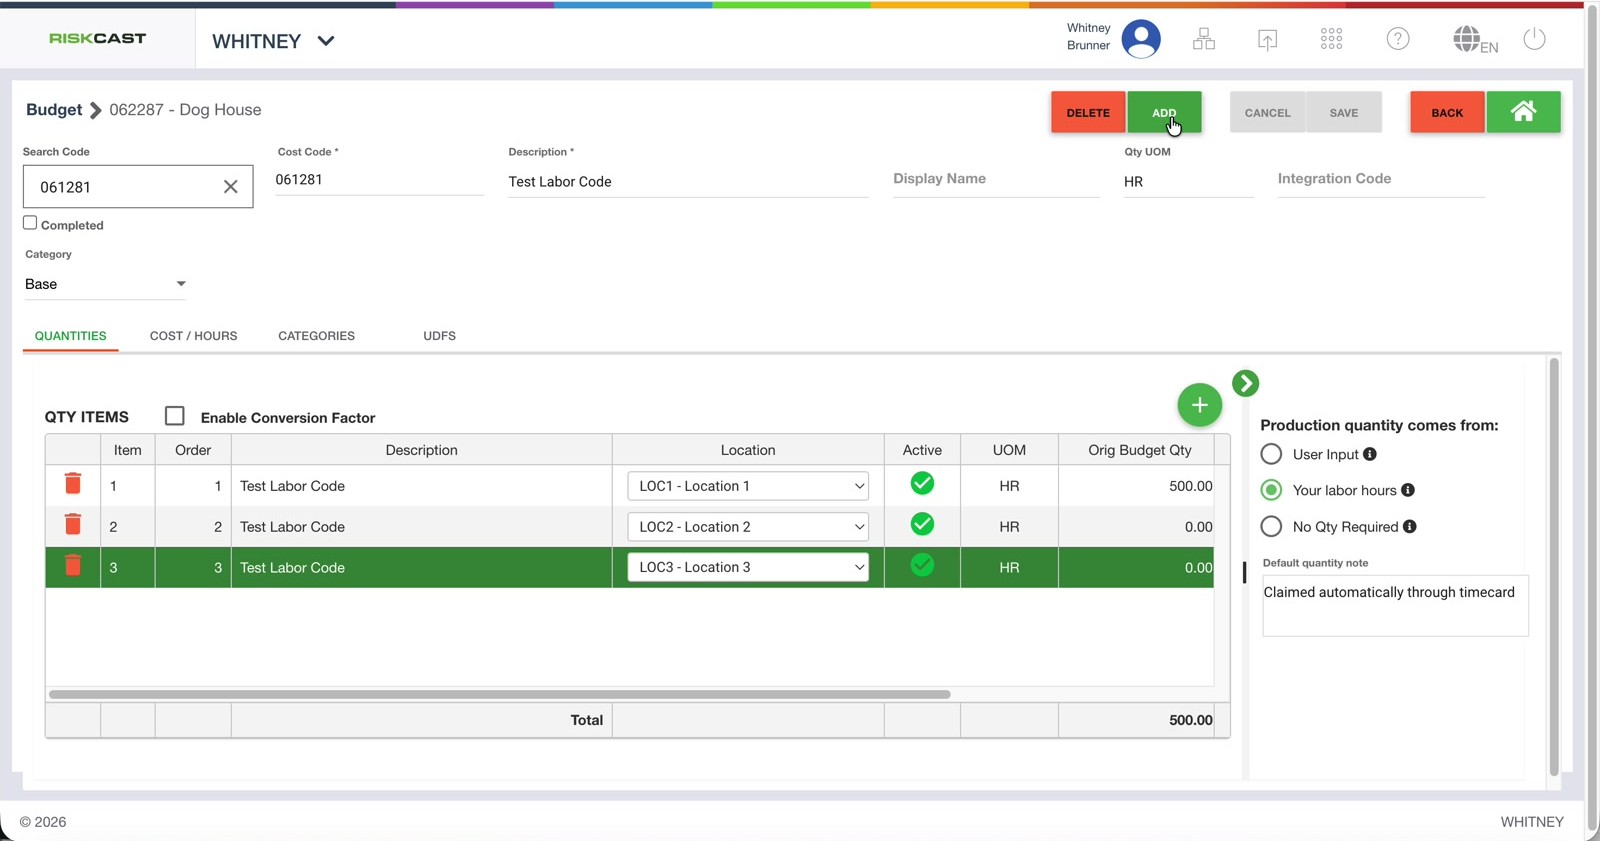
Navigate to the Job Cost tool for the project, then select the COST tab and the BUDGET sub-tab. This shows all cost codes currently budgeted for the project. Within an existing cost code, or during the creation of a new cost code, quantity line items are available to be modified or added. If the timecard option for ‘allow cost code locations for hours’ is turned ON, then the “location” field will appear for each quantity line item. Otherwise, that field will not be available.
Create one or more quantity line items, assign a location to each line item, and ensure the original budget qty is correct. On the right side of the screen, a side panel is evident. For each quantity line item for which hours and qty should be interchangeable, select Production quantity comes from ‘your labor hours’.
Step 3: This Setup’s Effect on Timecards
When on the timecard, these options enabled will essentially allow the Quantity Codes to become what is selected in the Cost Code Selection window of the timecard. When the “allow cost code location for hours” toggle is on, the ‘Select Location’ option will exist. Selecting a location will narrow down the quantity item selection based on the location tied to the quantity code.
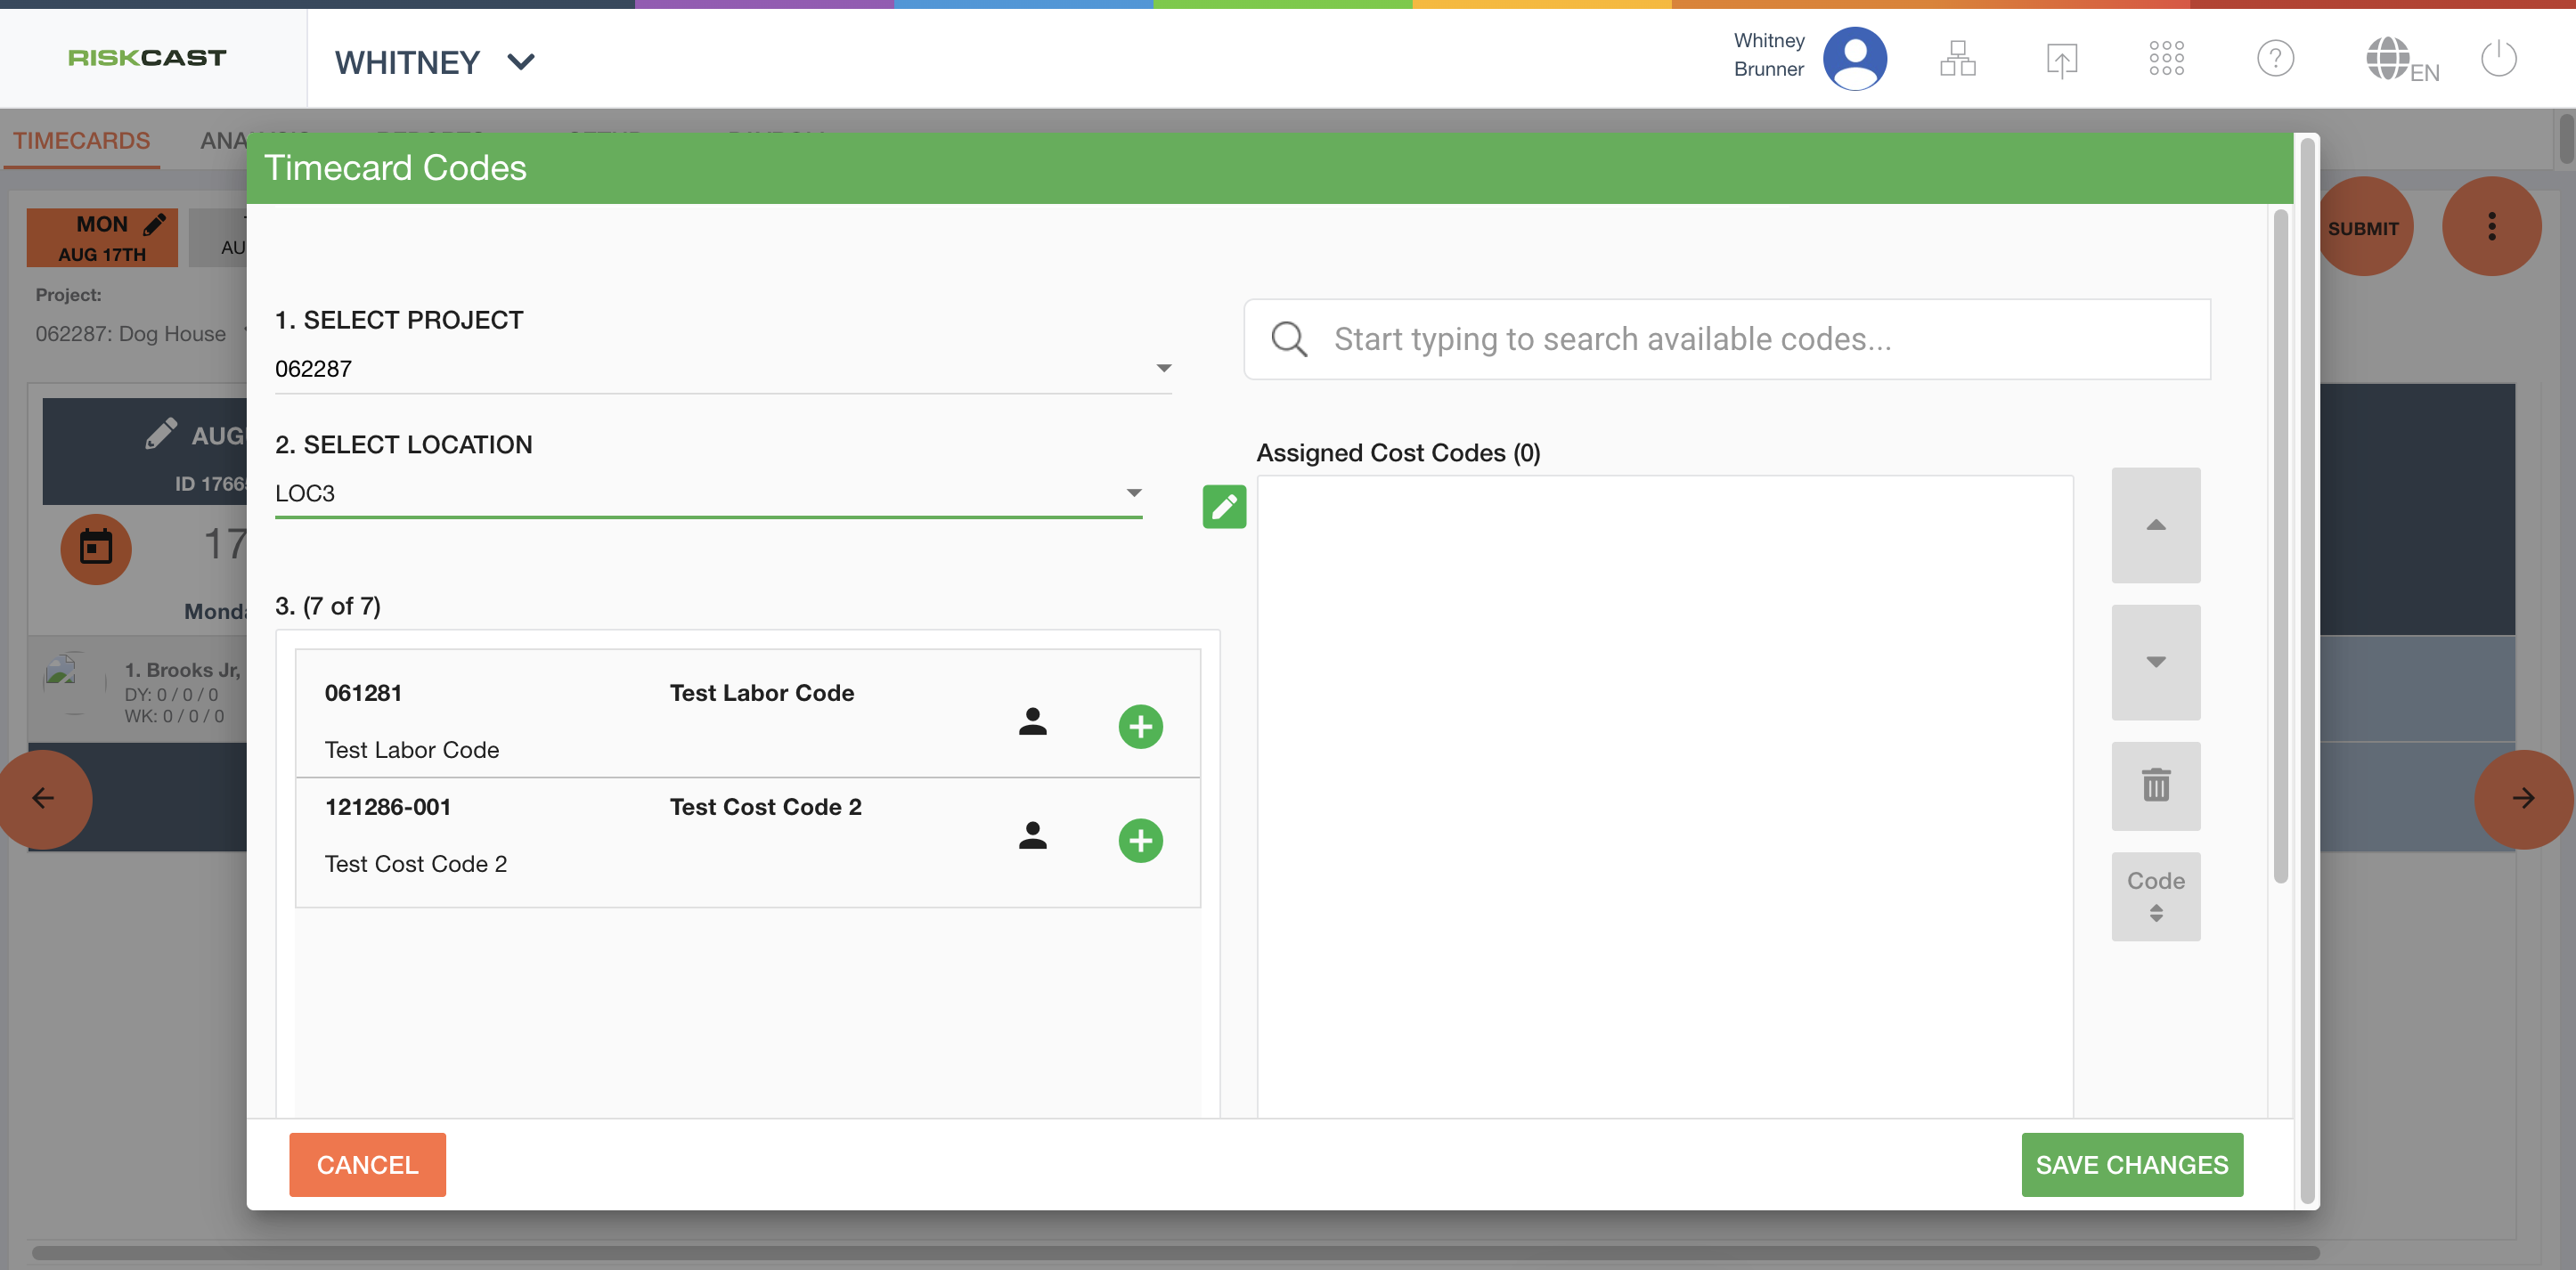
Once the correct codes are corrected with the correct locations (if used), a user would enter hours within the timecard as necessary. Because the “quantity item quantity input type” was selected as ‘your labor hours’, when the labor hours are entered, the quantity will automatically populate with those hours.