


Employee Clock In / Clock Out
How to set up and use time clock tracking on Timecards
Overview
RiskCast's Timecards module can capture the exact time an employee clocks in and clocks out each day, in addition to the hours logged against cost codes. This article walks through turning the feature on for a project and recording a clock in/out entry.
This feature is configured per project, so it can be turned on for the projects that need precise time tracking without affecting others.
1. Enable Employee Clock In for a Project
Employee Clock In is turned on from the project's settings, not from the Timecards screen itself.
- From the RiskCast dashboard, open Projects and select the project you want to configure.
- On the project page, click the OPTIONS tab.
- In the left-hand list of setting categories, click Timecard.
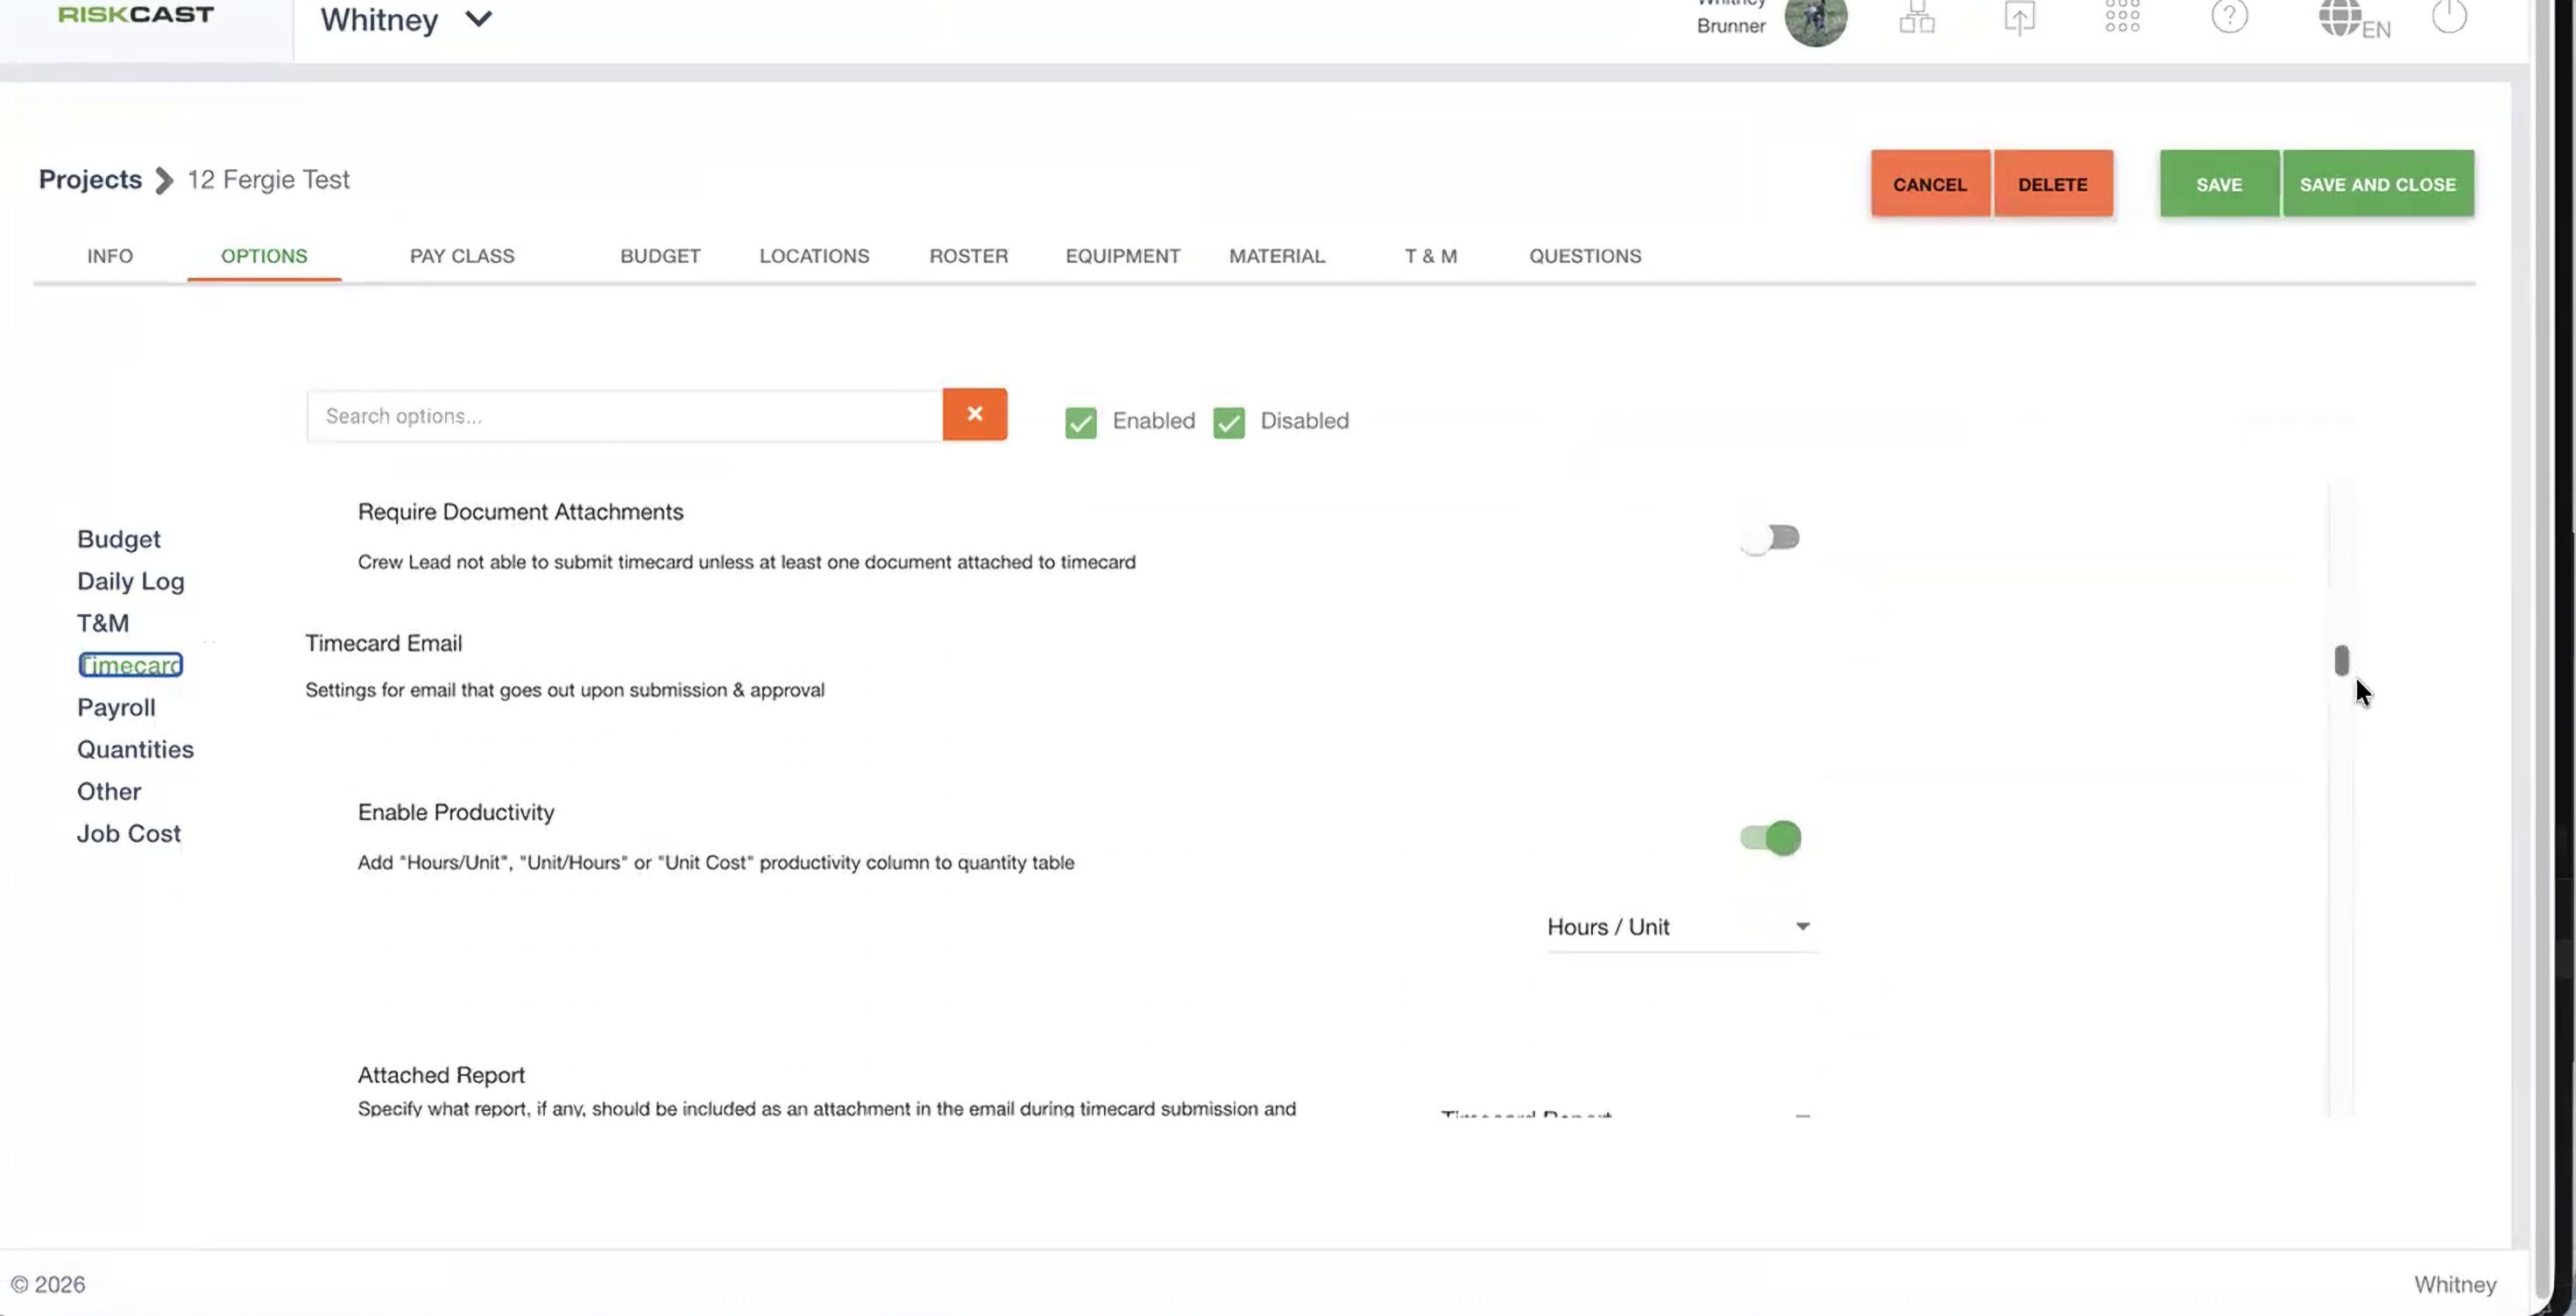
The project's Options tab, with the Timecard category selected in the left-hand list.
- Locate the following settings and turn them on as needed:
- Enable Employee Clock In — turns on clock in/punched time tracking for employees on this project's timecard.
- Type of Clock In — choose Manual Clock In to let employees or timekeepers enter a time directly (the alternative is a punched time source).
- Enable Breaks — optionally track breaks per employee on the timecard.
- Require Clock In/Out — when enabled, every employee must have both a time in and a time out before the timecard can be submitted (does not apply to equipment).
- Click SAVE or SAVE AND CLOSE to apply the changes.
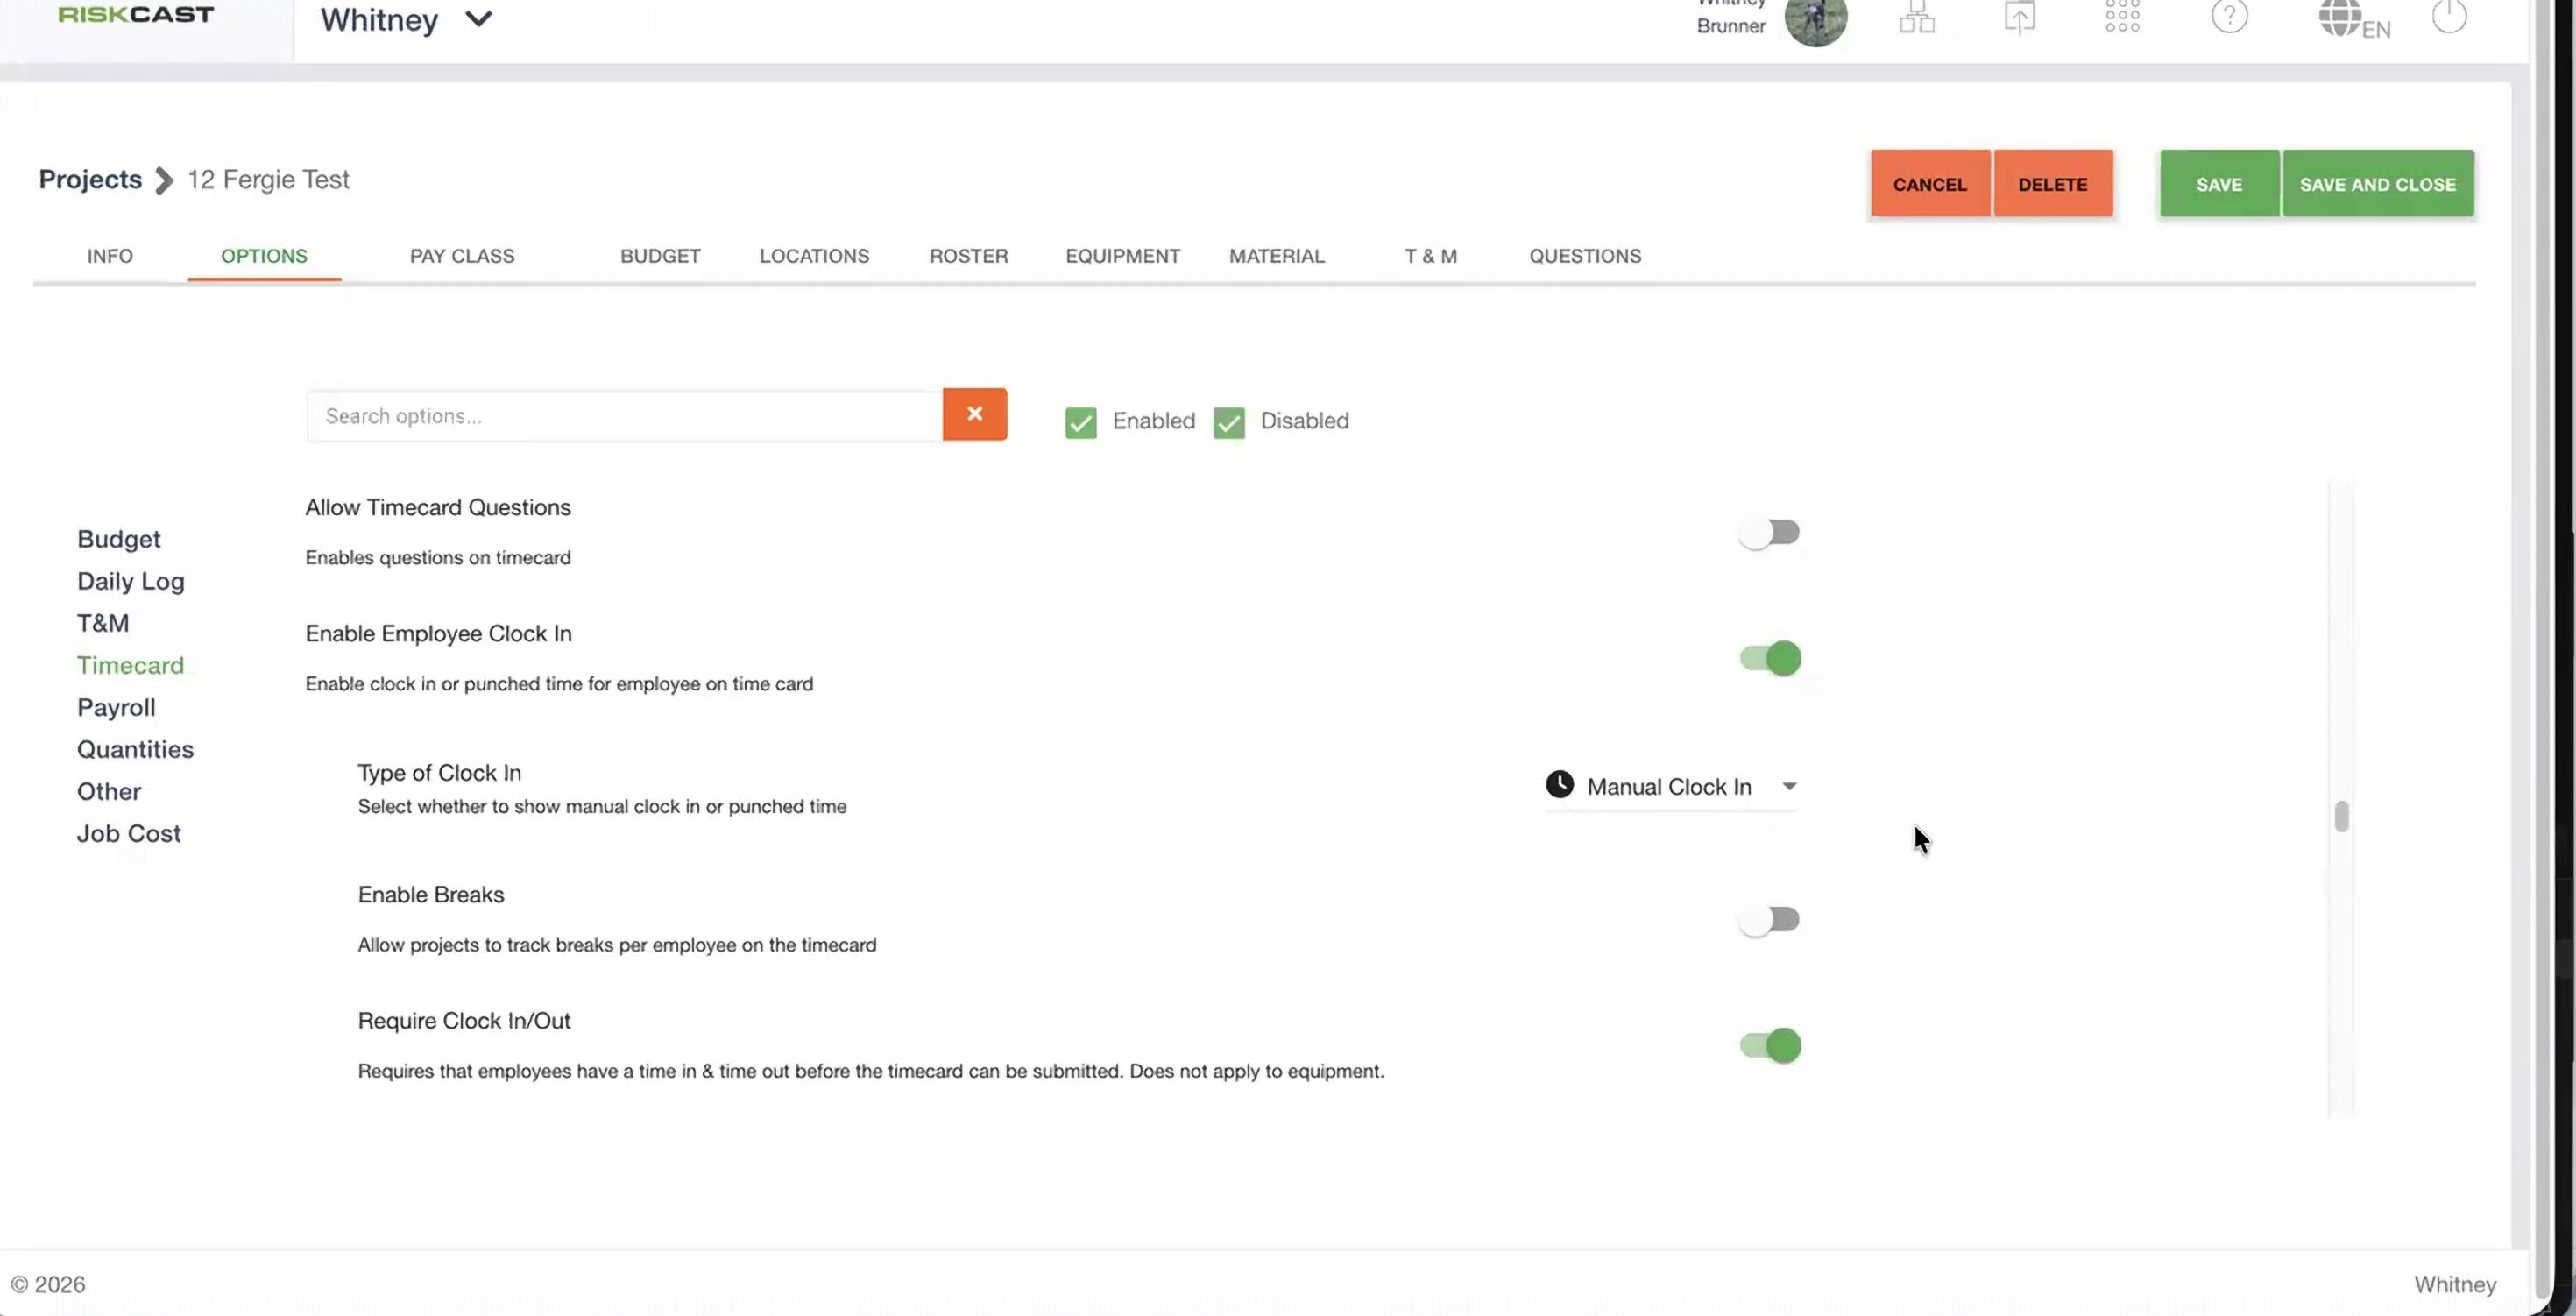
Employee Clock In turned on, with Manual Clock In selected and Require Clock In/Out enabled.
Note: Turning on Require Clock In/Out is what triggers the validation warning described in Section 3 — leave it off if you only want clock times tracked informally.
2. Clocking an Employee In and Out
- On the day's timecard, click the + under TIME IN / OUT in the employee's row.
- In the panel that opens, enter the Time In (or click IN to capture the current time).
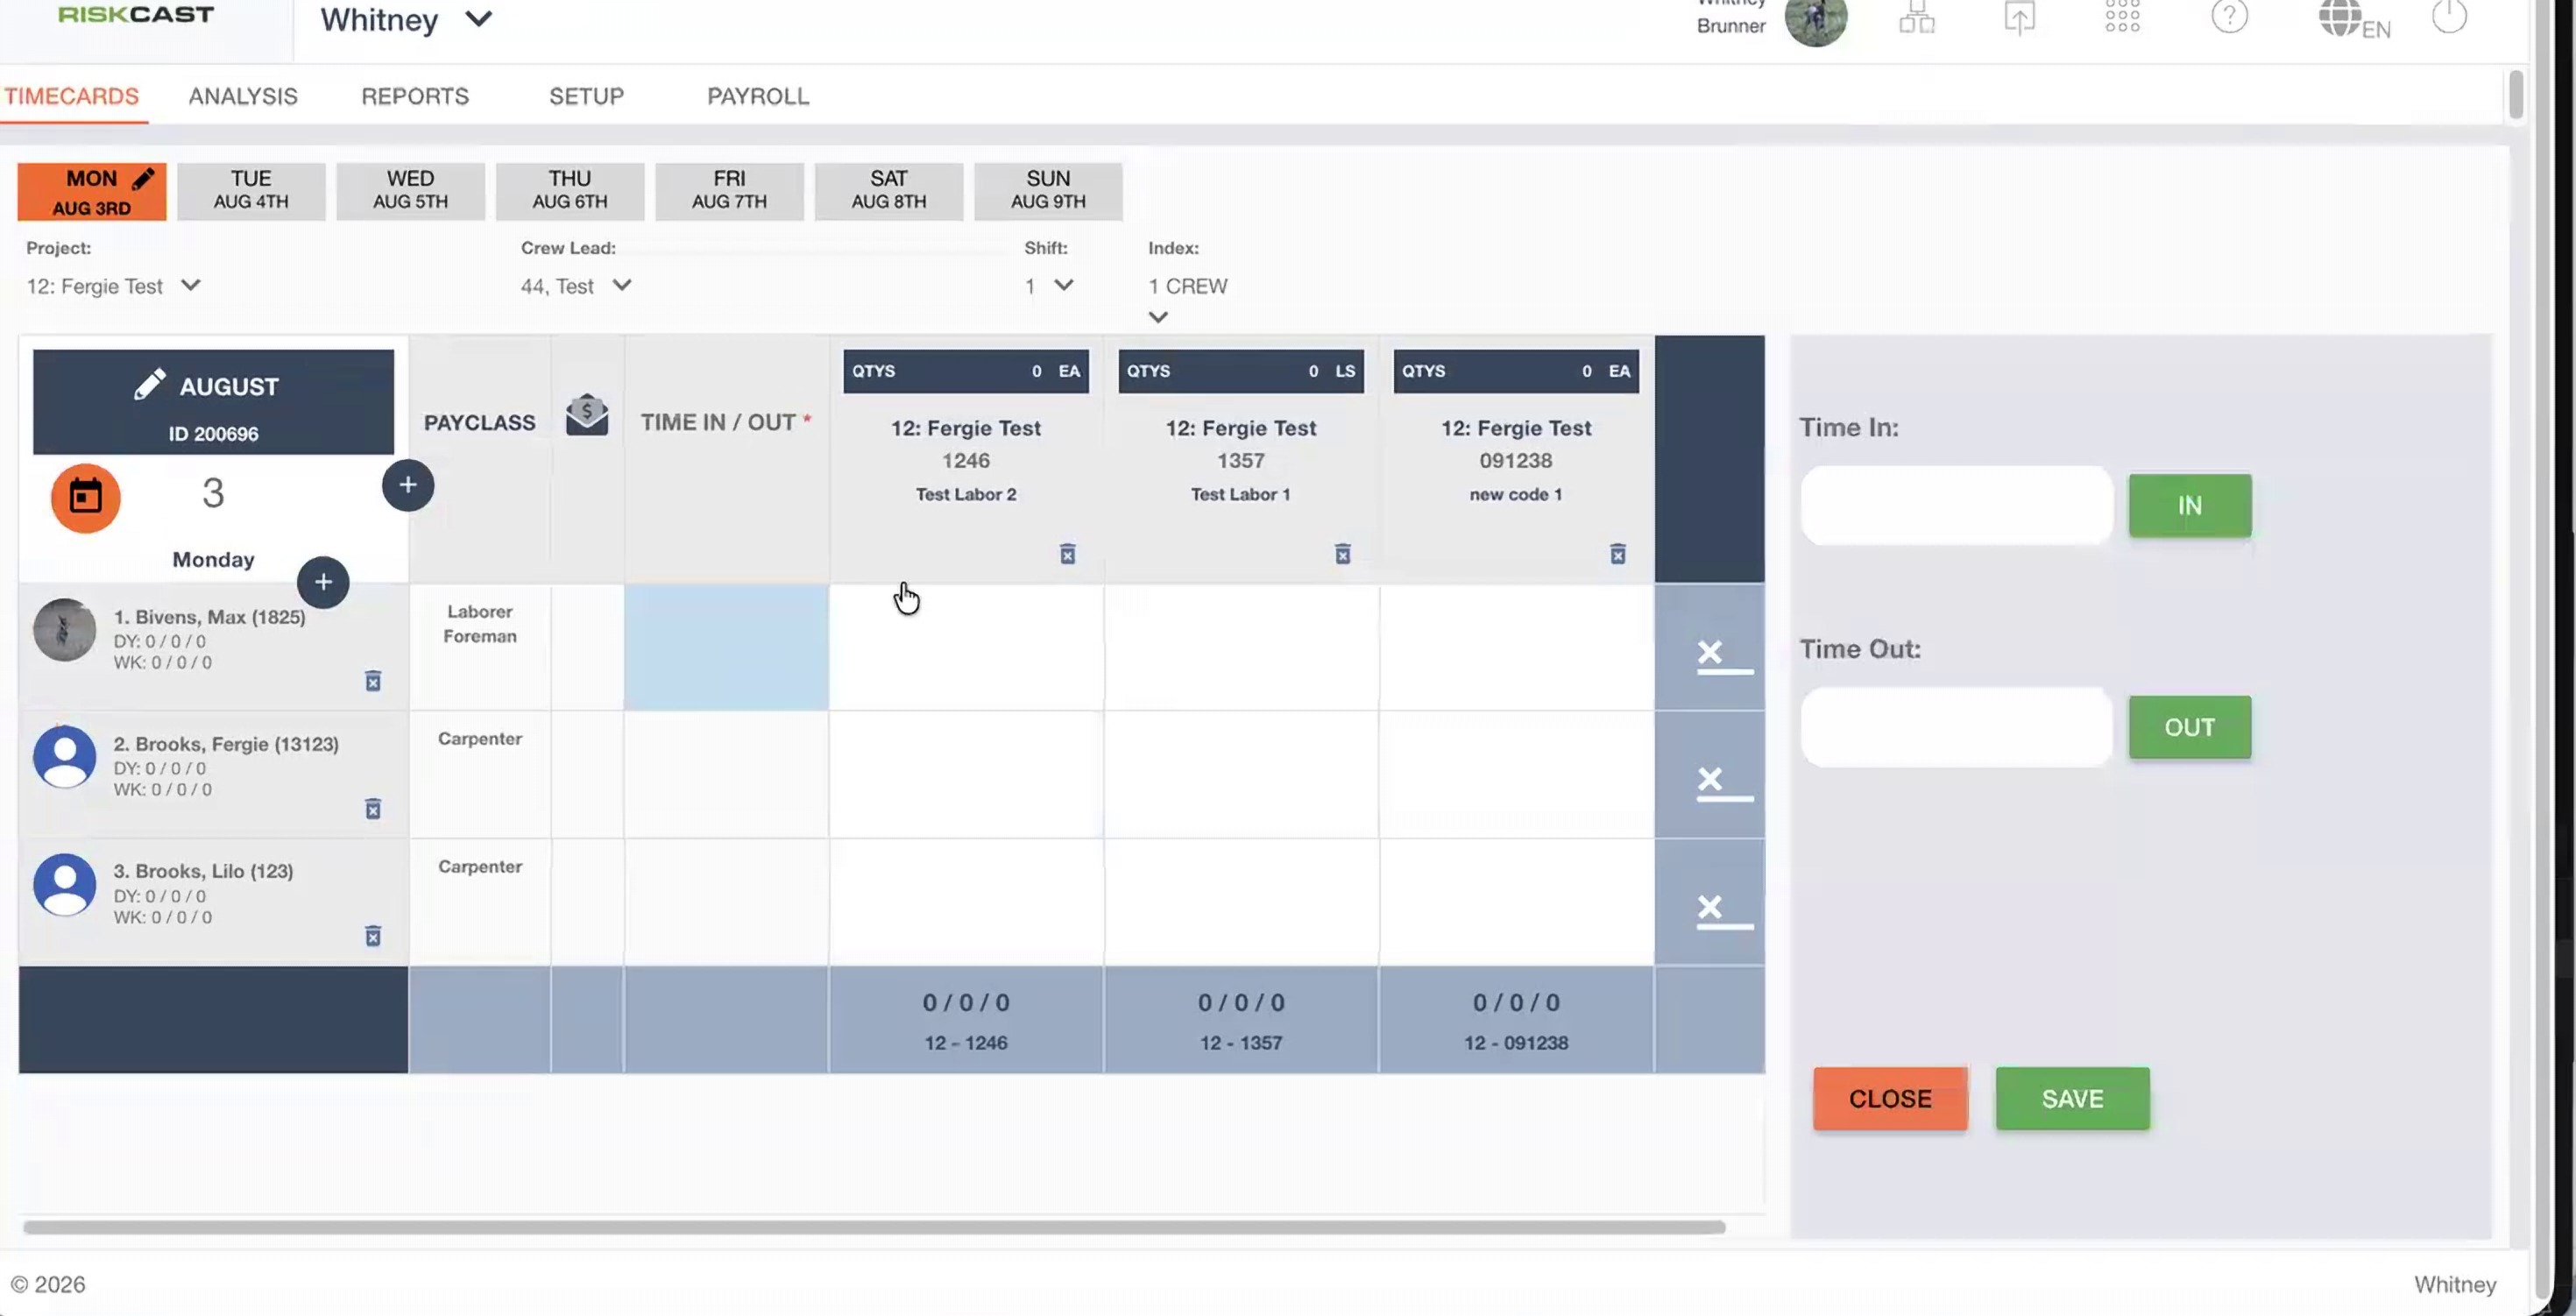
The Time In / Time Out panel, opened from the + button on an employee's row.
- Enter the Time Out the same way (or click OUT), then click SAVE.
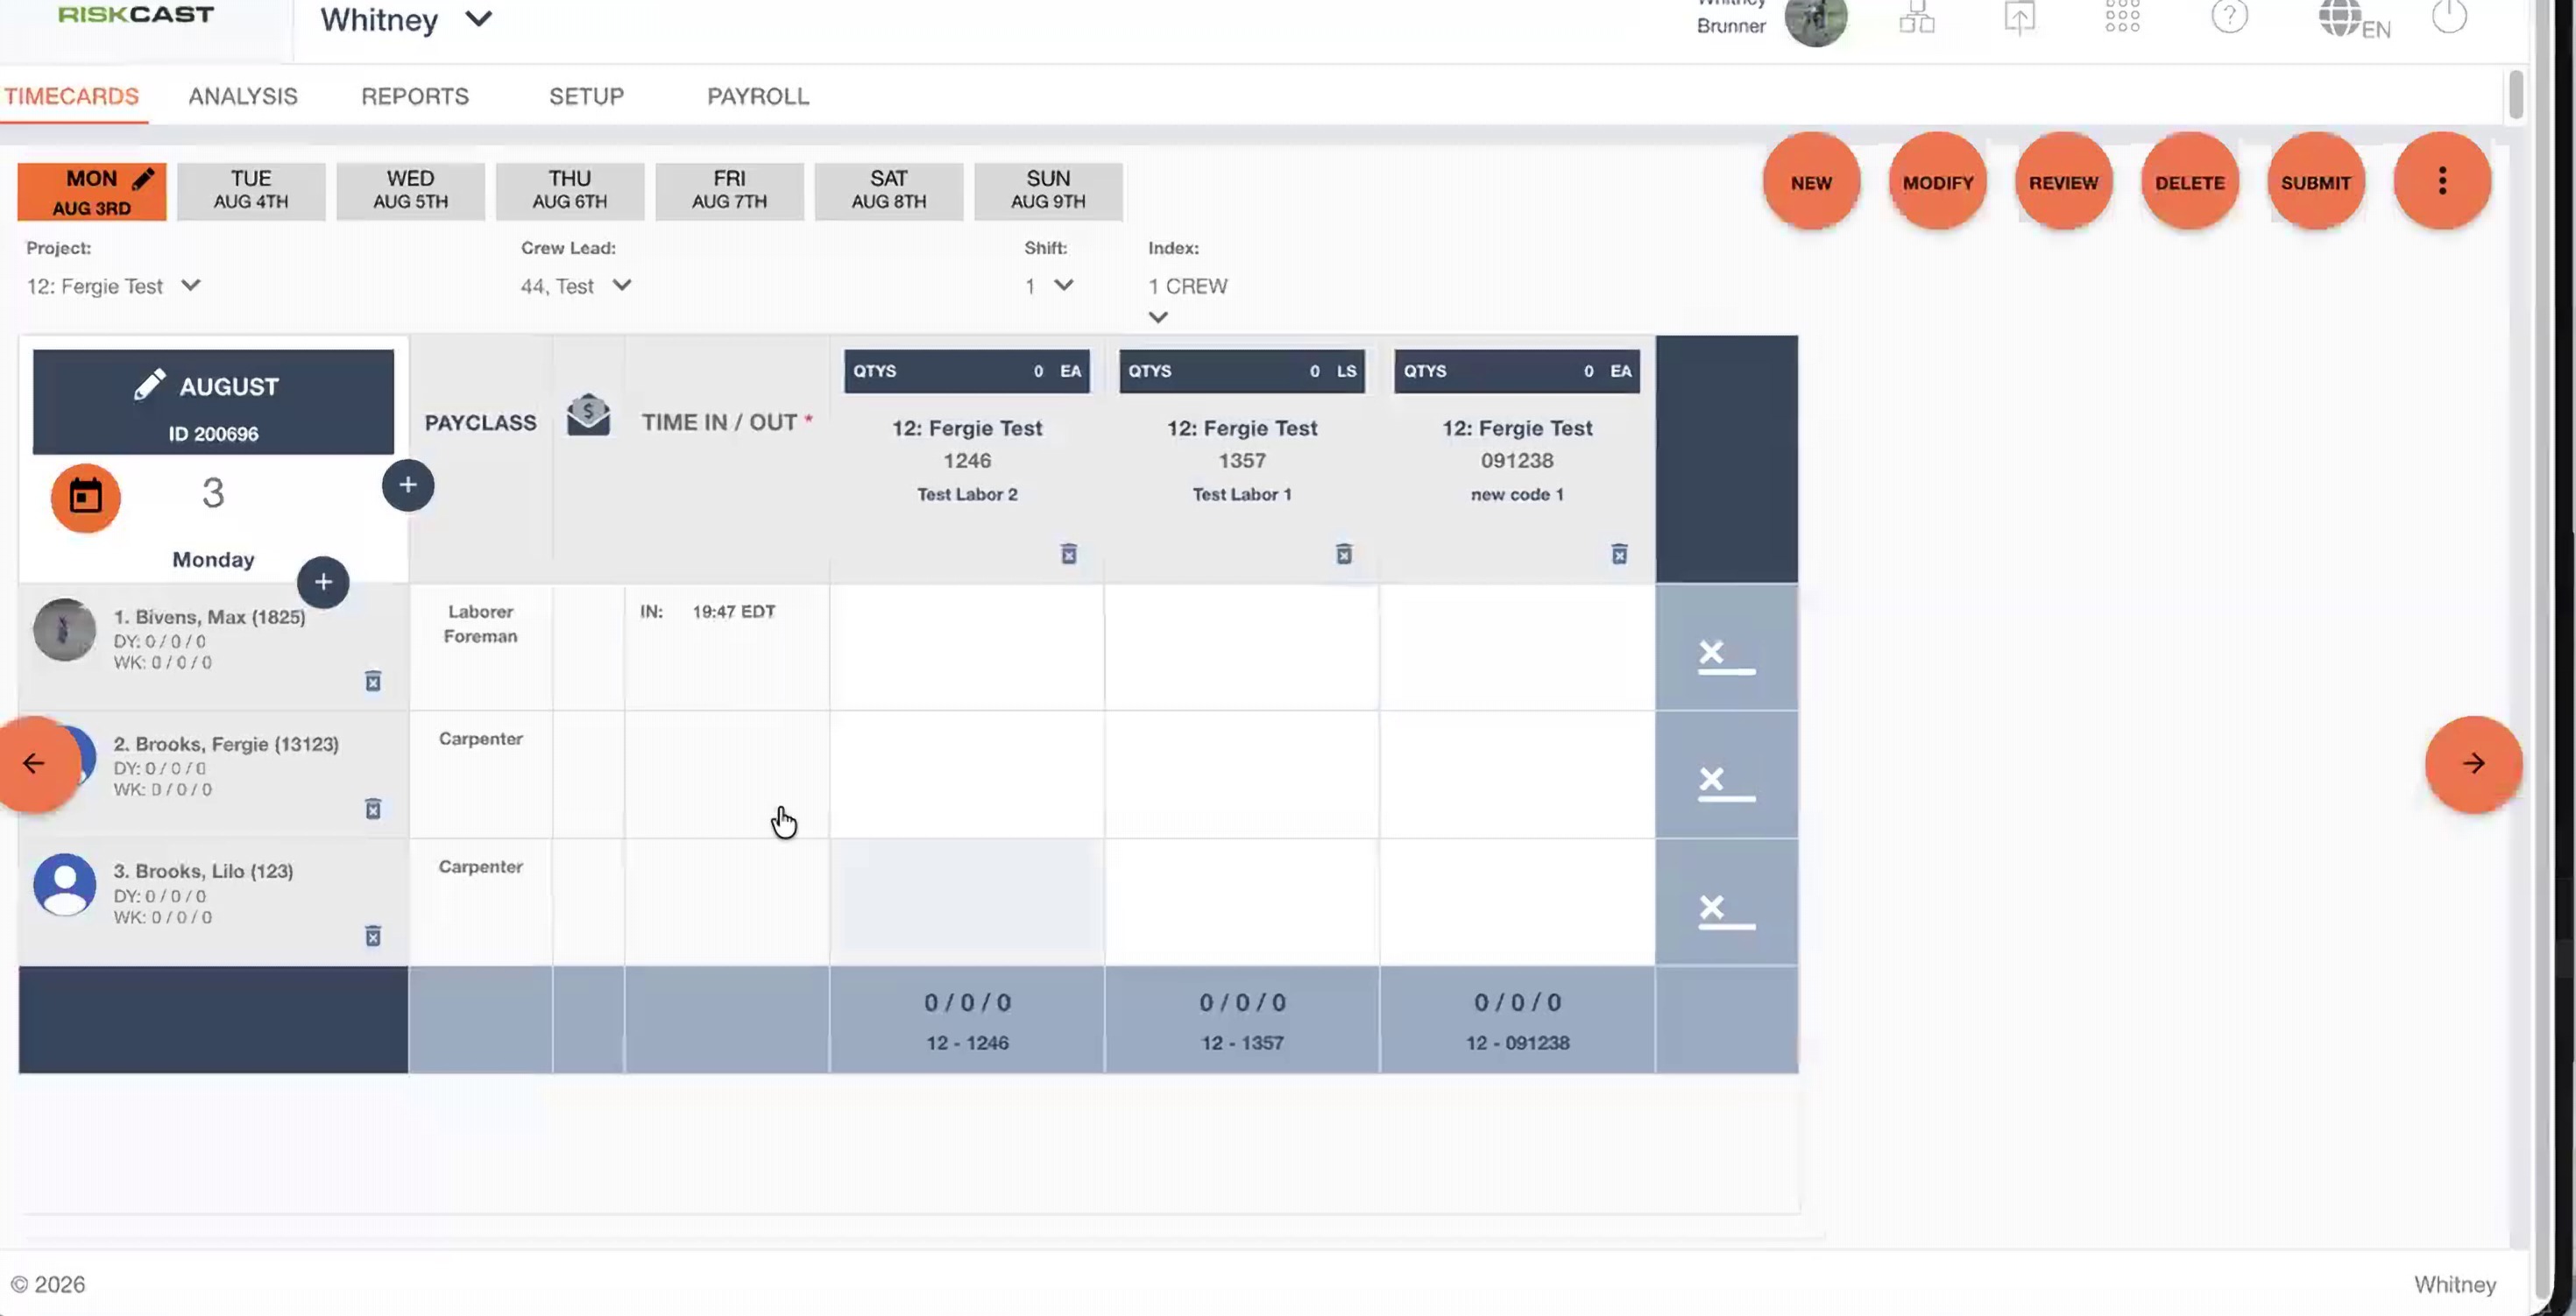
A time in has been recorded for the employee; time out is still pending.
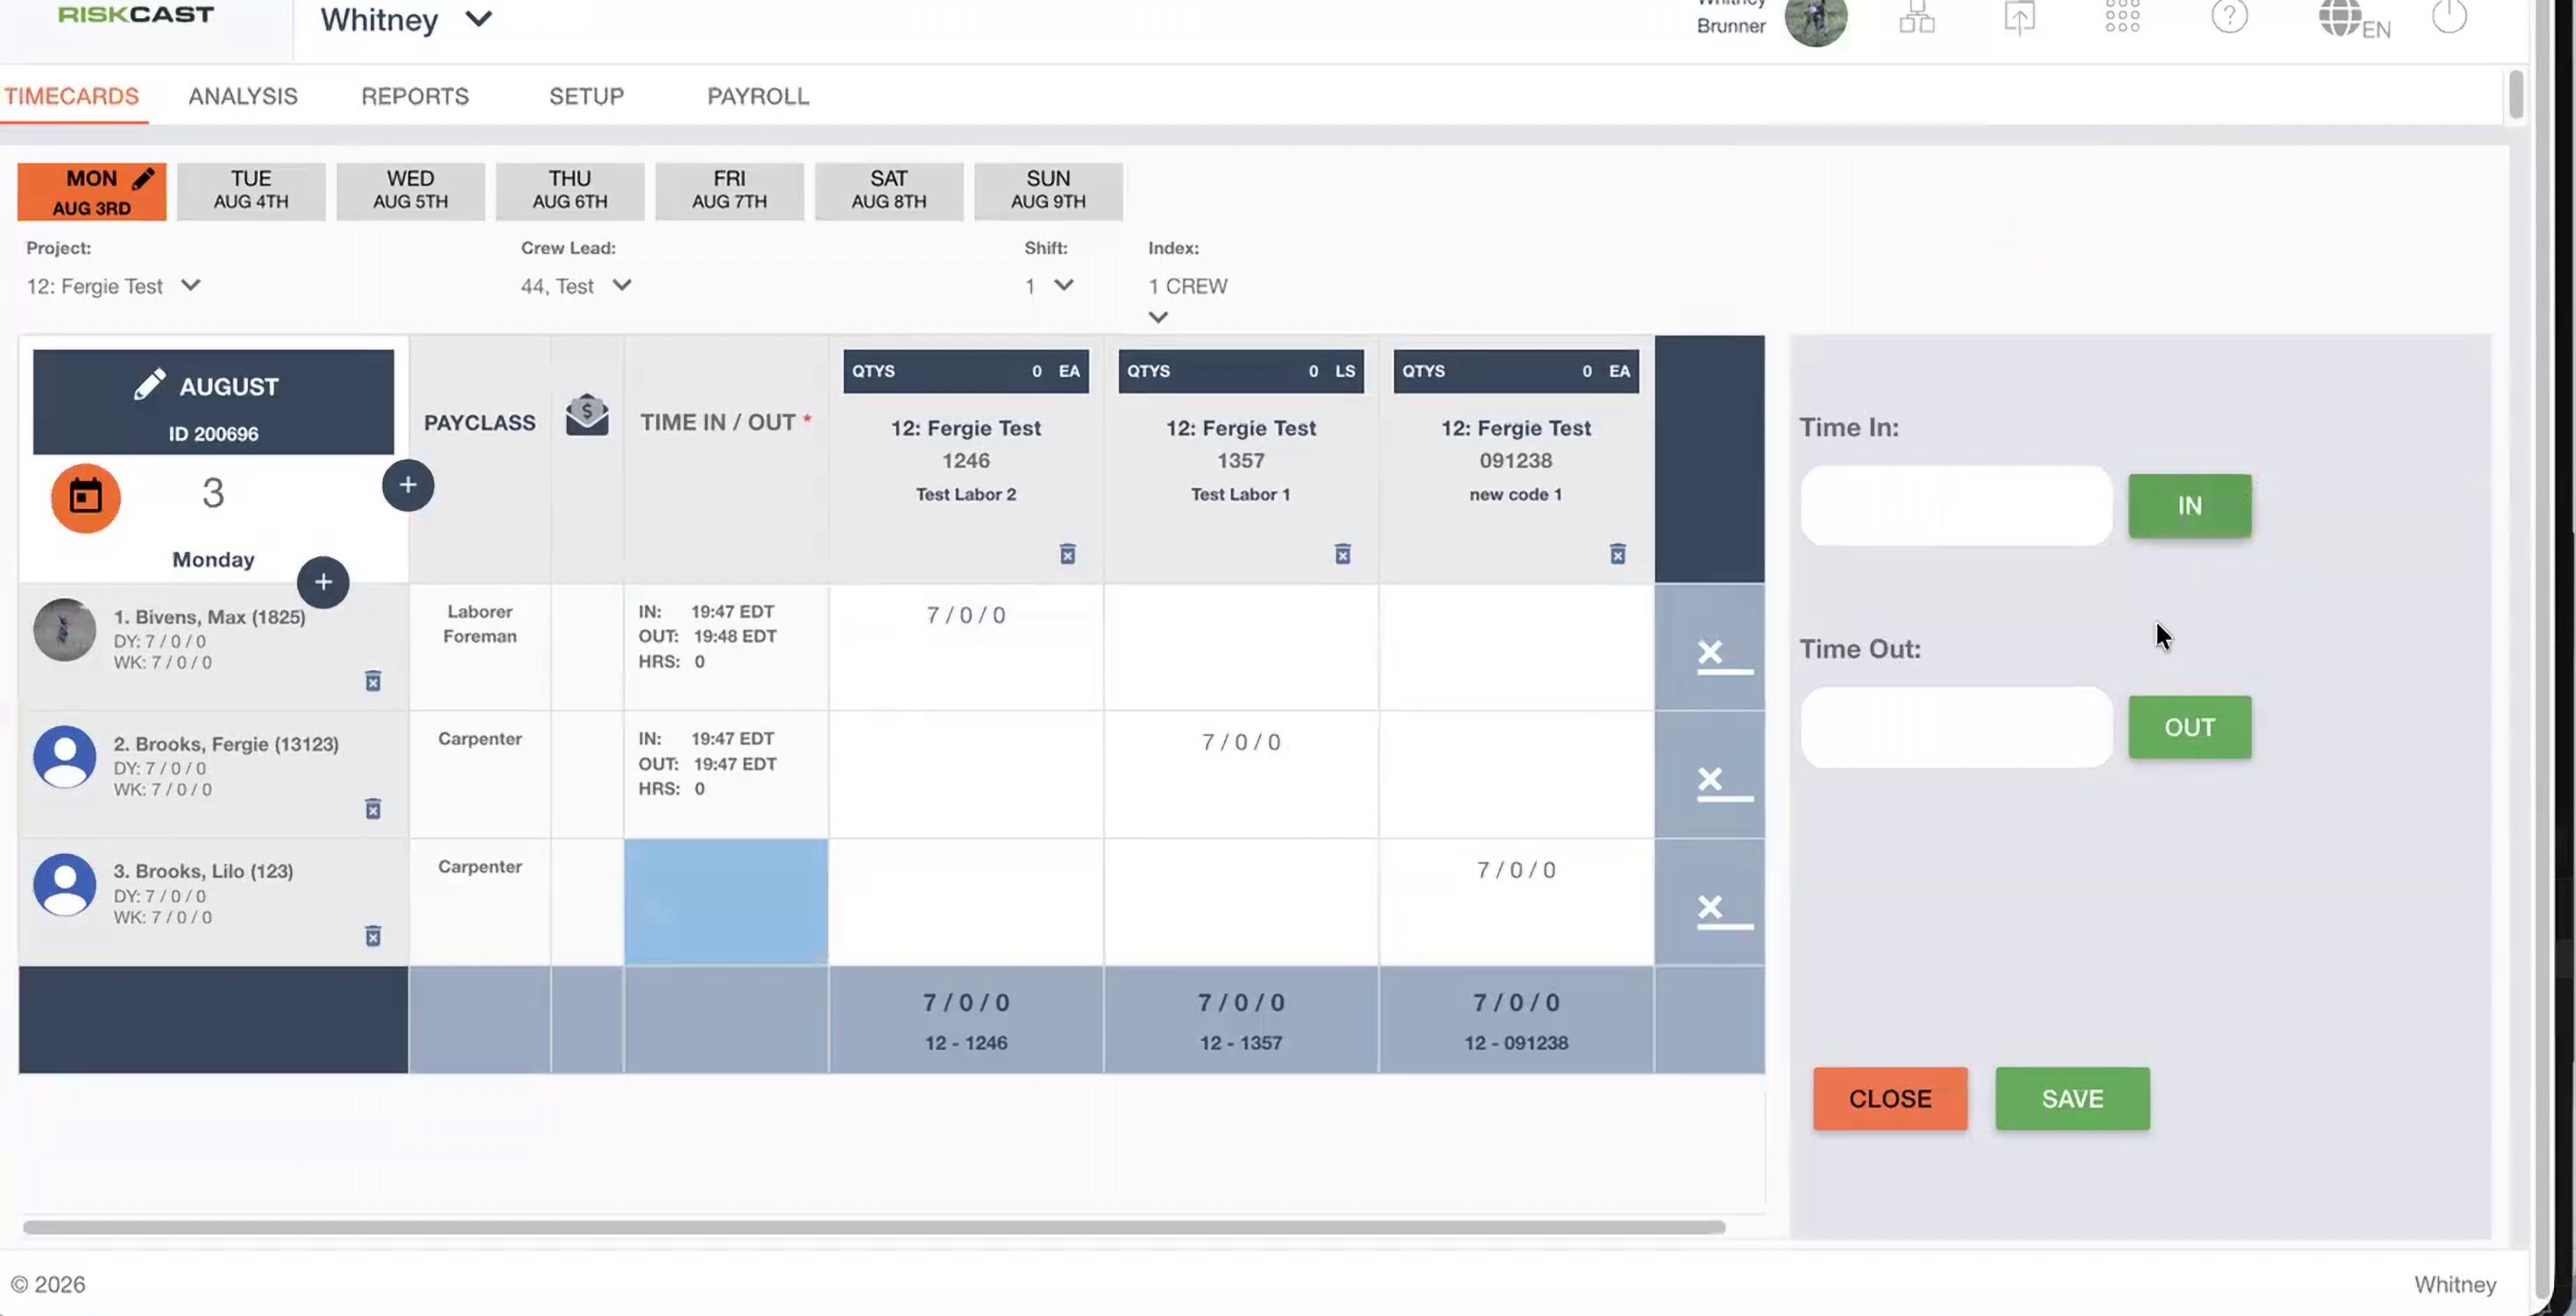
Entering both a time in and time out before saving.
- Repeat for each employee and day that needs a clock in/out entry. Hours worked continue to be logged against cost codes in the columns to the right as usual.
3. Required Time In / Time Out Validation
If Require Clock In/Out is turned on for the project (Section 1), the timecard cannot be submitted until every employee has both a time in and a time out recorded for the days they worked.
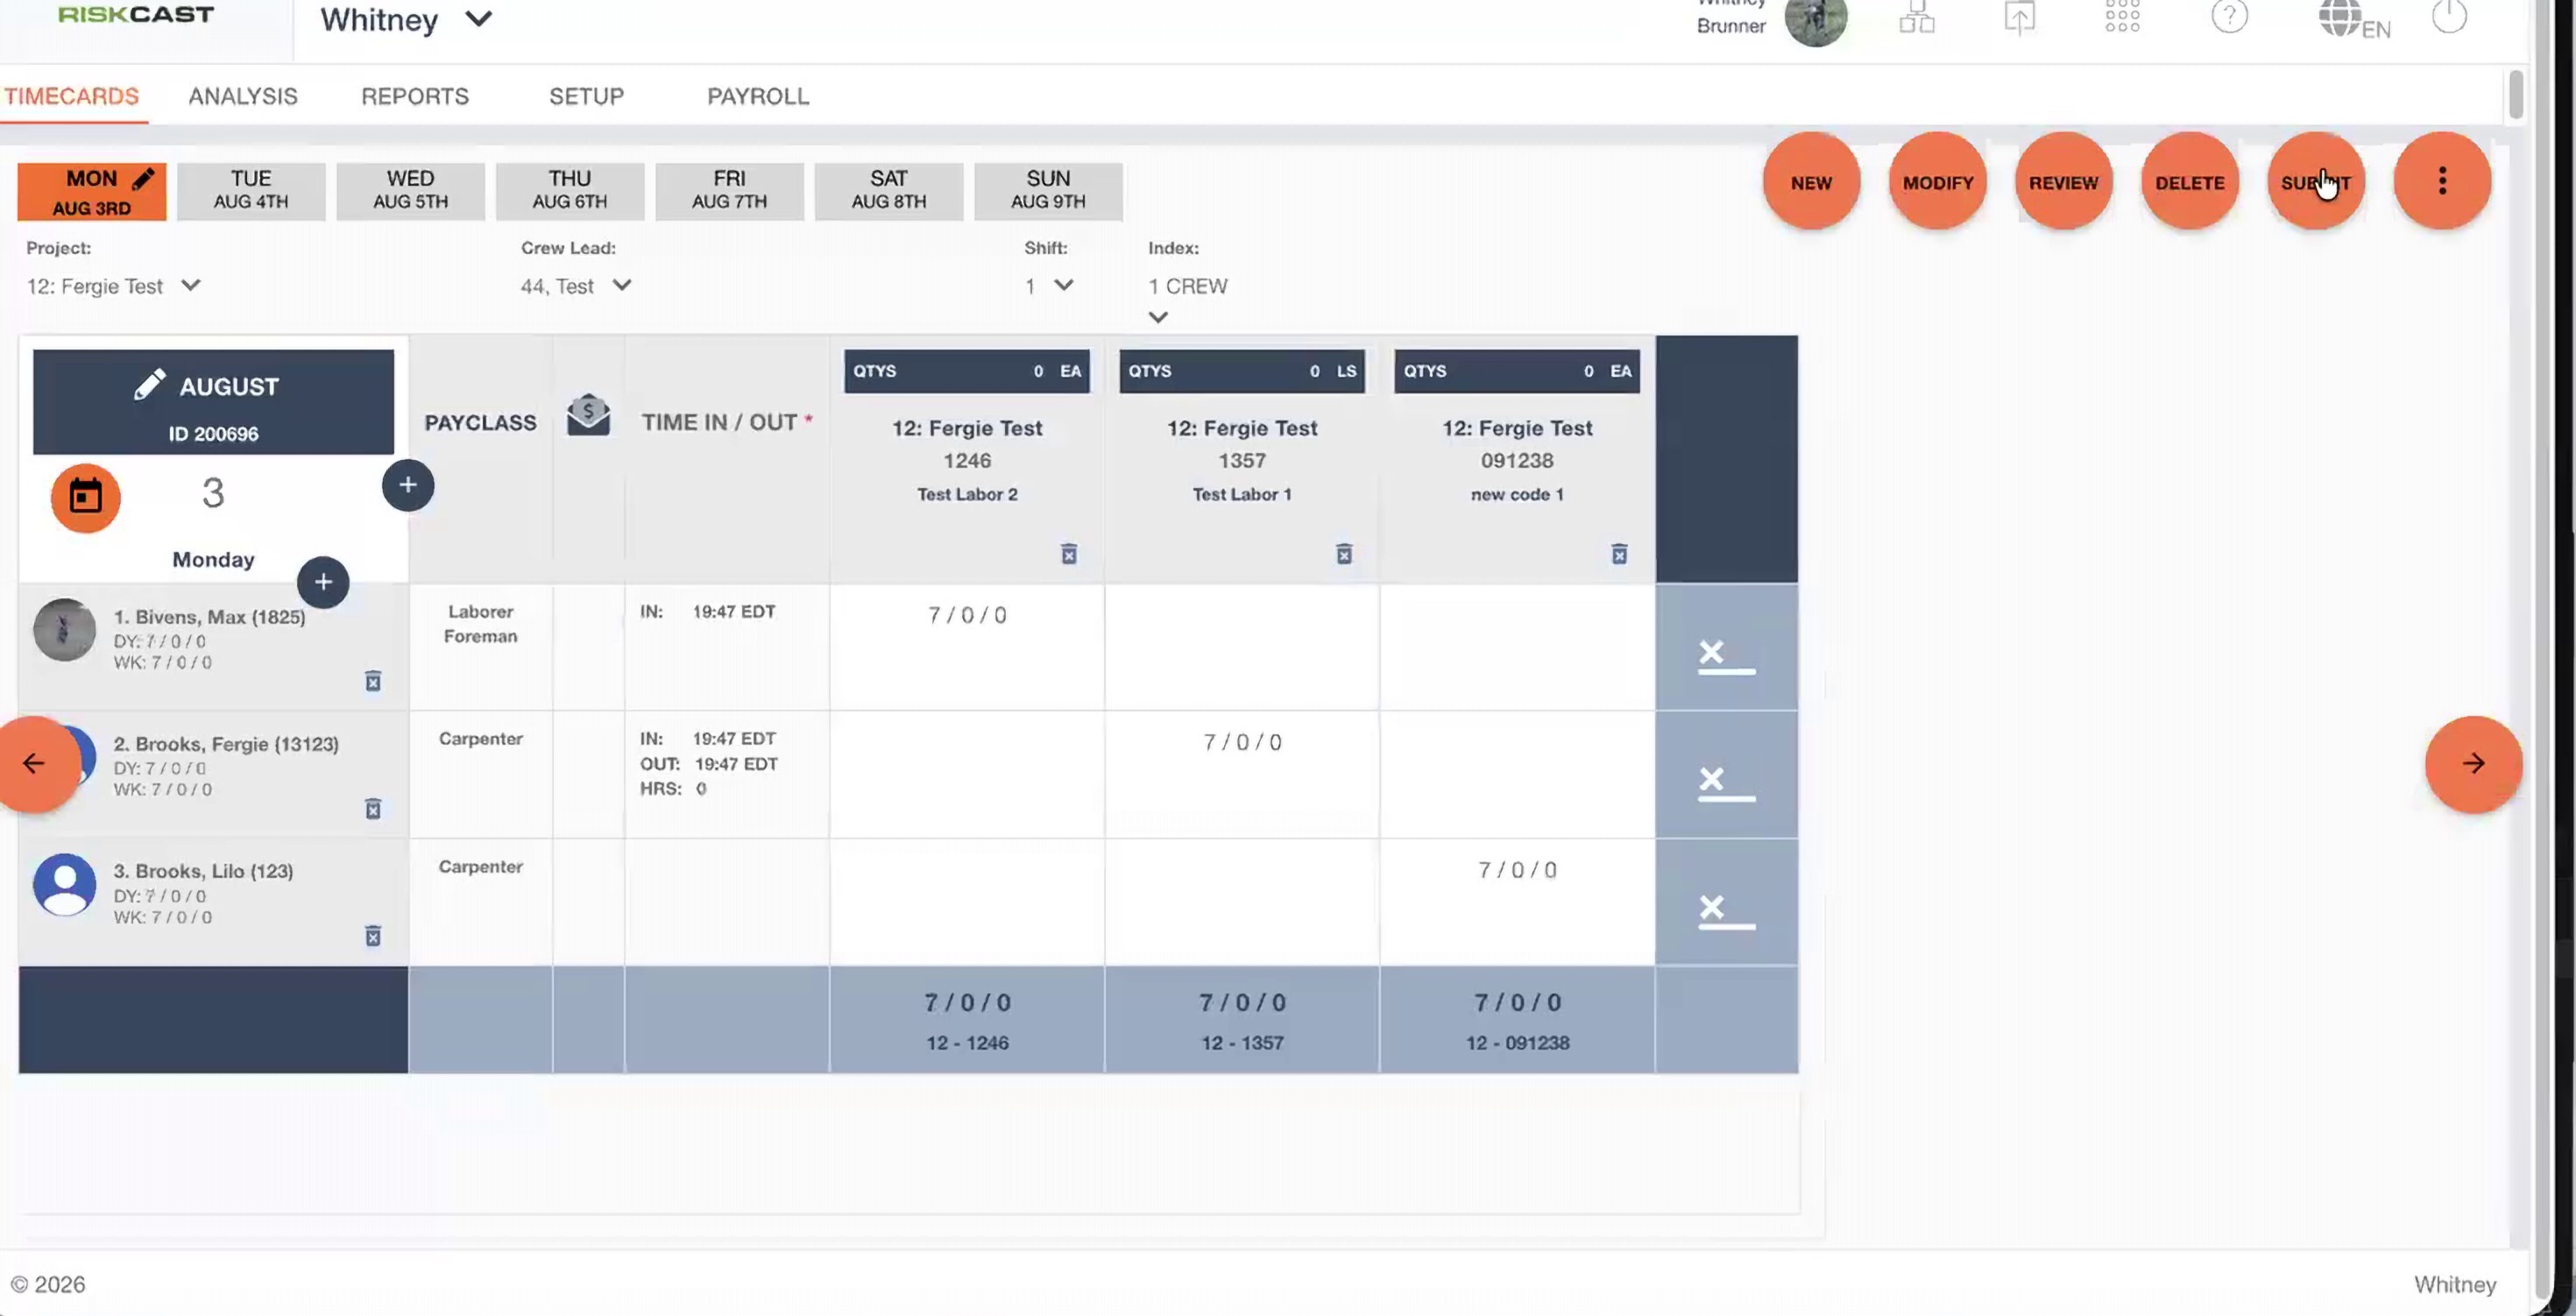
Attempting to submit with missing entries shows a warning listing the affected employees.
Rows or cells with missing entries are highlighted so they're easy to find and correct.
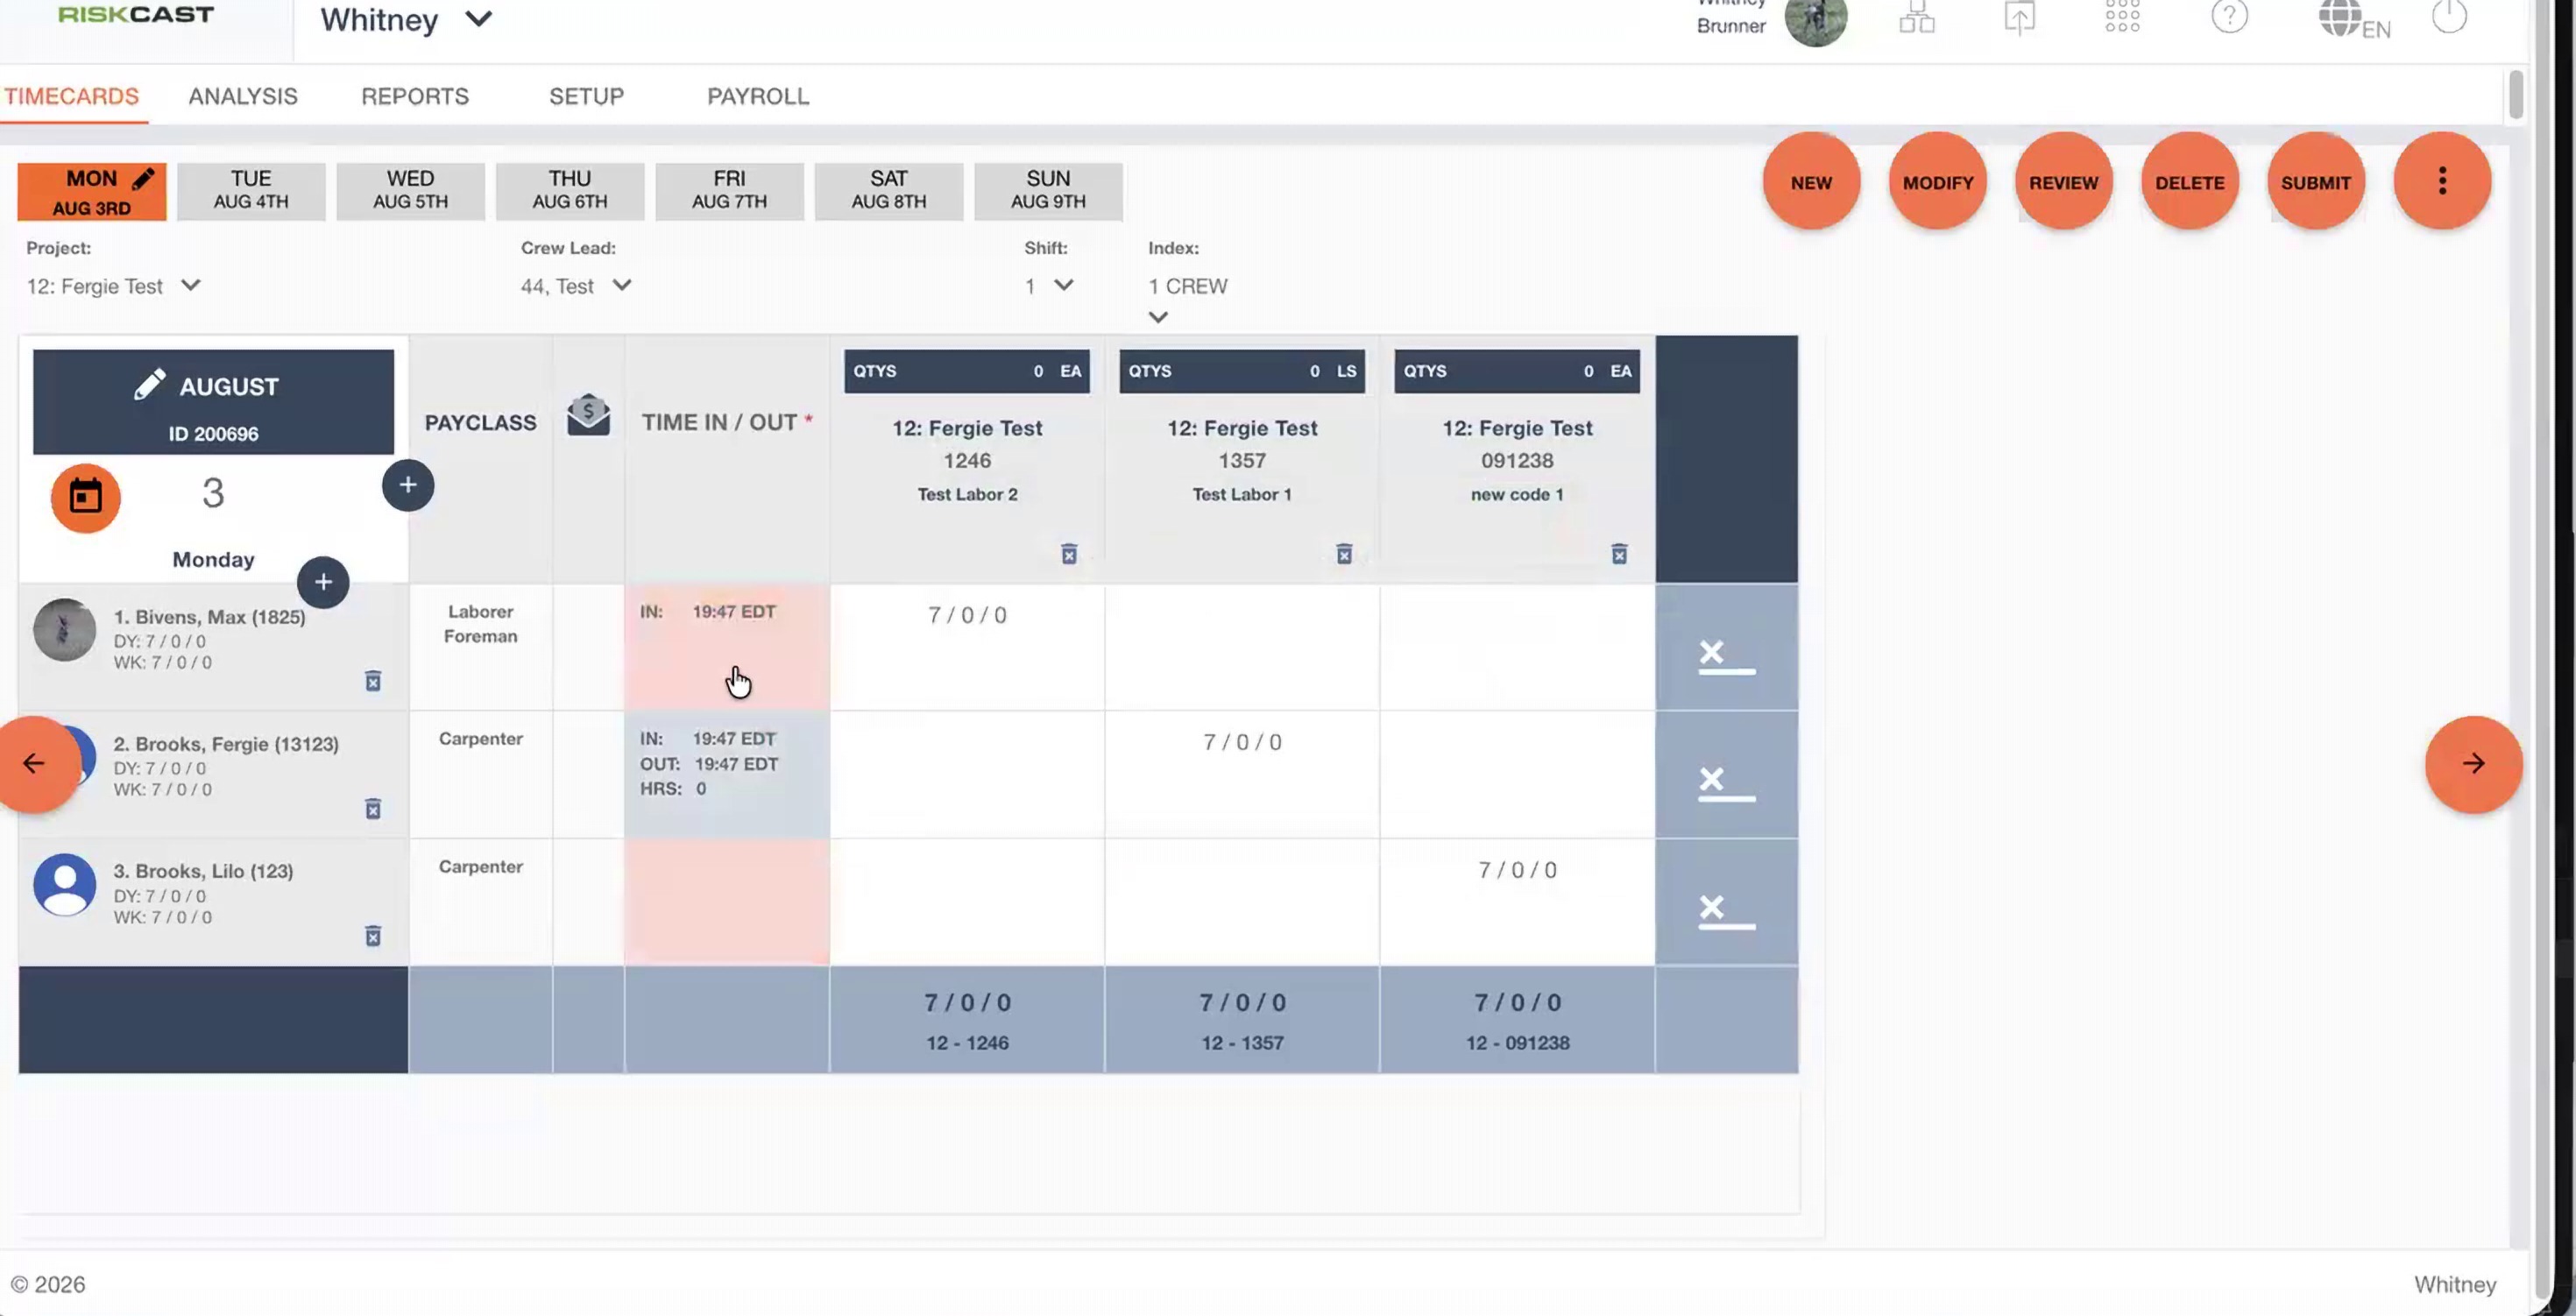
Missing time in/out entries are flagged directly on the grid.
- Click CLOSE on the warning, fill in the missing time(s) as described in Section 2, and try submitting again.
Note: this requirement only applies to the actual submission of the timecard. Approvals can occur without a time in/time out to not interrupt an existing payroll process.
Quick Reference
- Enable the feature per project: Project > OPTIONS > Timecard > Enable Employee Clock In.
- Require Clock In/Out makes both times mandatory before submission.
- Use the + under TIME IN / OUT on an employee's row to record a time in/out entry.

