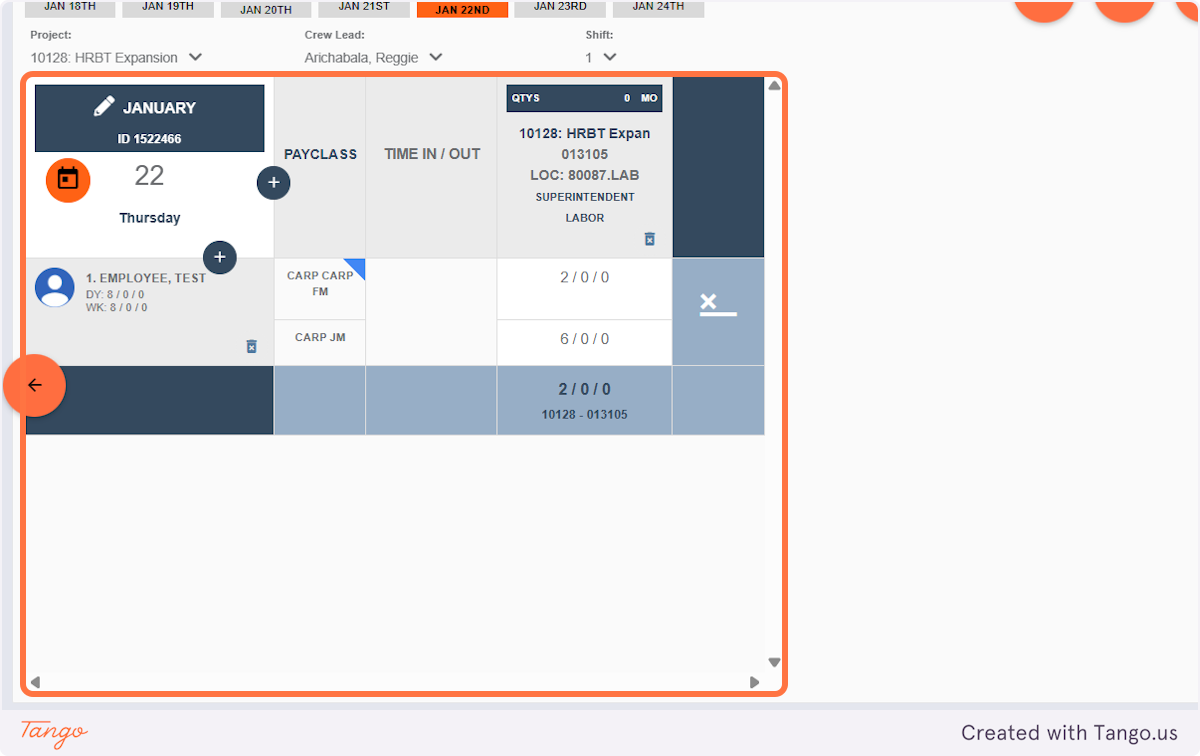
22
22
Overview
In Riskcast, an employee can log time under multiple pay classes on the same day and within the same time card.
This is helpful when an employee performs different types of work that are tracked separately for labor costing, such as working part of the day in a field role and part of the day in a supervisory role.
Example:
John works:
- 2 hours as an Electrician
- 6 hours as a Project Manager
Both sets of hours can be entered for John on the same time card using different pay classes. This ensures accurate labor costing, proper role-based reporting, correct pay class tracking for payroll or exports. Each line is treated as a separate labor entry, even though it is the same person and date.
Prerequisites
Before using multiple pay classes on a time card, confirm:
- The employee is assigned to more than one pay class in Riskcast
- The project allows time entry for those pay classes
- The user entering time has permission to change or select pay classes on the time card
Note: Some environments require a specific permission or system setting to allow pay class changes during time entry.
How to Enter Multiple Pay Classes for One Employee
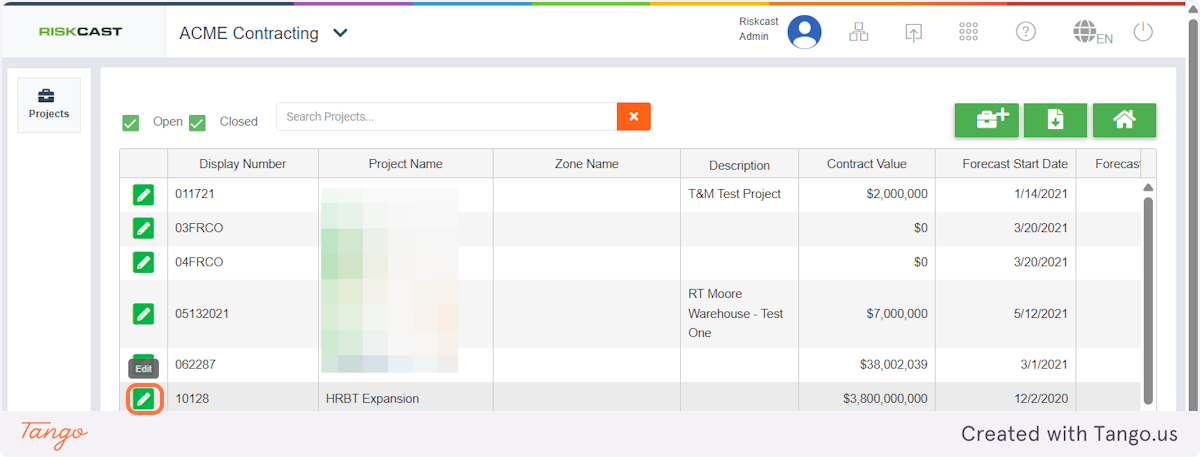
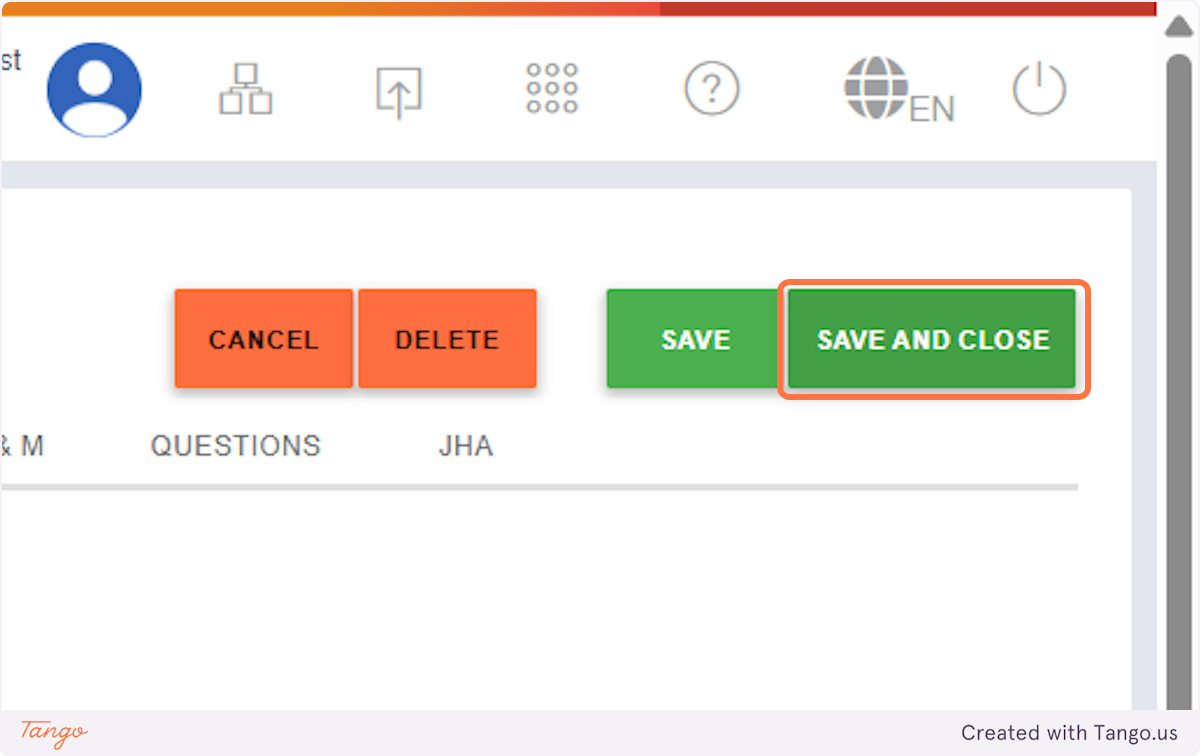
1. Click on Edit for the applicable Project
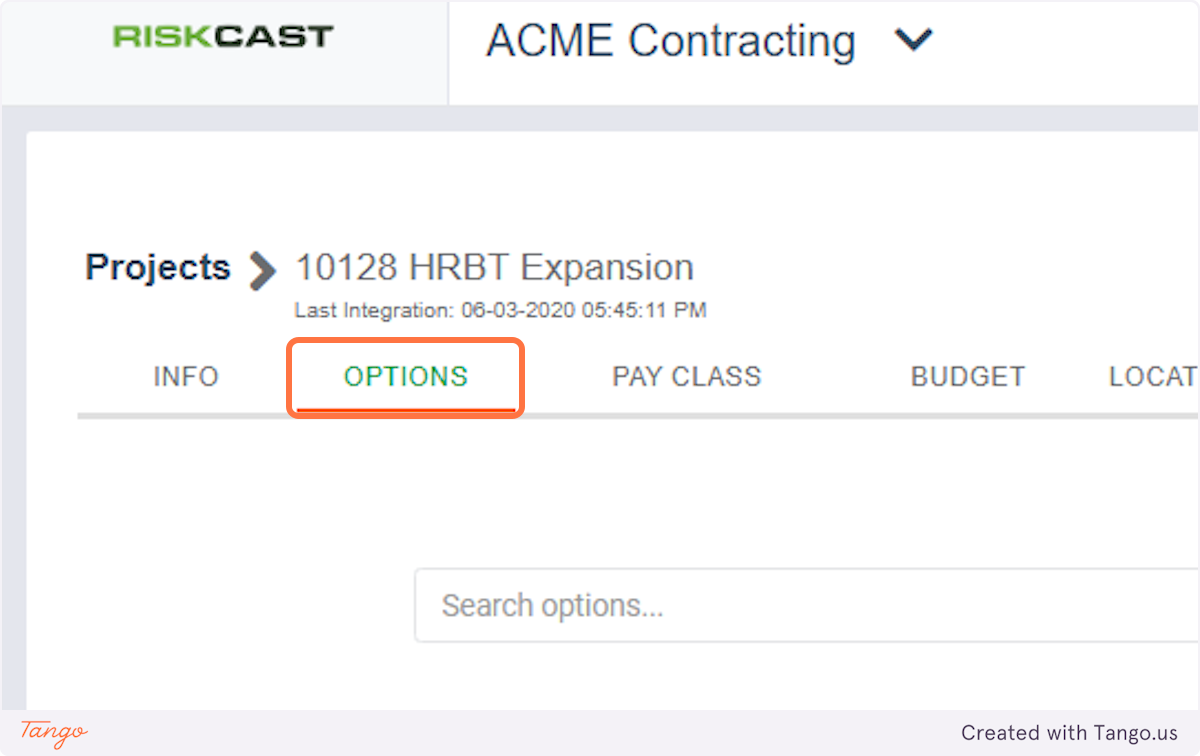
2. Go to Options
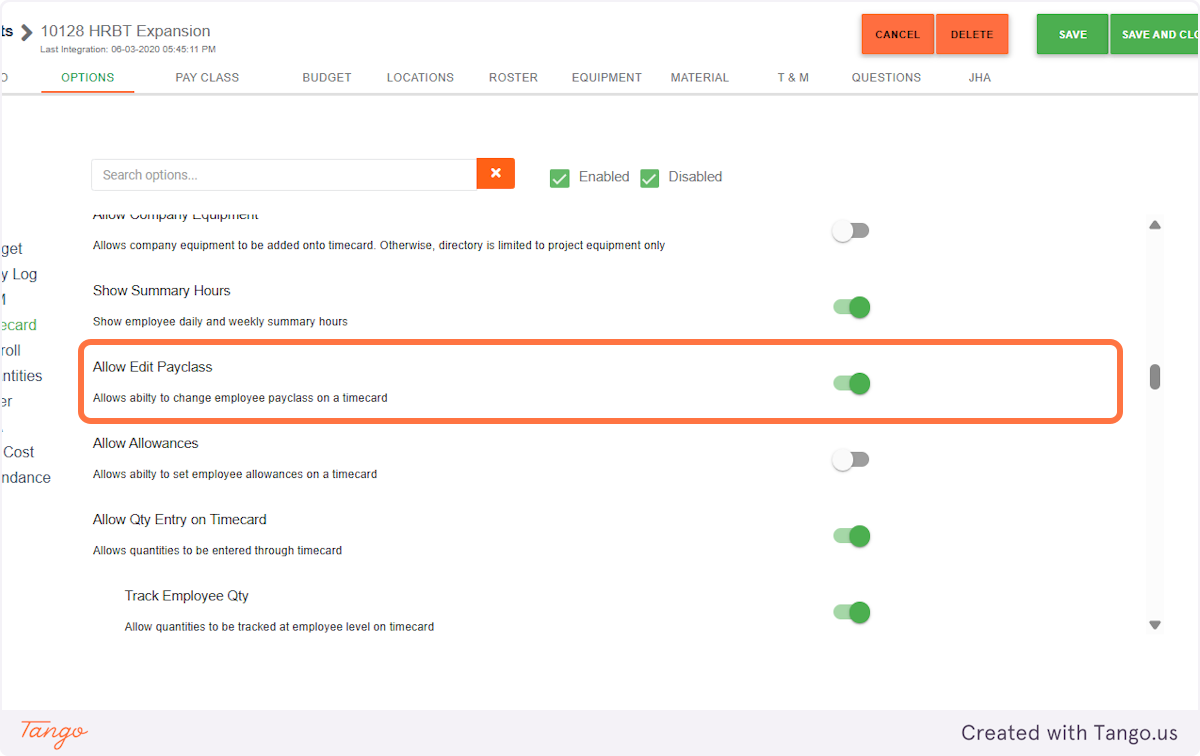
3. Enable Allow Edit Payclass
4. Click on SAVE AND CLOSE
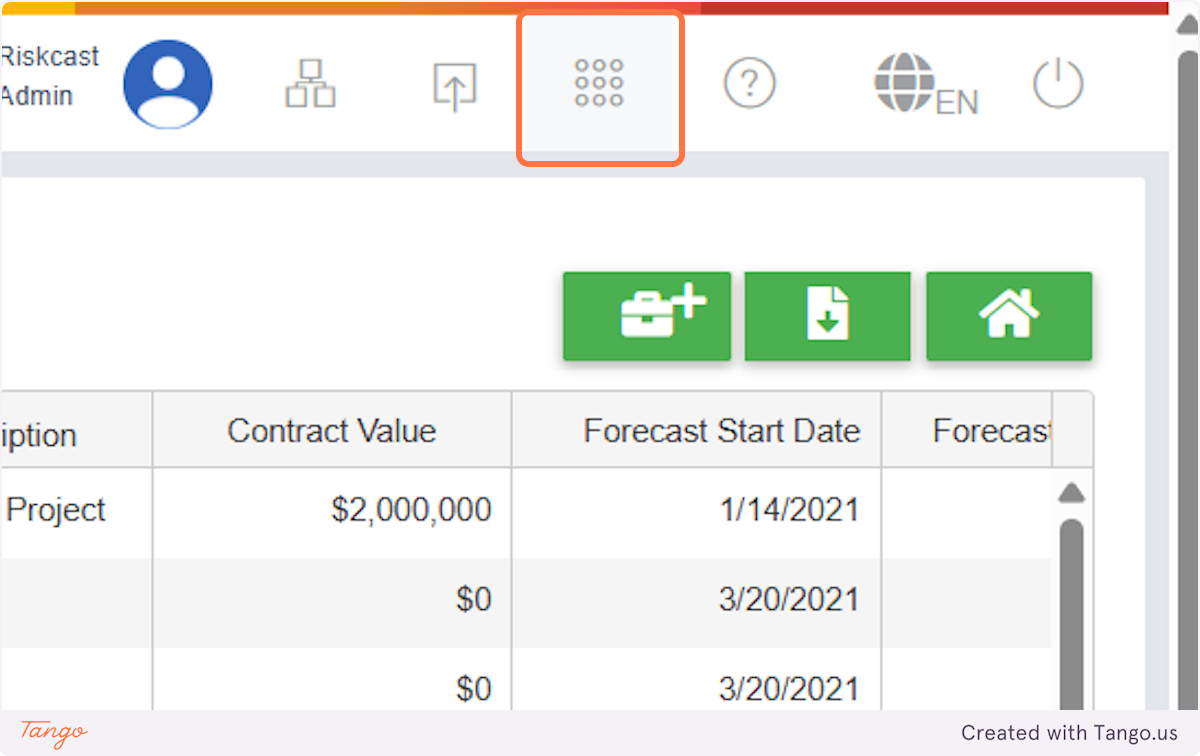
5. Click on Tools
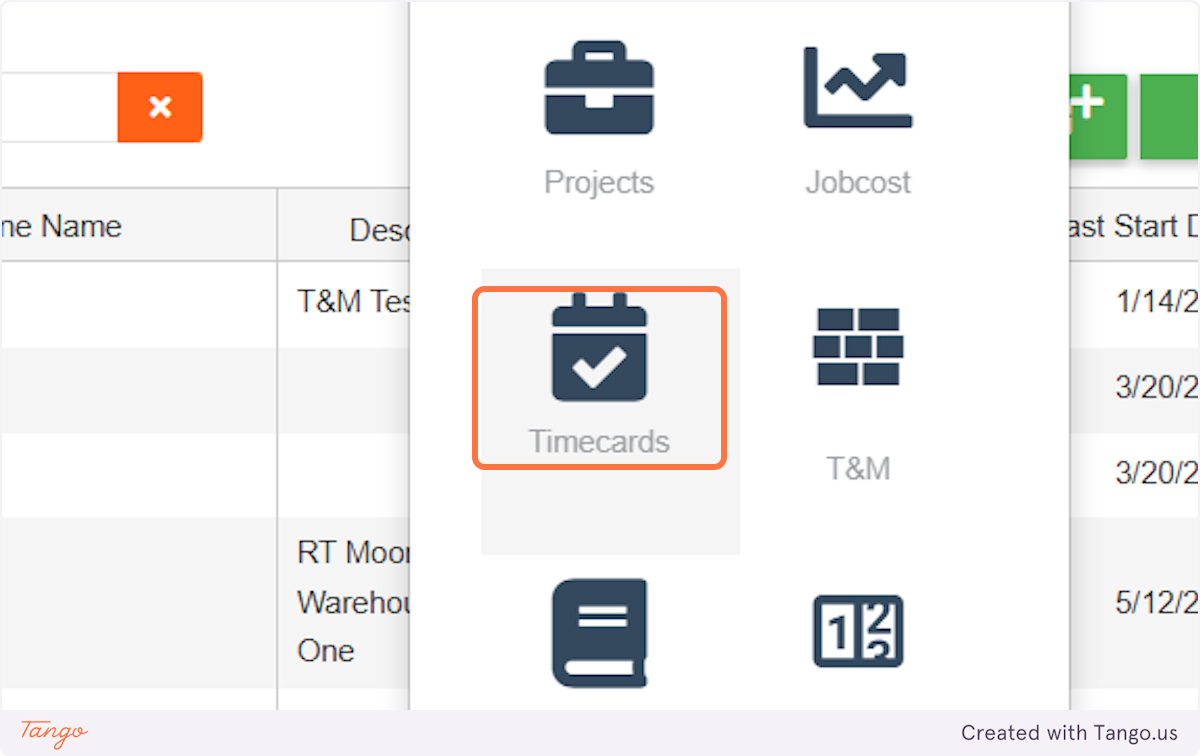
6. Click on Timecards
7. Click on Click To Add Crew
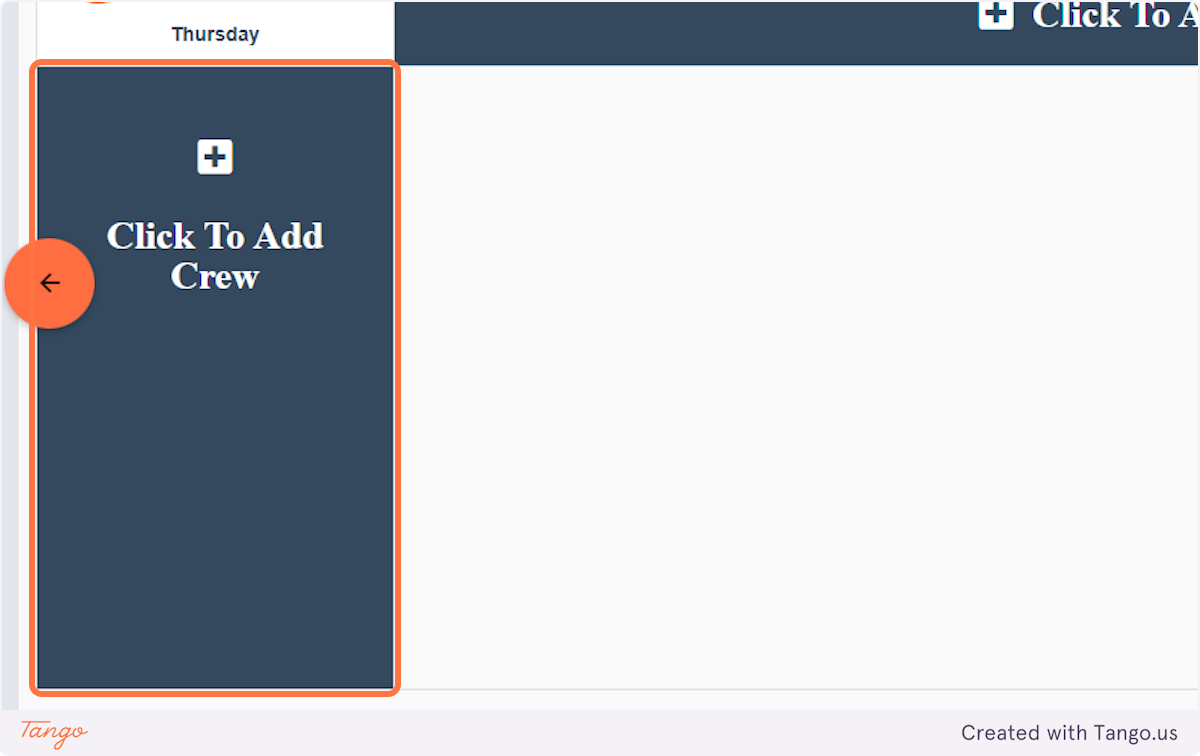
8. Choose the employee(s)
You will click this button however many times for the different pay classes there are (i.e. if you have two pay classes for the same project you will add the employee to the time card twice)
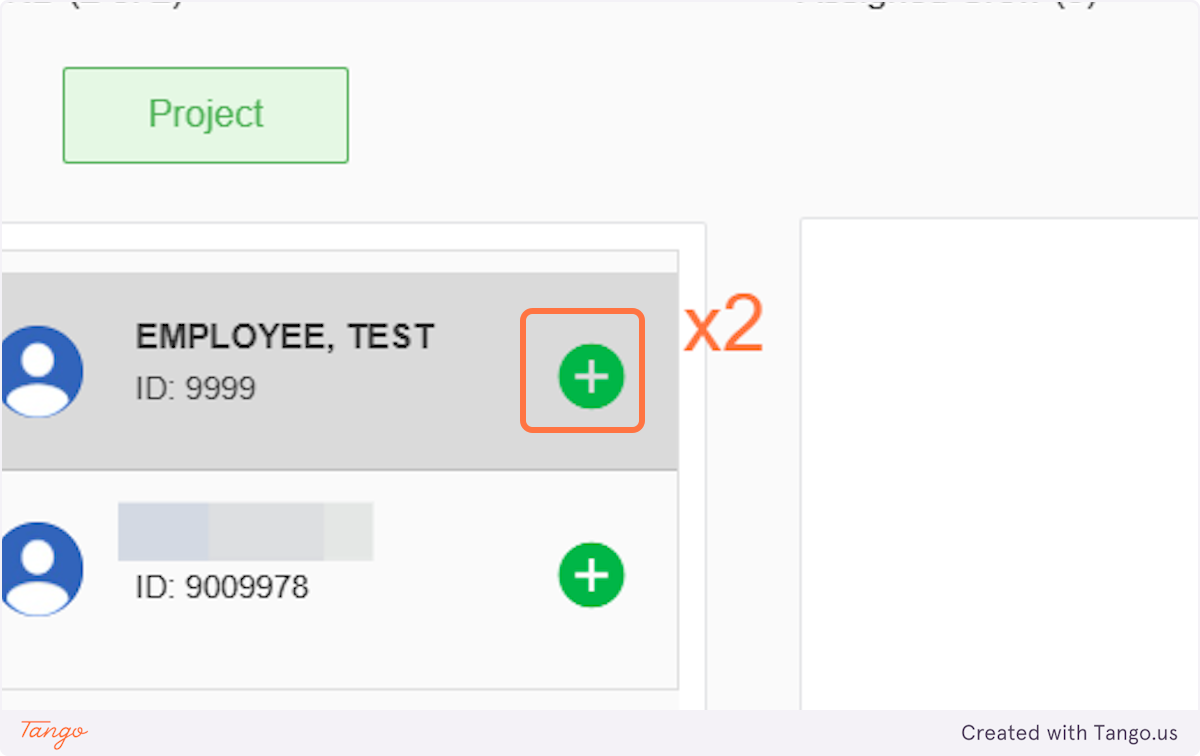
9. Click on EMPLOYEE, TEST…
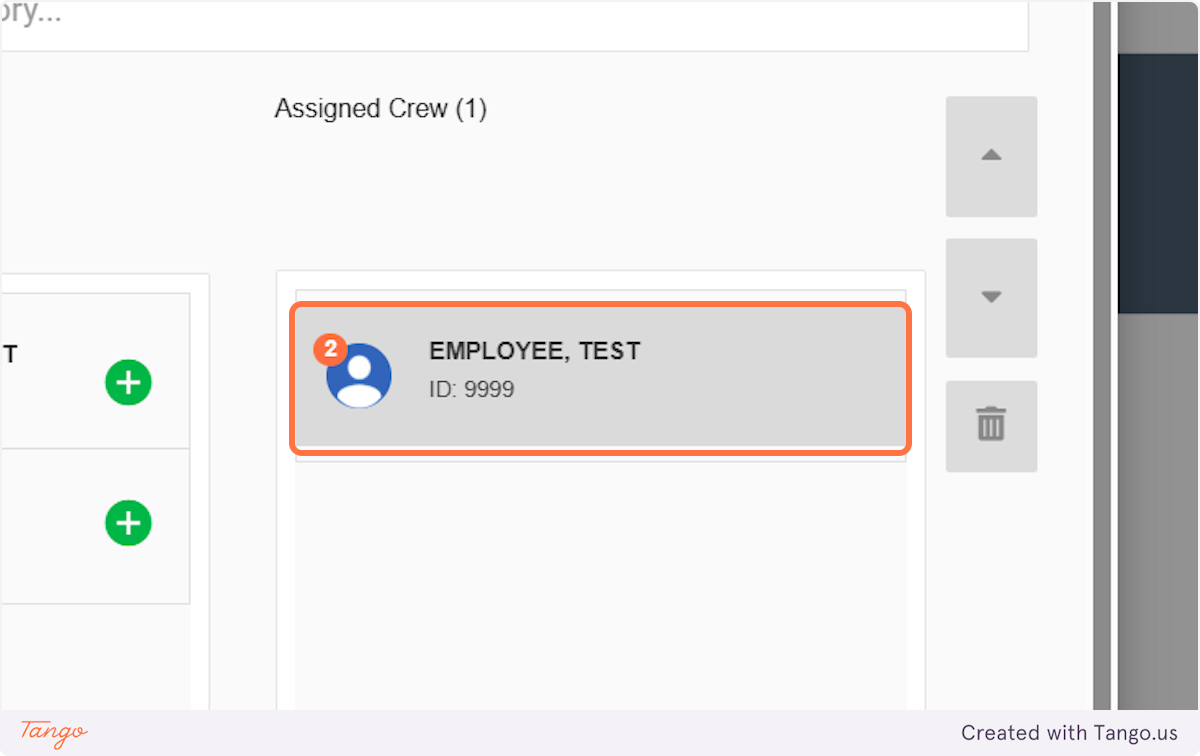
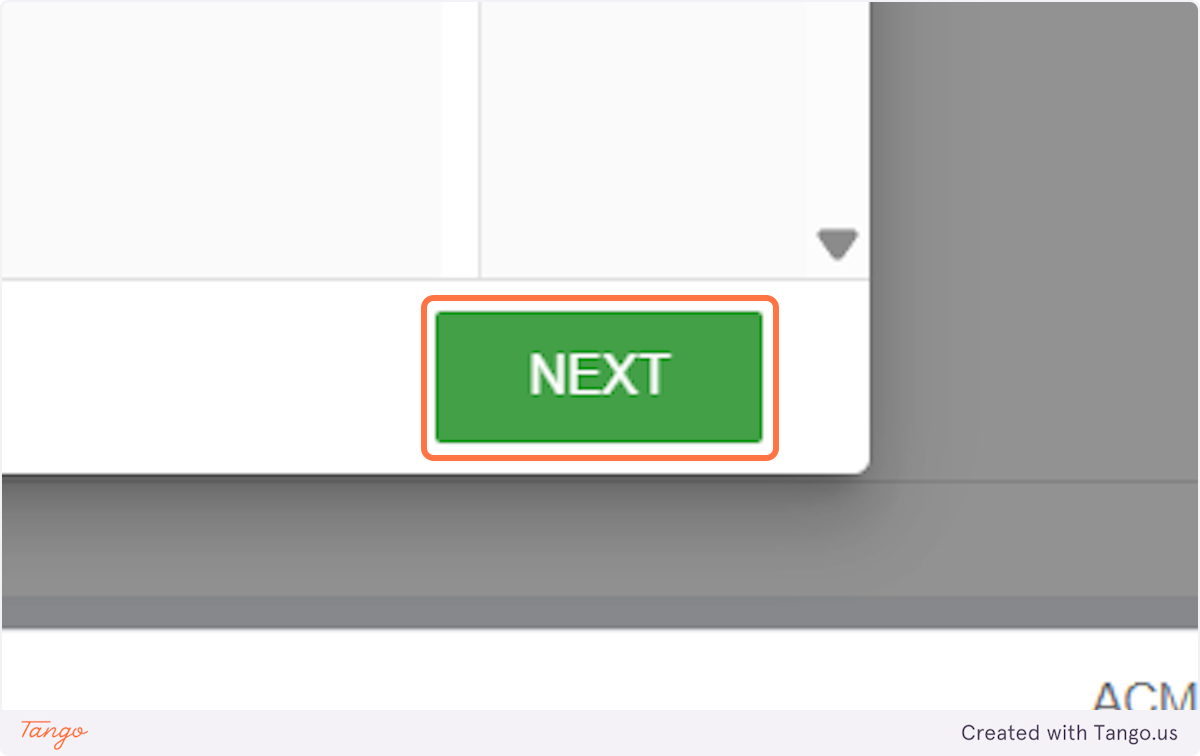
10. Click on NEXT
11. Set up your Cost Codes as you normally would
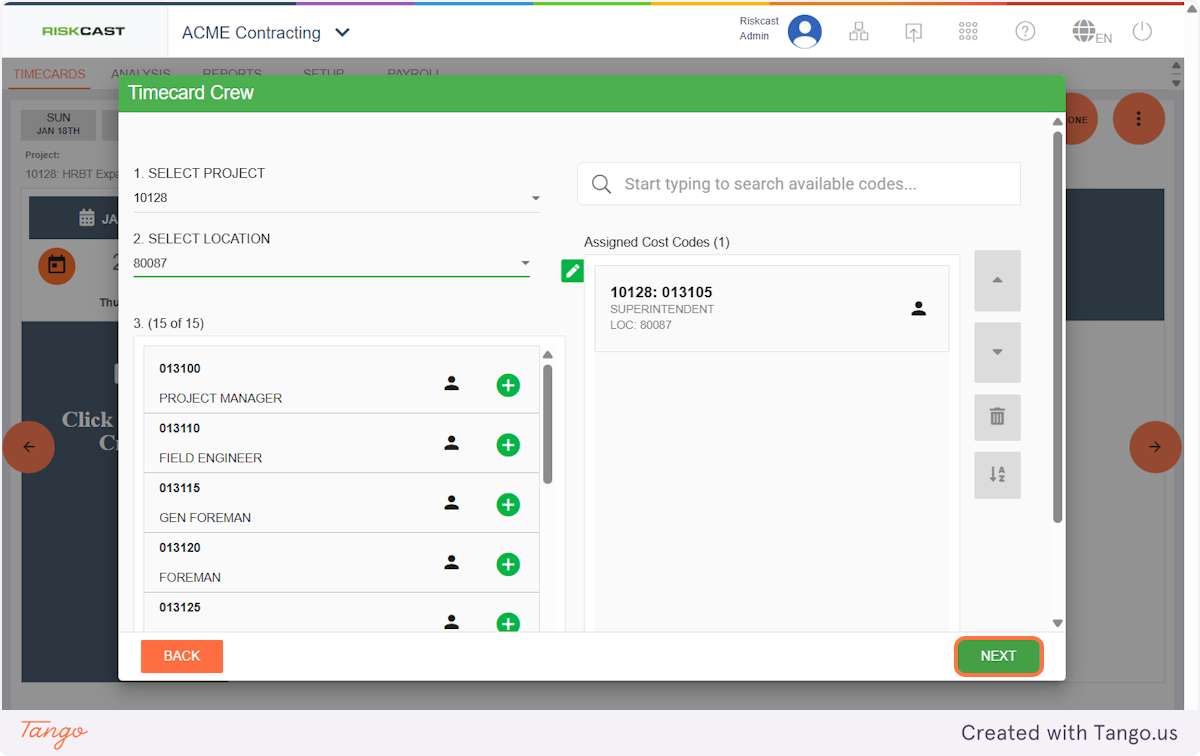
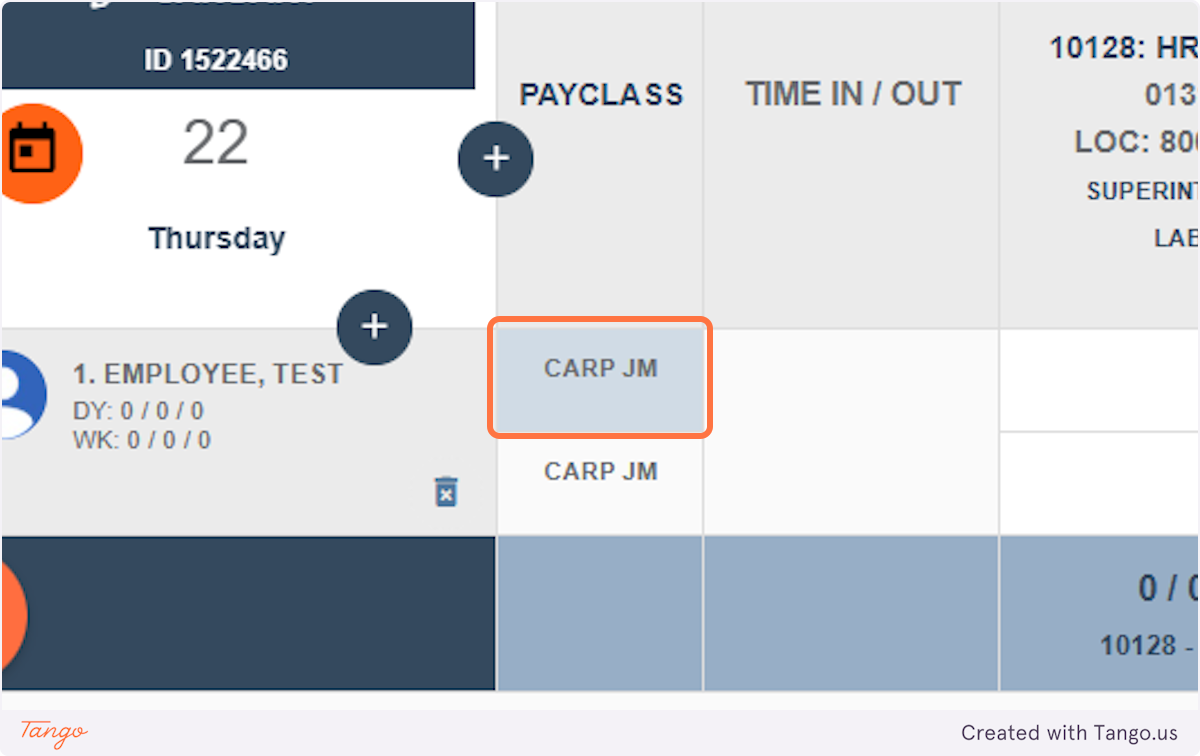
12. Click on the pay class you want to change
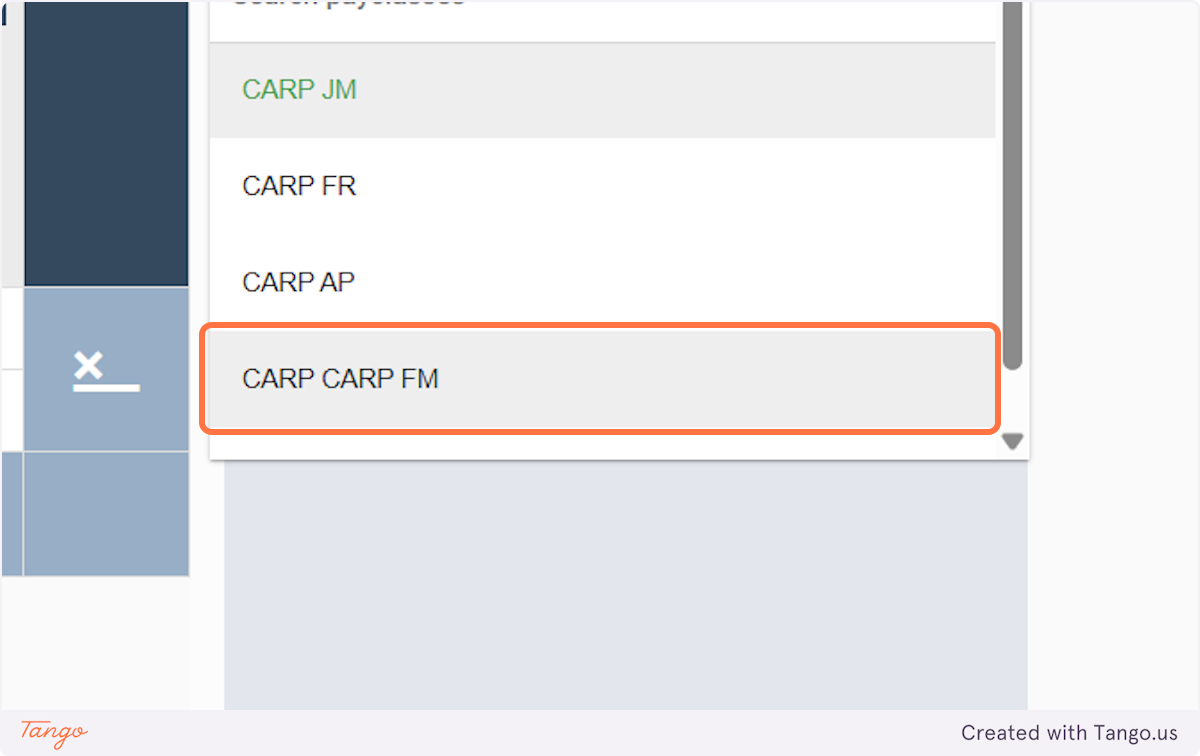
13. Choose the new pay class
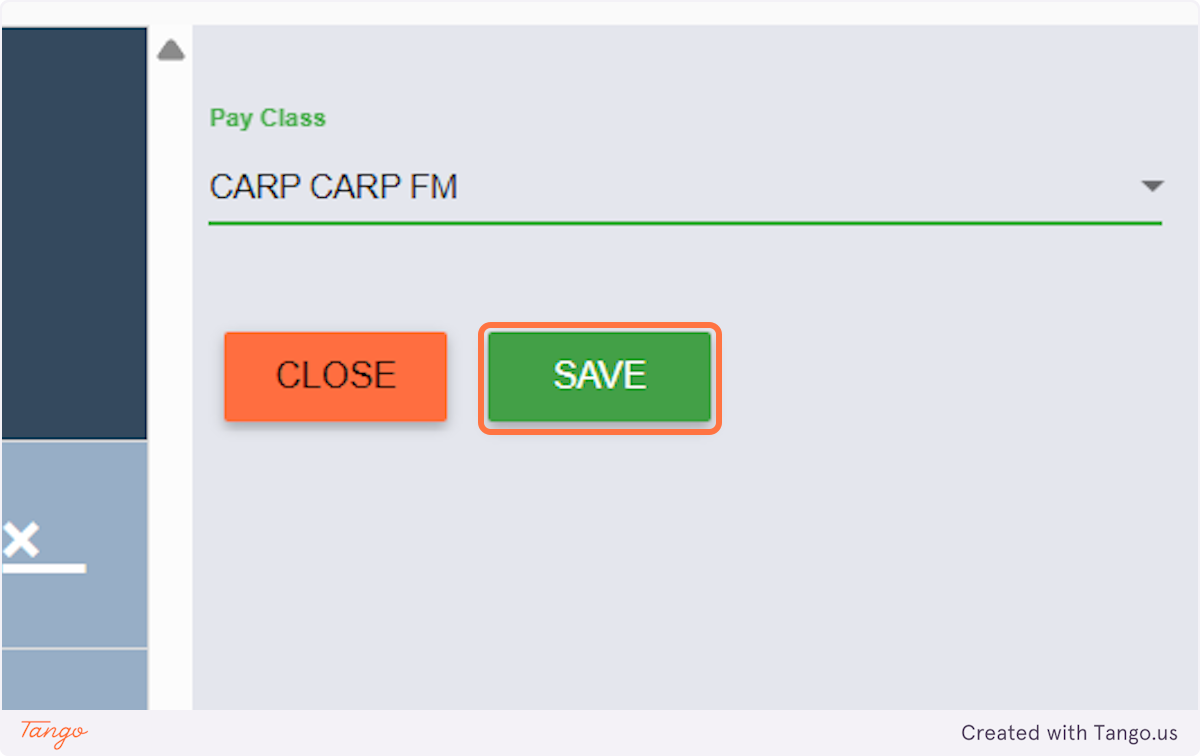
14. Click on SAVE
15. Add hours for each pay class as needed!