
Creating Saved Views within People Roster

Apr 29, 2026
 36
36
Overview
Saved views allow you to customize which employee information (columns) you see and reuse those settings anytime—helping you work more efficiently and stay organized.
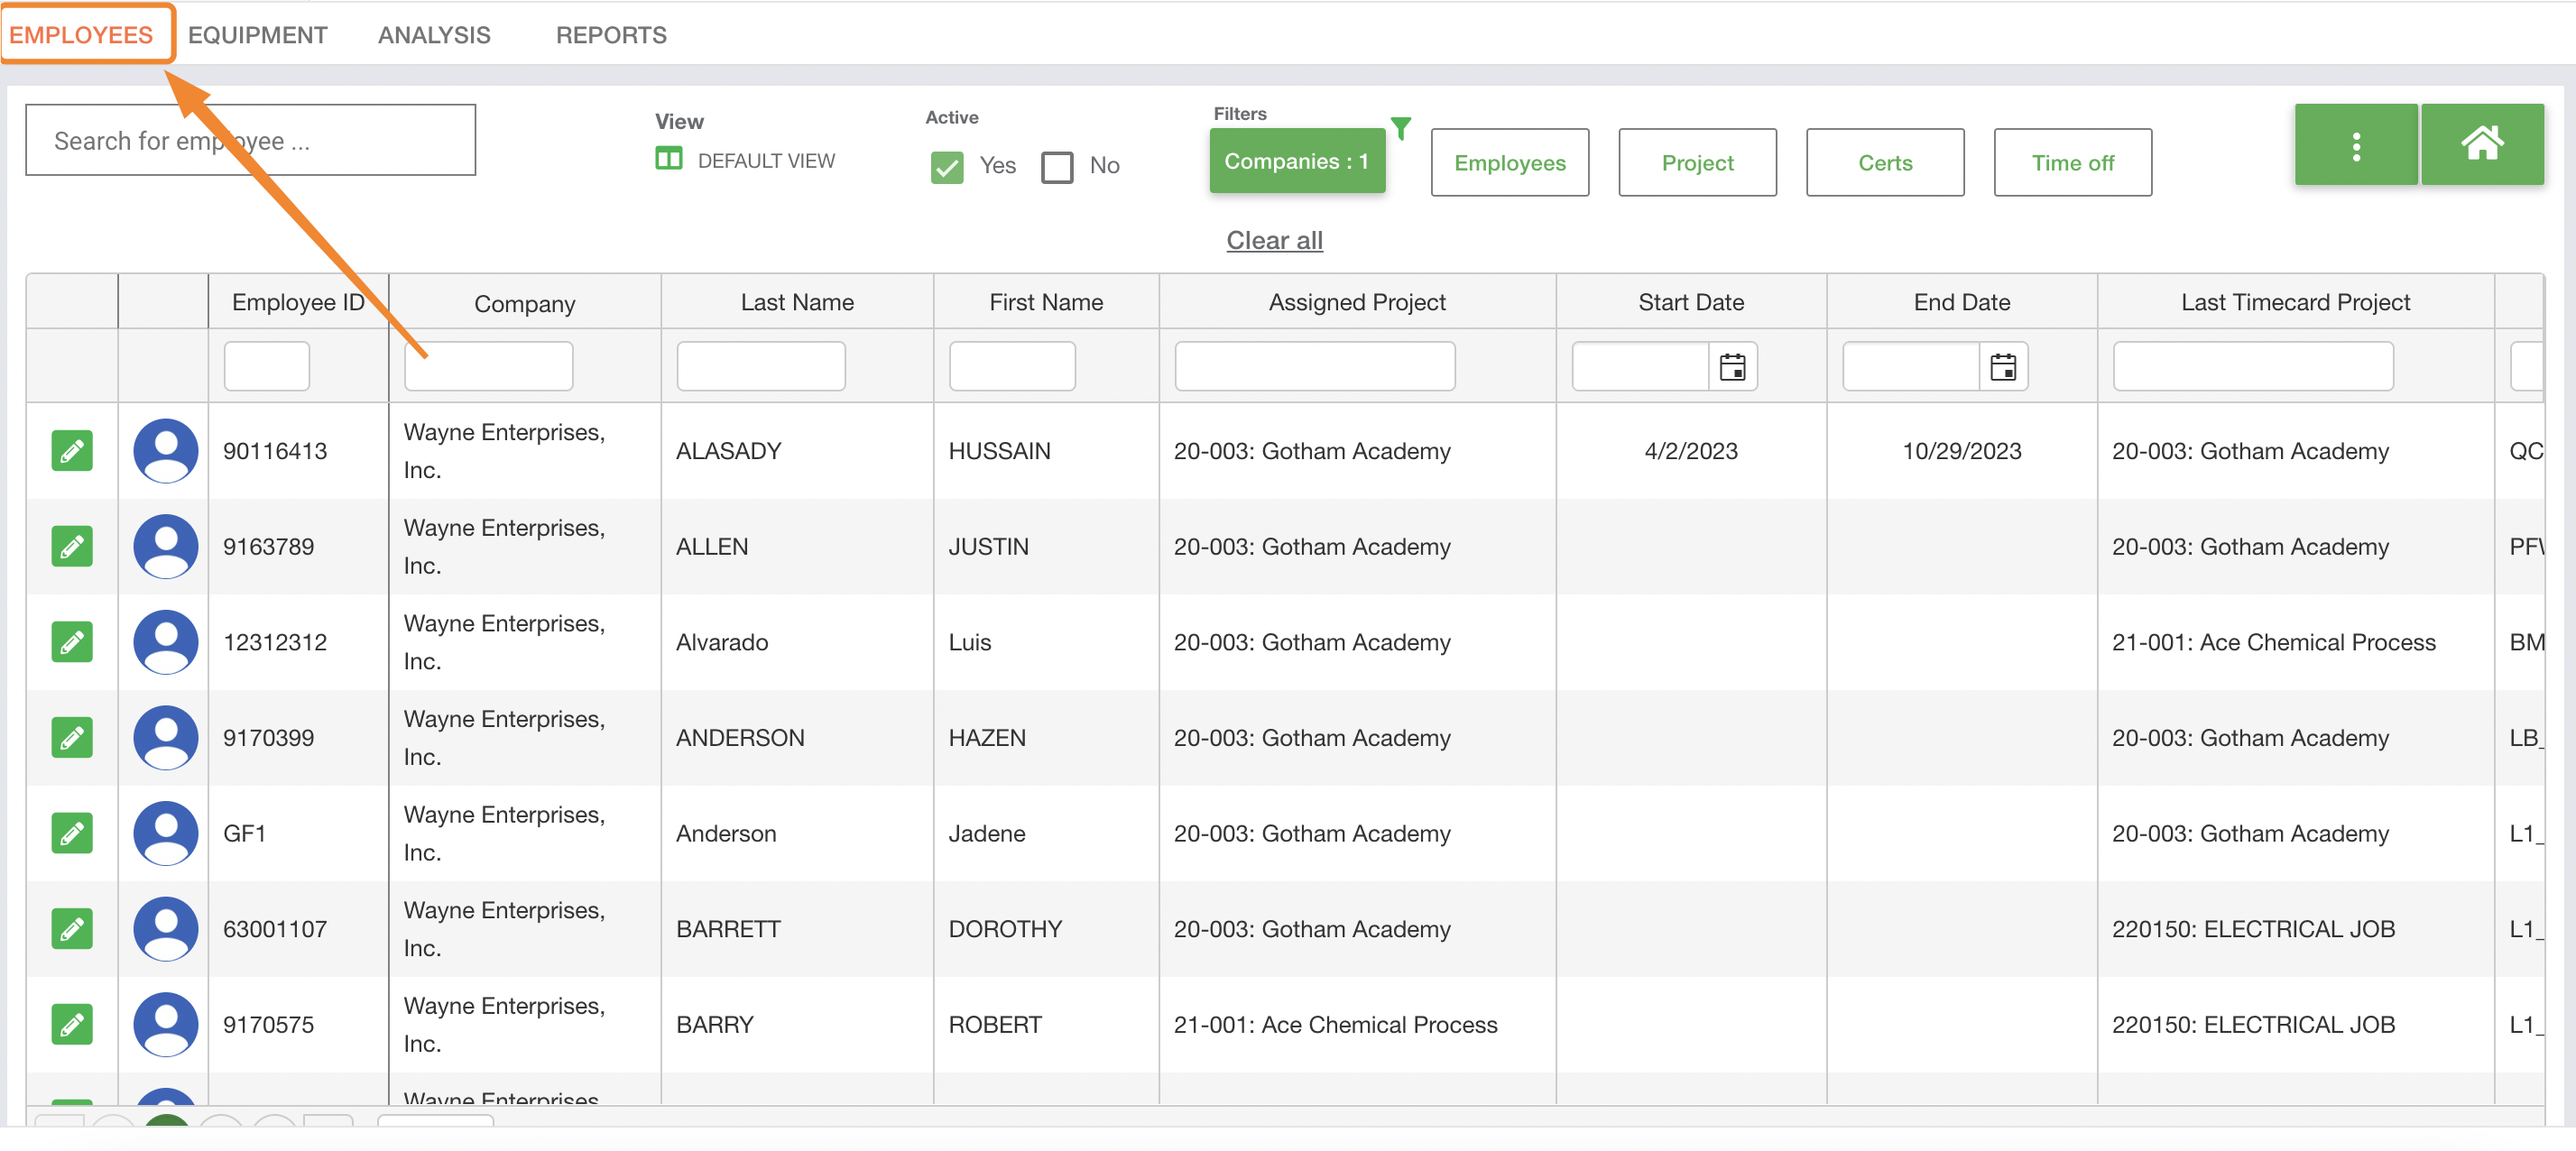
1. Navigate to the People and Equipment Module
- Click on the Employees tab
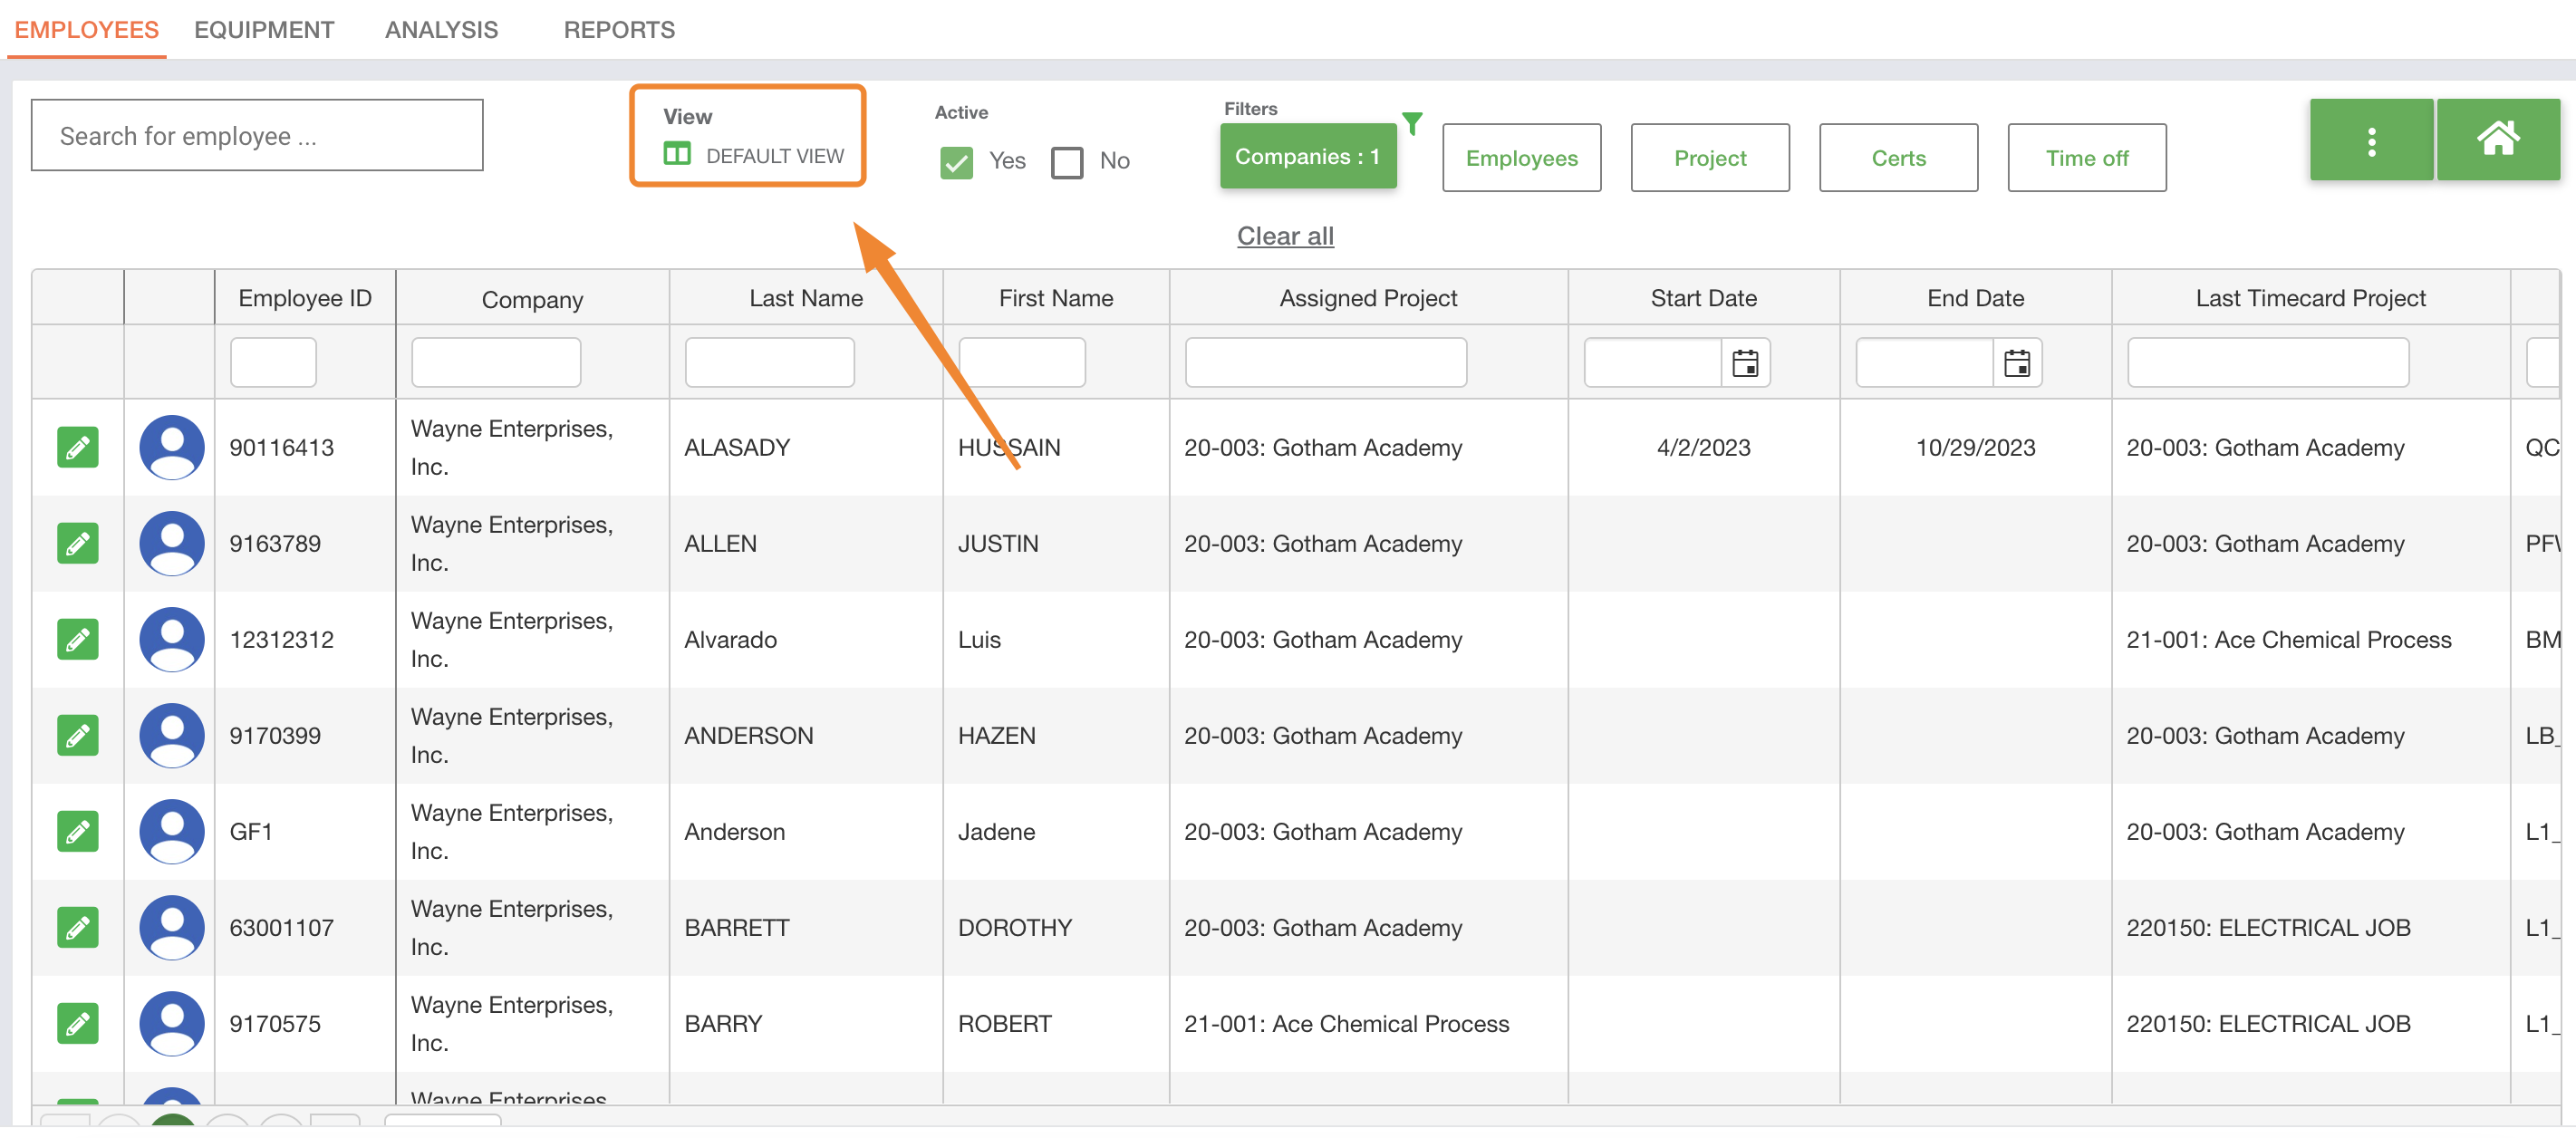
2. Access View Options
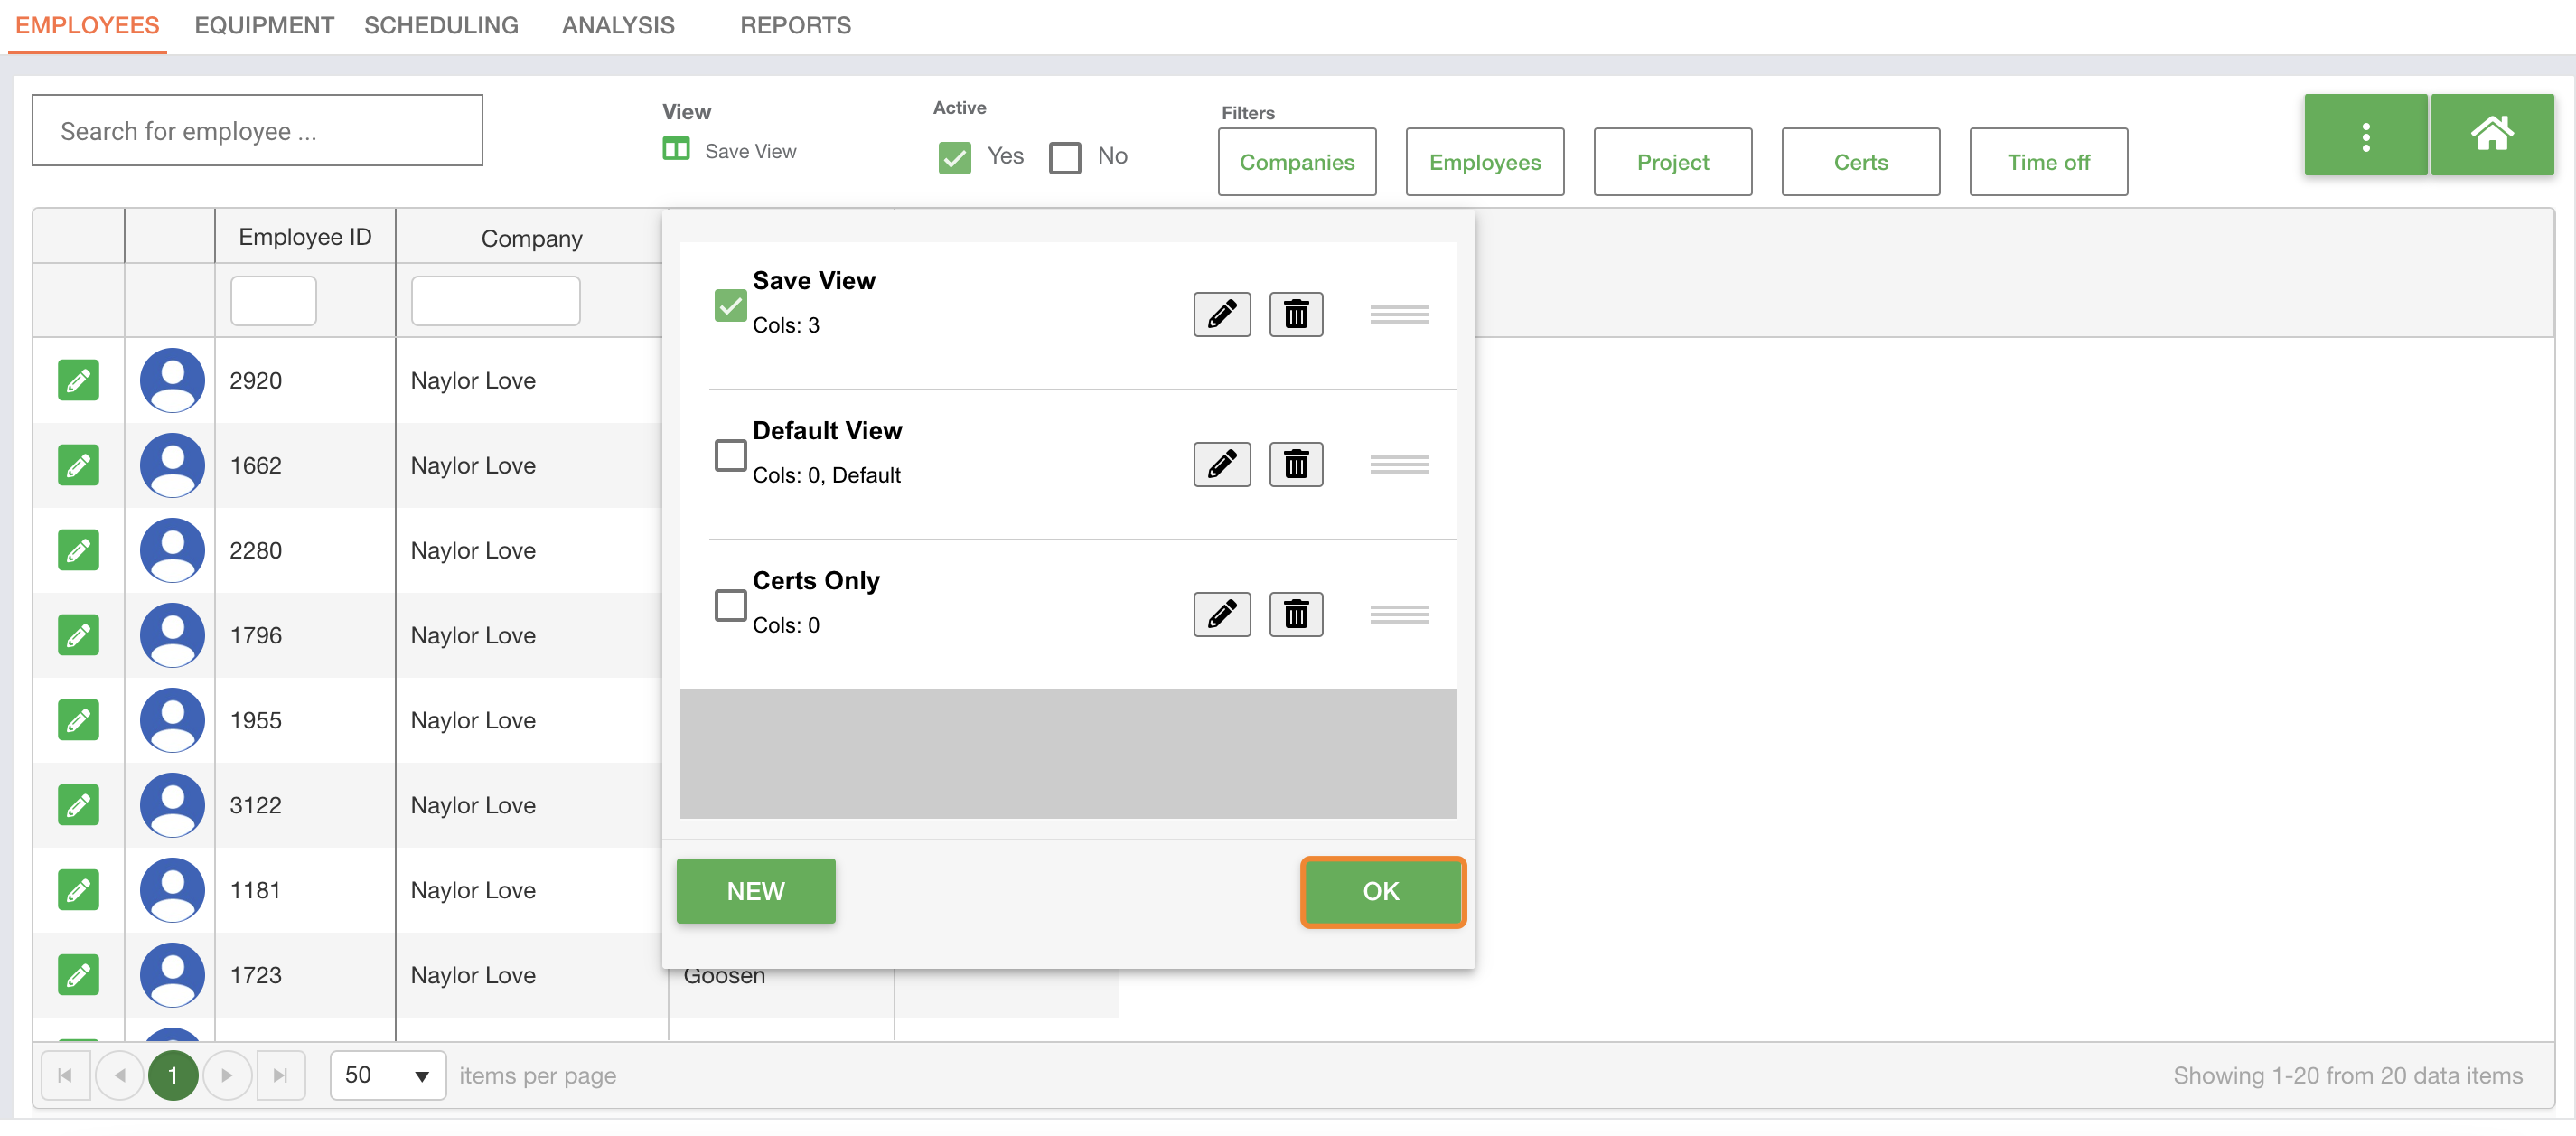
- Click the View button located at the top of the screen
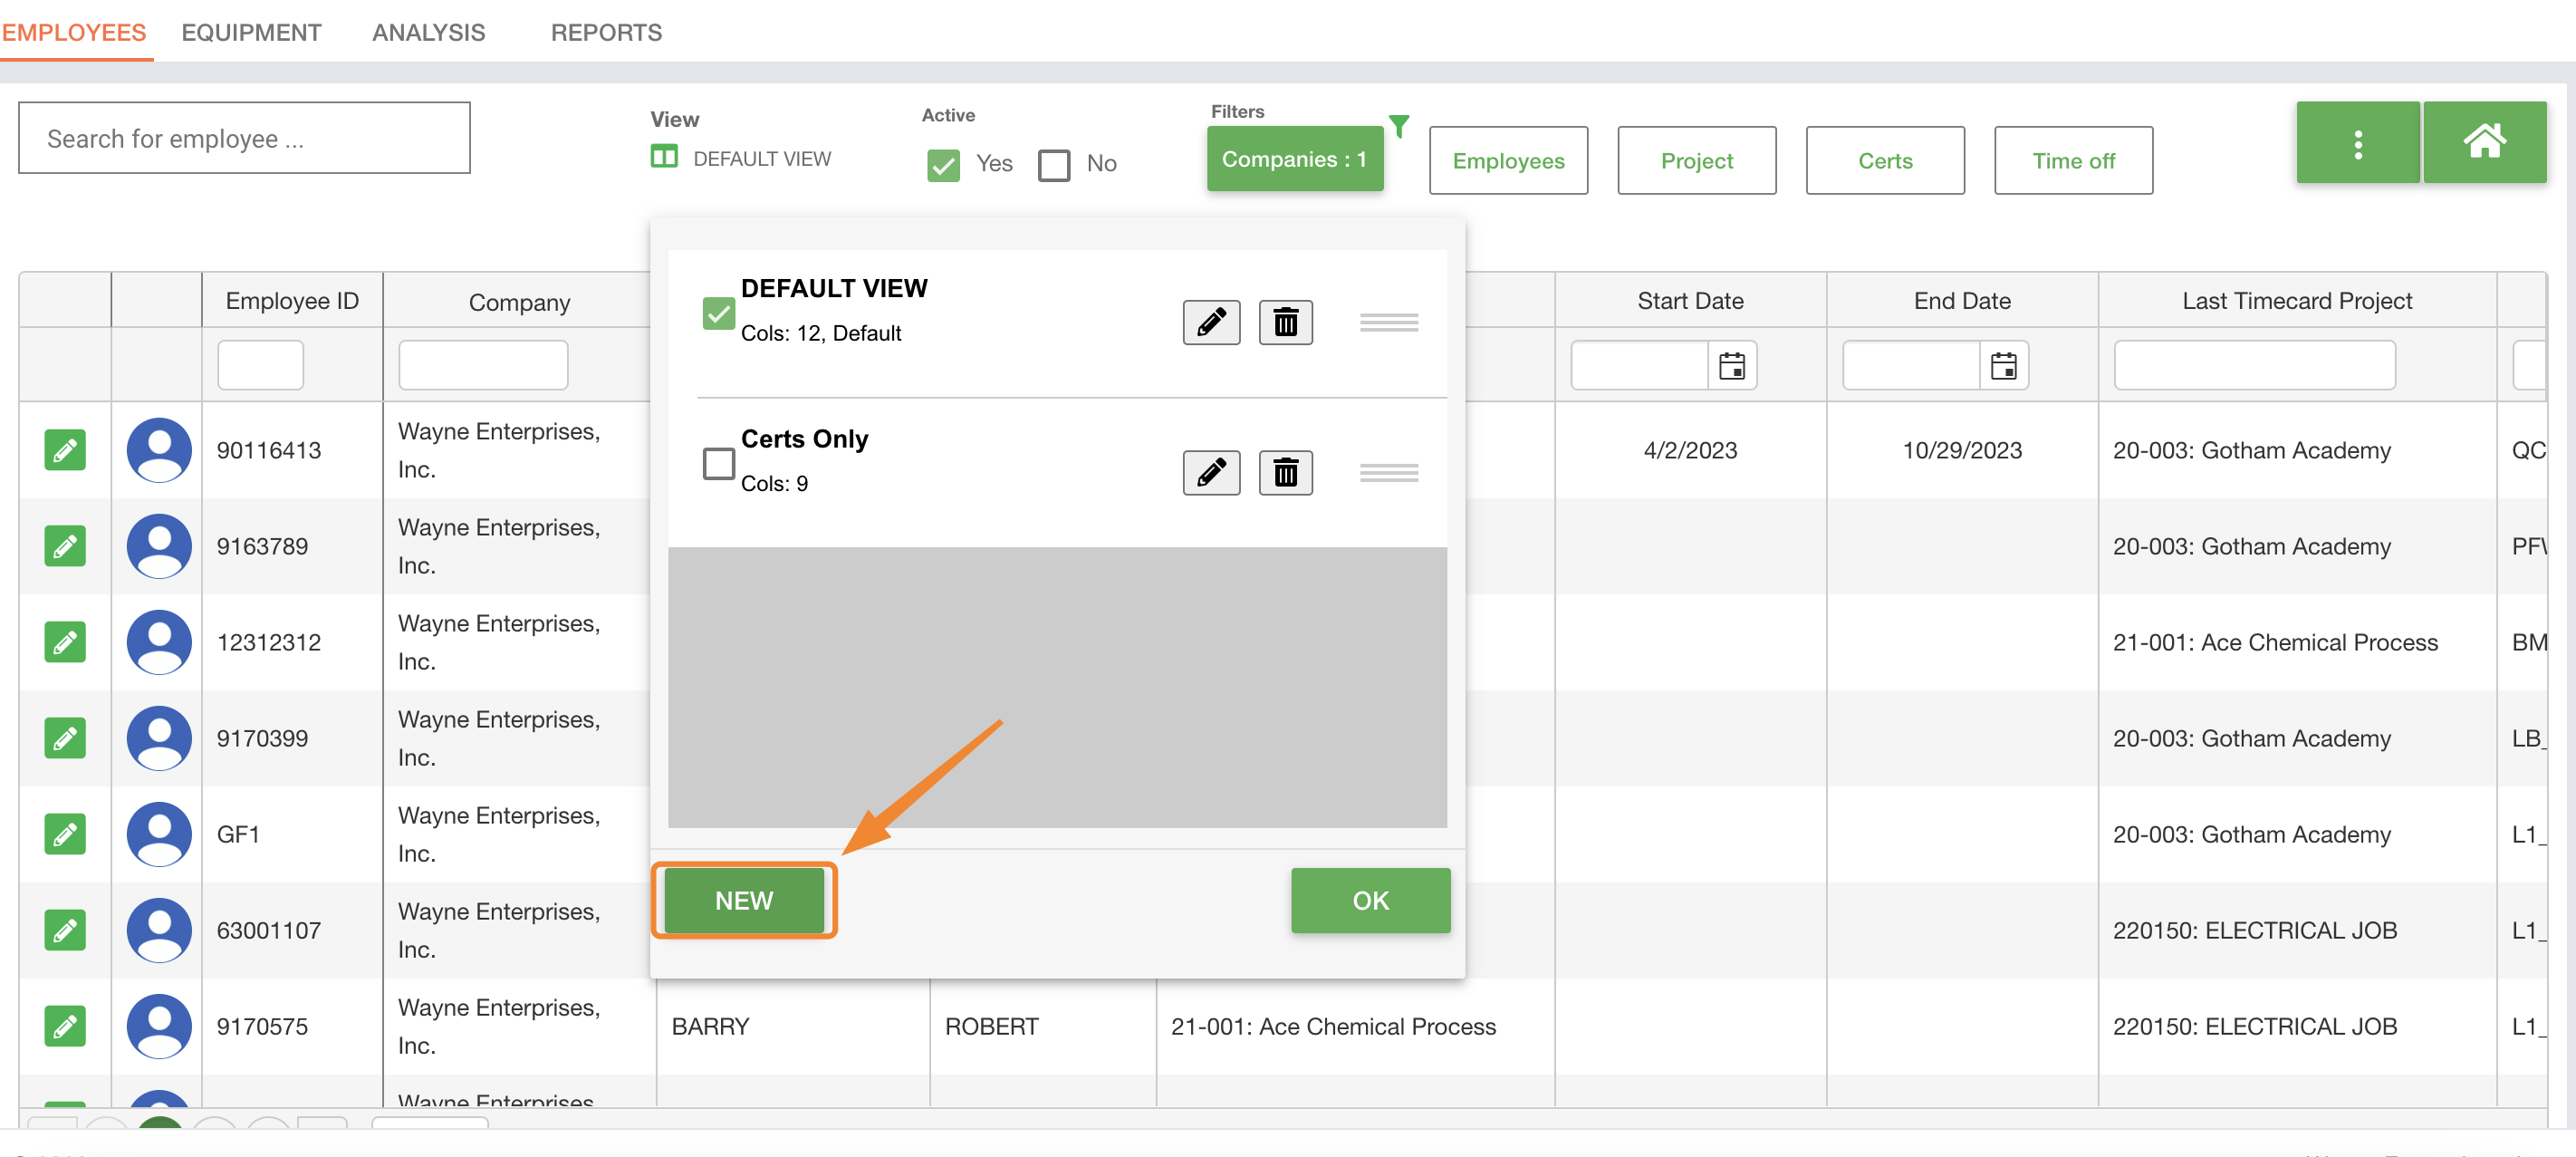
3. Create or Select a View
- Choose an existing view or click New to create a new one
4. Configure Your View
- Enter a View Name
- Select the columns you want displayed
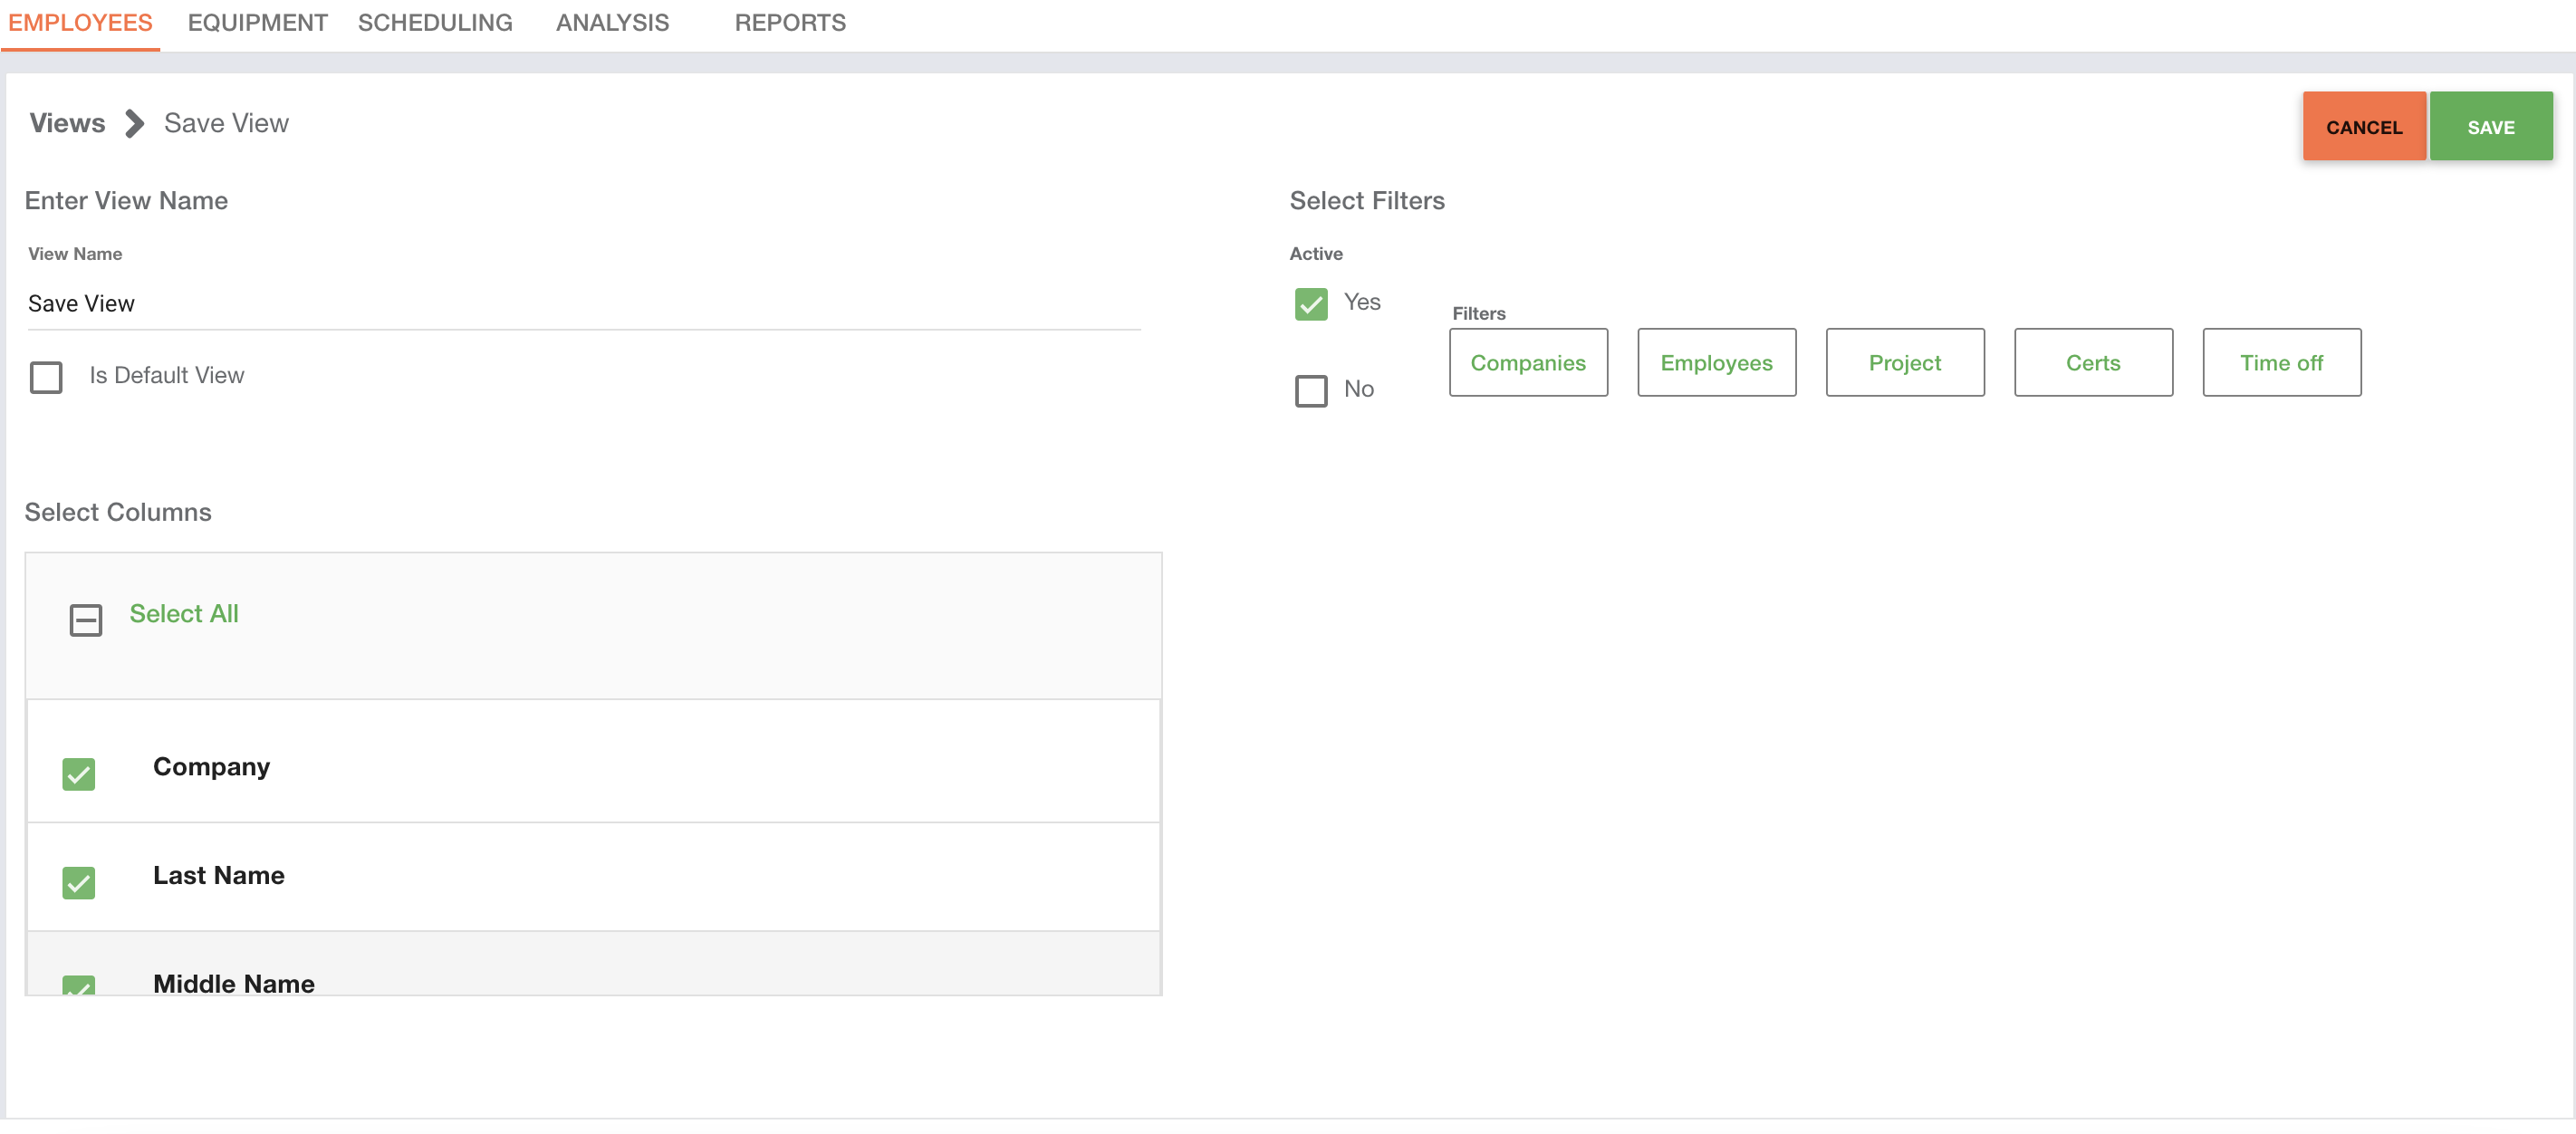
5. Save and Apply
- Click Save
- Select your saved view and click OK to apply it
Why Use Saved Views?
- Quickly access relevant employee data
- Reduce time spent reconfiguring columns
- Standardize views across teams
Best Practices
- Use clear naming conventions
Name views based on purpose or team (e.g., Payroll View, Field Crew View) to make them easy to identify. - Limit columns to what’s necessary
Avoid clutter by only selecting the fields needed for that specific workflow. - Create role-based views
Set up different views for HR, payroll, and operations to match their unique needs. - Standardize across teams
Align on a set of shared views so everyone is working from consistent data perspectives. - Review and update periodically
Revisit saved views as processes change to ensure they remain relevant and useful.

